JHM Solid Short Shifter Install - Audi A4
This mod is brought to you by Speedlifemotorsport.com Discuss this mod - Here |
||
| Prior Experience: None |
 Use promotional code A4MODS at checkout for free shipping in the US |
|
| Cost: approx $239 | ||
| Time: 2 hours | ||
| For the past two years I have been running the Neuspeed short shifter. I had noticed that the shift motion was getting a bit sloppy as time passed, so I decided to upgrade. After hearing excellent product reviews, I got my hands on a JHM Solid Short Shifter from SpeedLife Motorsport. This product is a completely solid, adjustable, steel contruction which minimizes slop in the shift motion. It is a product that is truely made to last - and once installed the quality and feel speak for themselves. | |||||||||||
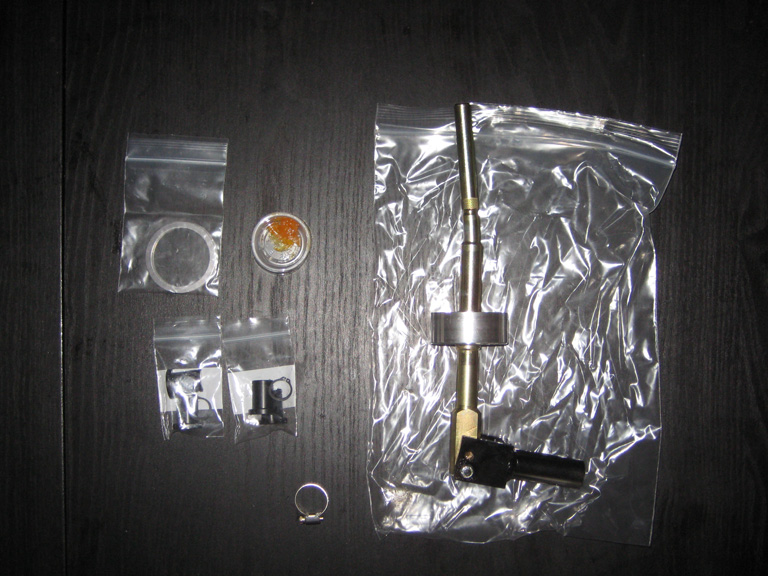
The product comes in a well packaged box, covered in bubble wrap. With the excpetion of a few tools, it includes everything you need to get the product installed. To the right you will see the shifter, new derlin bushings, grease, a hose clamp and some steel shims. |
 |
||||||||||
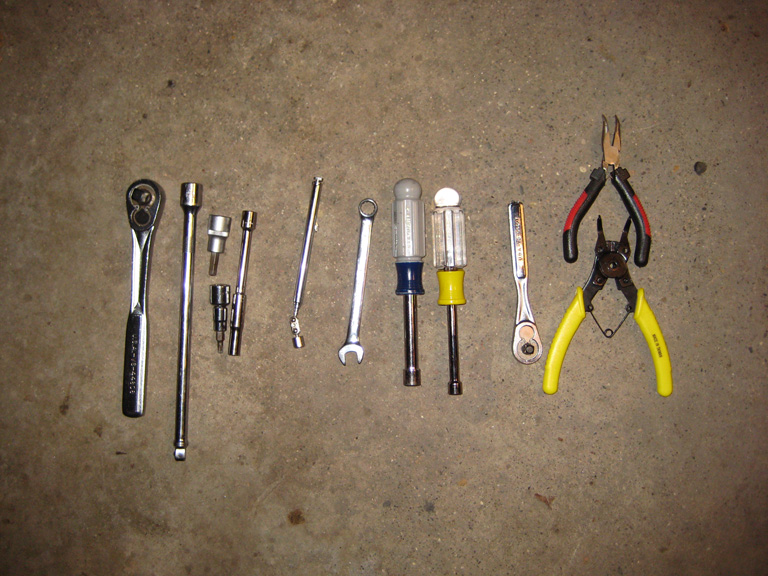
| SUPPLIES - Most of the tools you need for this insall should be laying around in the garage if you've worked on this car at all in the past. The only unusual tool may be the circlip/retainer clip pliers. You will need these to remove and install a couple retainer clips. Make sure you have ones capable of working with internal and external clips. | |||||||||||
|
 |
||||||||||
I would recommend getting the hex bits for your wratchet, and not trying to use an allen key. I tried that in the past, and it doesn't work well. Get the right tools, and the job will be much easier. |
|||||||||||
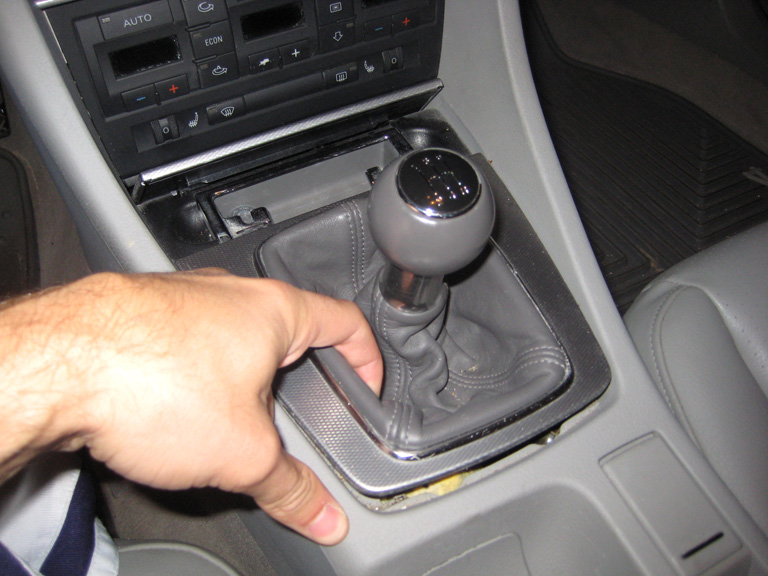
The first thing you want to do is lift up the plastic piece around the stock shifter (its just 4 clips around the outside - you can put your hand down by the shift boot and yank it up) |
 |
||||||||||
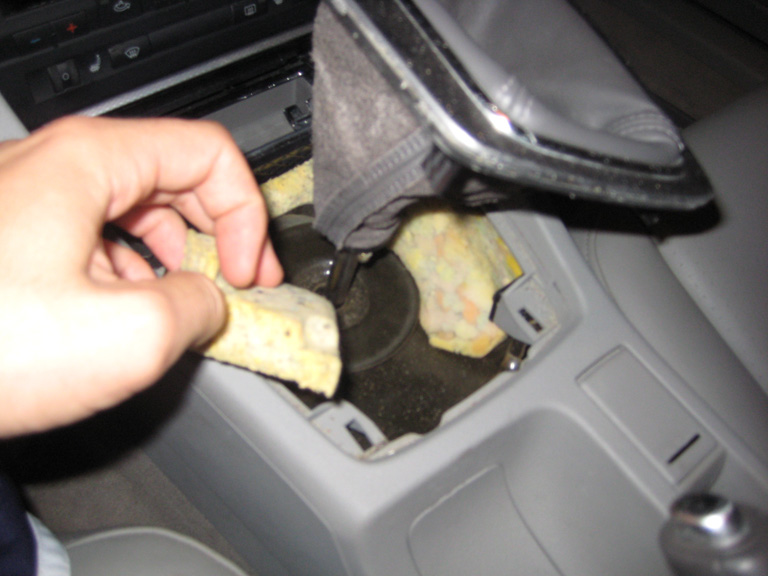
Lift the boot up and pull out the insulation/sound deadening around the shifter. This stuff rips fairly easily, so just be careful. Also remove the large leather piece which is under the foam. |
|
||||||||||
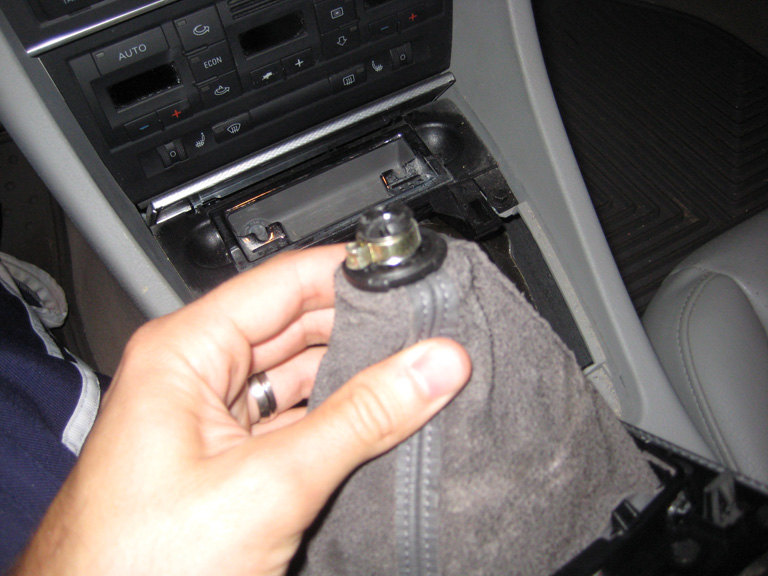 |
The shift knob is held onto the shifter by a one time use retainer clip. These clips can be a bit of a pain to deal with, but take your time and remove the clip and pull the knob off of the shifter. You can losen the clip and pull up on the knob and you may get lucky and get the knob off without getting the clip completely off. Here's what the clip/bottom of the shift boot look like. |
||||||||||
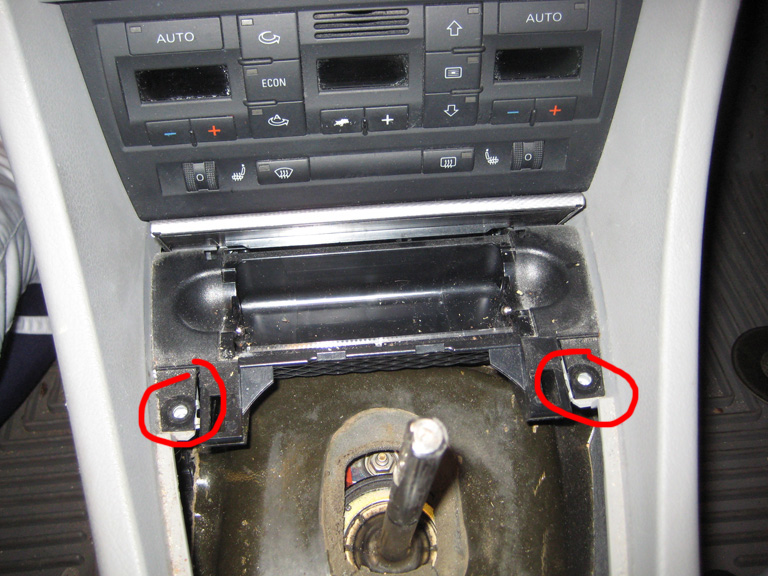 |
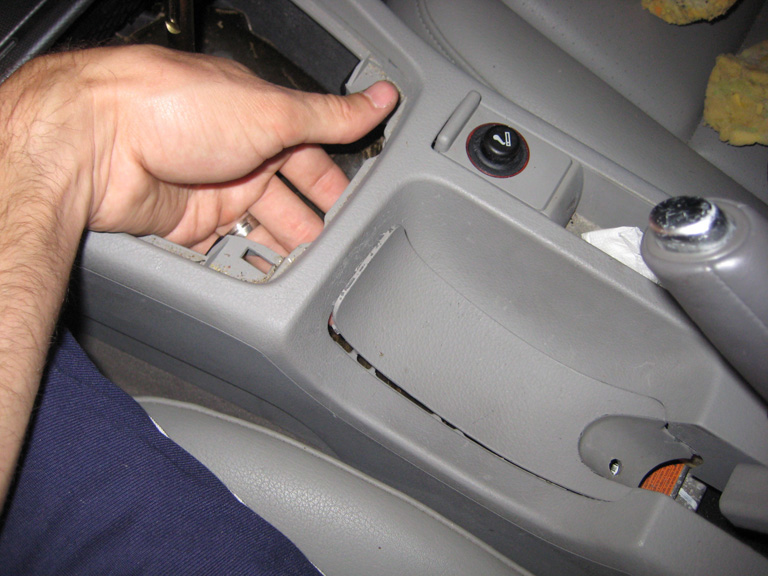
You will want to remove or losen the ashtray in order to make this job easier. You will find you are very limited on space, so if you have large hands I would highly recommend getting the ashtray out of the way. There are two bolts that need to be removed - they are already removed and circled in red to the left |
||||||||||
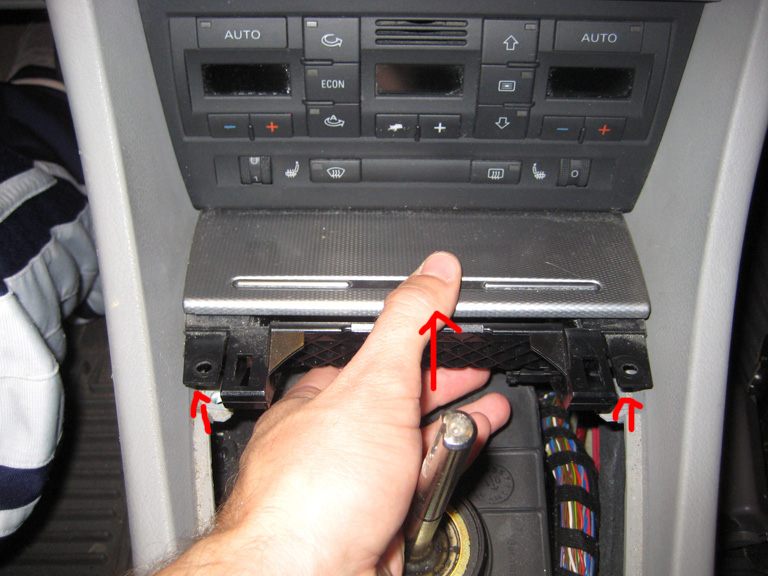
The ashtray is a little tricky to move out of the way. The motion to move it is basically three steps. First you lift up the front of the ashtray.
|
 |
||||||||||
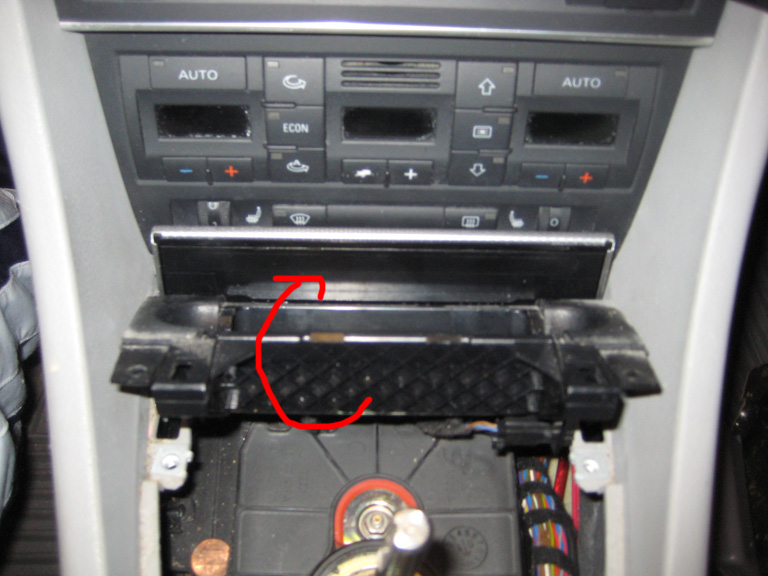
| Then you have to pull it towards you while rotating it up as shown below. | |||||||||||
 |
 |
||||||||||
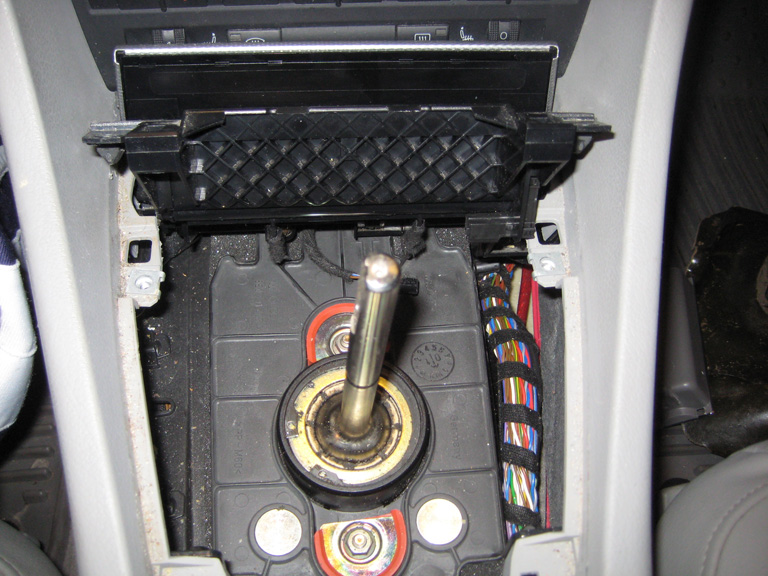
| With the ashtray out of the way, remove the two 10mm nuts and the plastic piece surrounding the shifter | |||||||||||
 |
 |
||||||||||
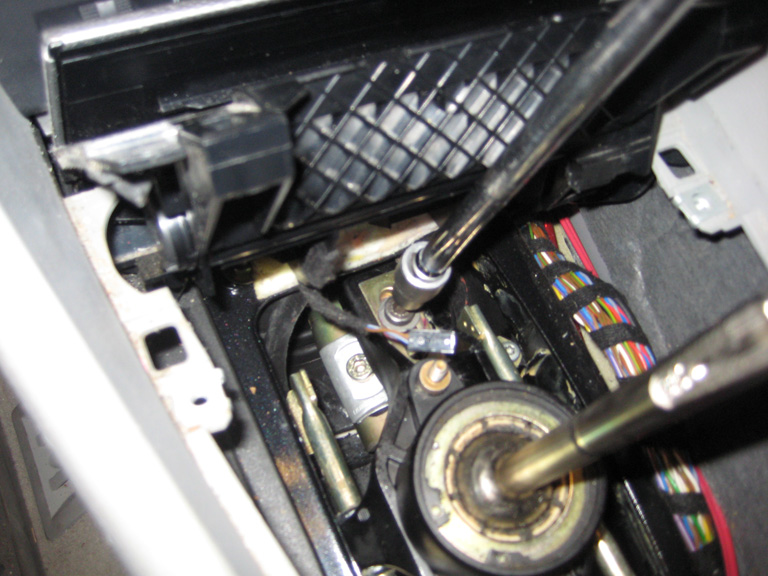
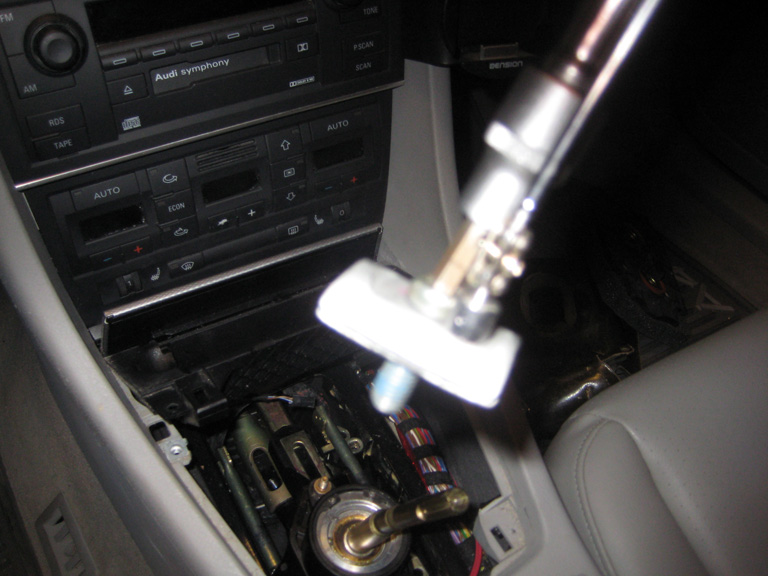
With your 6mm hex bit, remove the bolt connecting the shifter to the shift rod. |
|
||||||||||
I would suggest keeping your magnetic retrieval tool handy. When all the bolts get close to being out, just pop the magnet on them to make sure they don't fall. If you drop them, they will be difficult to find and pick up. |
|
||||||||||
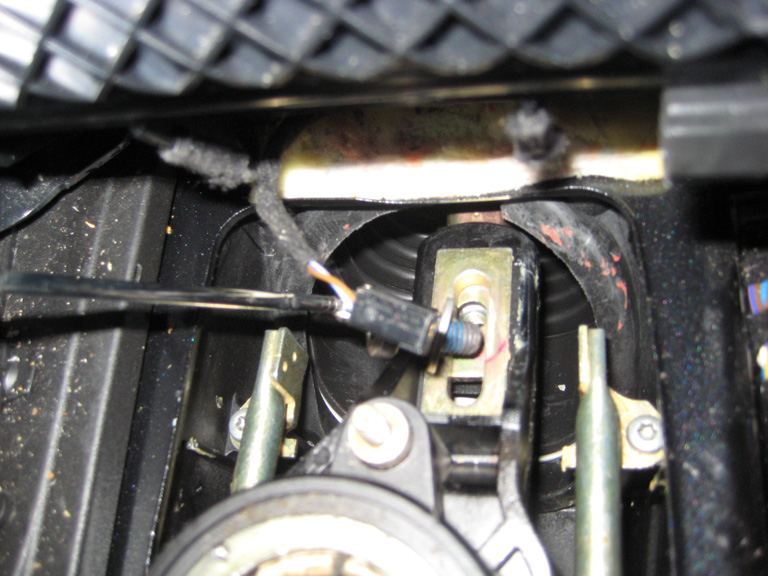
| Next you have to remove the adjustment bolt that connects the shifter to the linkage rod. There is a bolt and a small steel plate that will come off with it. Use the 6mm hex bit with the extension to get this out. | |||||||||||
|
|
||||||||||
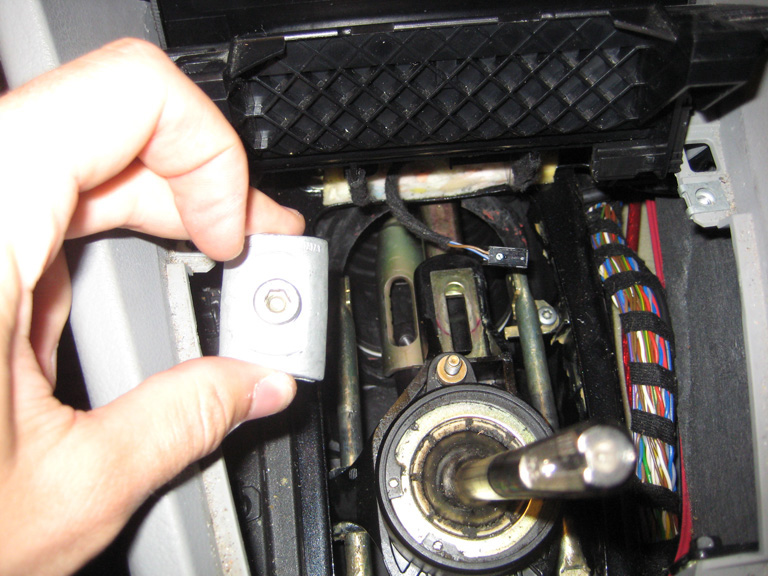
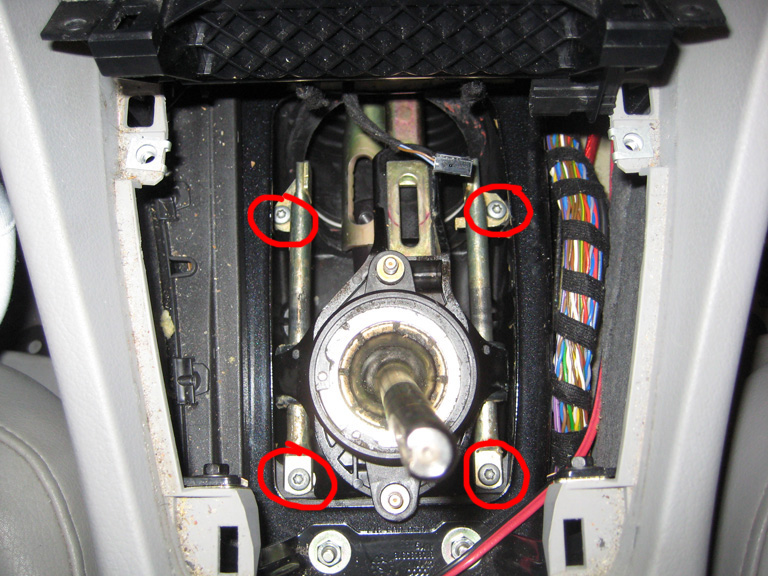
After you remove the 2, 6mm hex screws, you want to remove the 4, #25 torx screws that are holding the shifter in place. The four torx screws are circled to the right. |
 |
||||||||||
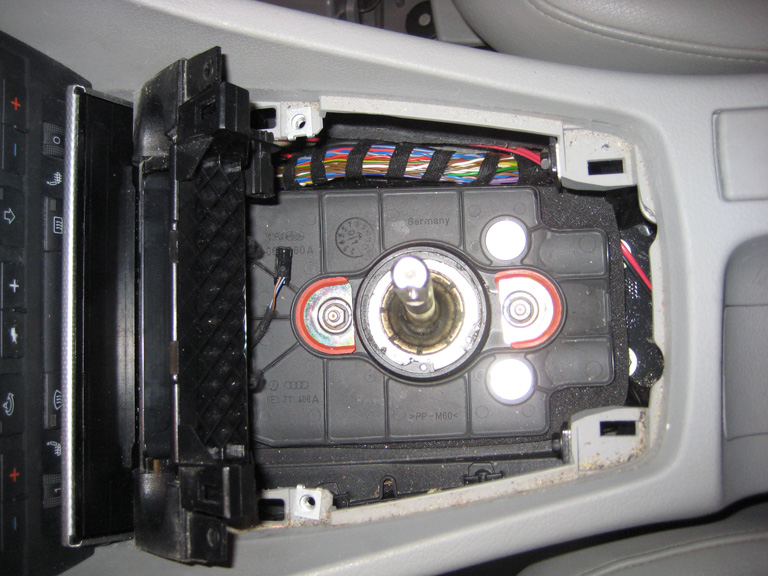
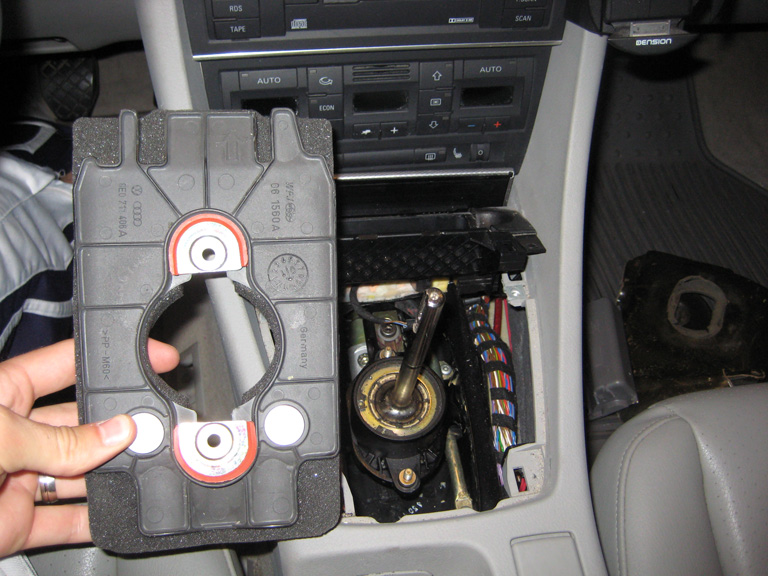
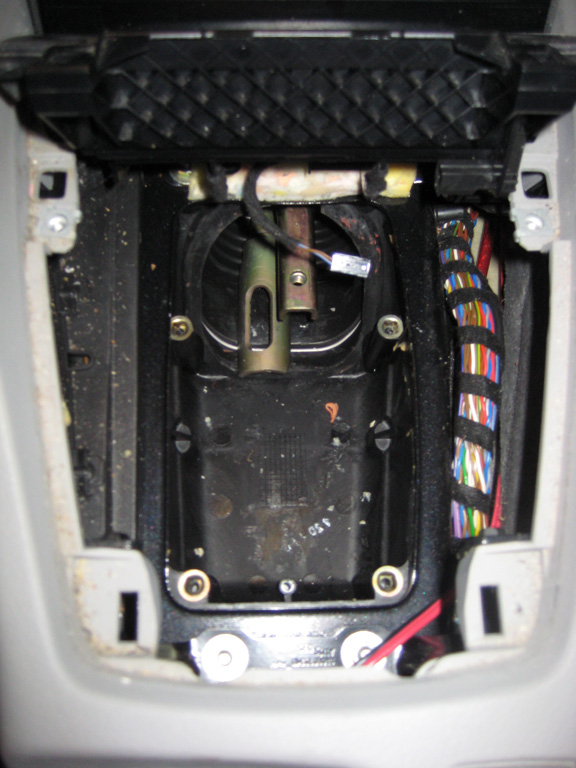
When the T-25 Torx screws are removed, the entire shifter assembly can be removed. |
 |
||||||||||
|
|
|||||||||||
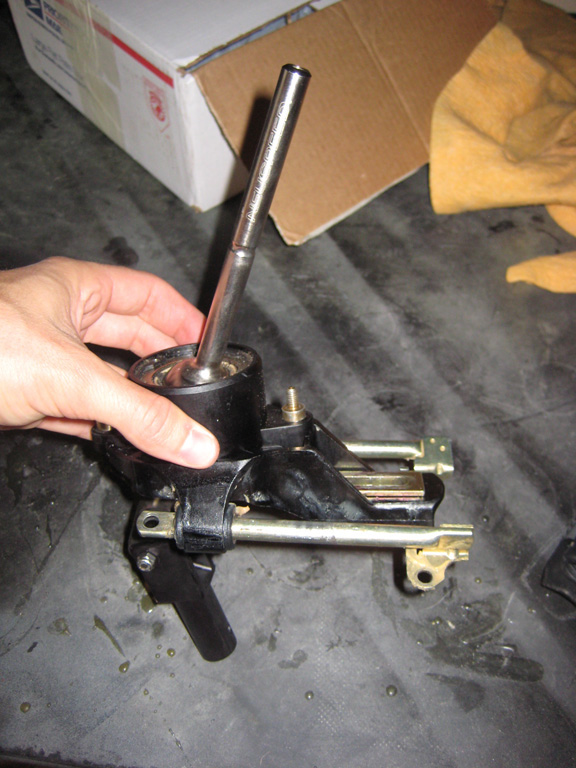 |
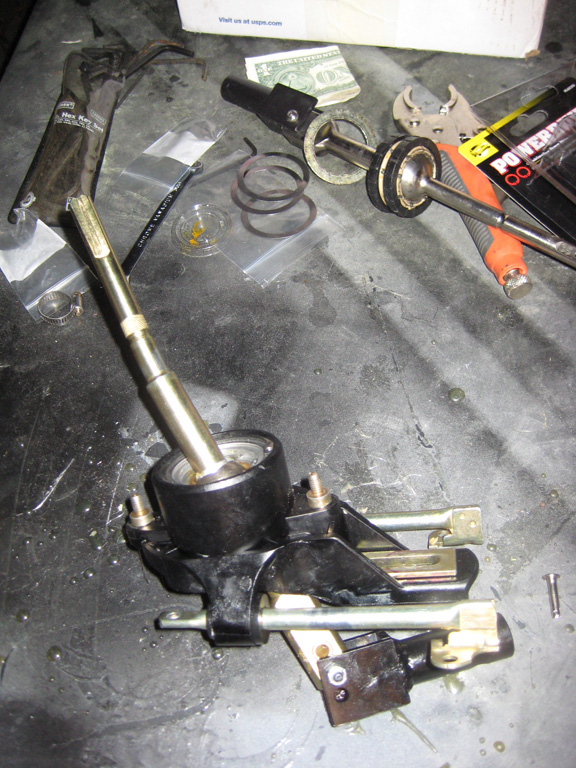
Here is what the shifter assembly looks like when it is removed |
||||||||||
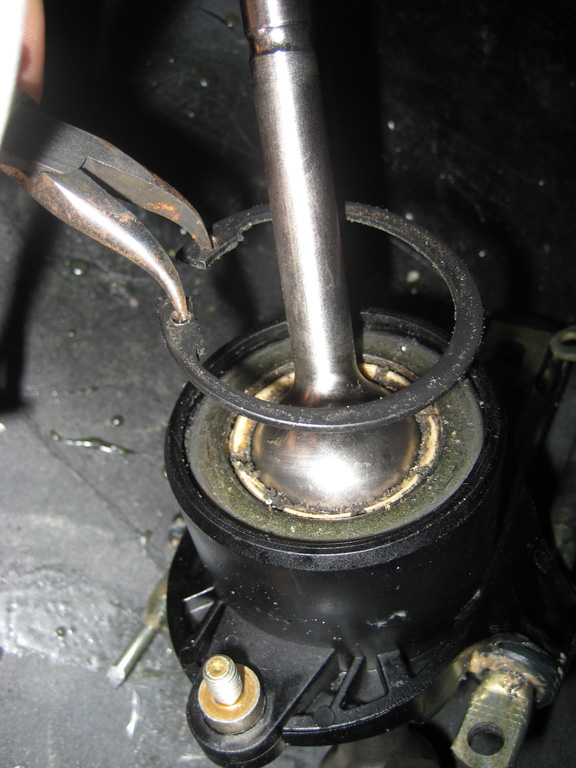
To break down the shifter, and remove the shift rod from the assmebly, you need to remove the circlip at the top of the shifter. In this image I used a pair of needlenose pliers, but as it turns out, I needed to go get a pair of circlip pliers to finish the job. |
 |
||||||||||
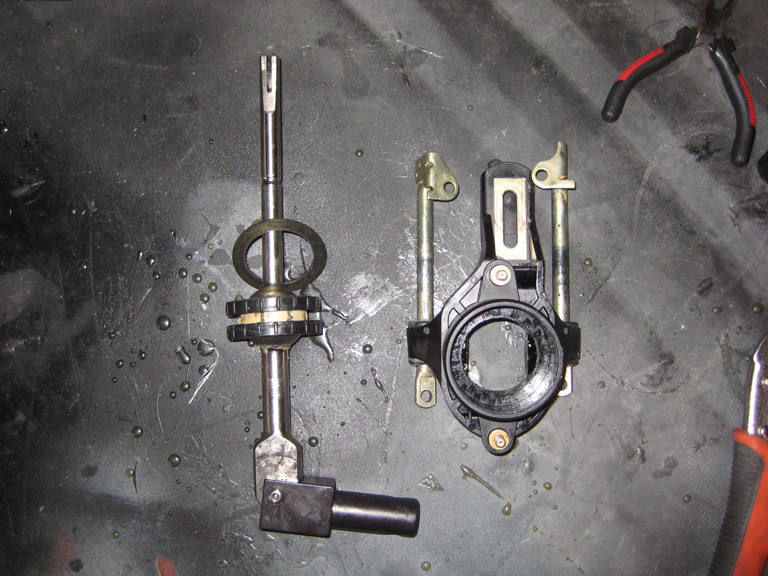
At this point the shifter should be in two pieces as shown to the right |
 |
||||||||||
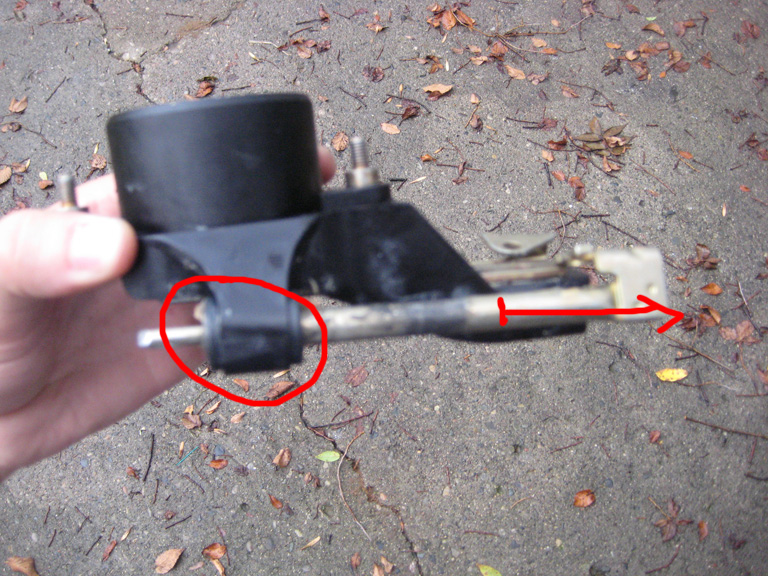
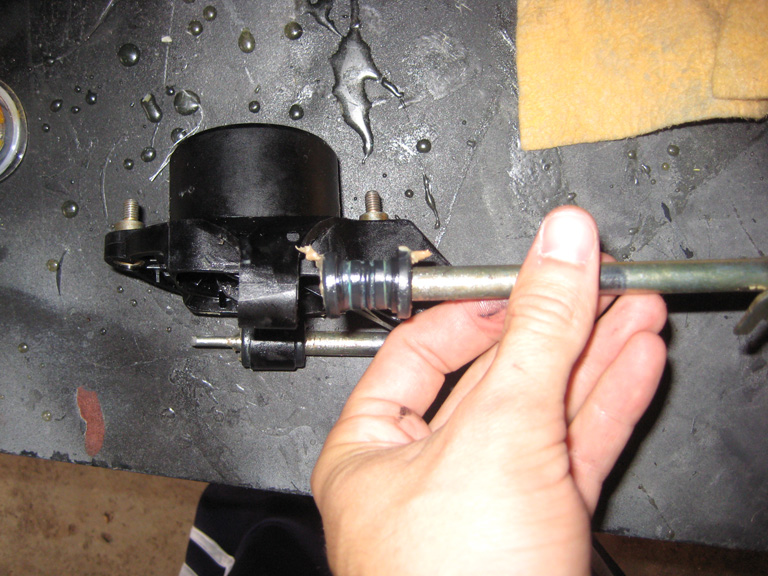
One very nice thing about the JHM Shifter is that it comes with replacement bushings for the base of the shifter. The stock bushings are soft rubber which allows the shifter to float around, and give is that soft feel. The ones that come with the JHM Shifter are derlin - which is a harder plastic. They drastically change the feel of the shifter. These bushings are circled int he picture below (left). In order to change these out, you need to remove the rods at the base of the shifter. You do this by simply pulling them in the direction indicated by the arrow below. The bushing make stick on the rod like the picture on the right, don't worry, just pull it off. |
|||||||||||
 |
 |
||||||||||
 |
The new, derlin bushings have been cut in half and packaged seperately. Be sure not to mix up the halves, or they wont fit back together properly. Open one package and put some of the supplied grease on the new bushing |
||||||||||
|
|||||||||||
| Put the two bushing halves back together on rod. Orient the bushing as shown to the right. The wide end of the busihng is towards the wide end of the rod. |  |
||||||||||
|
|||||||||||
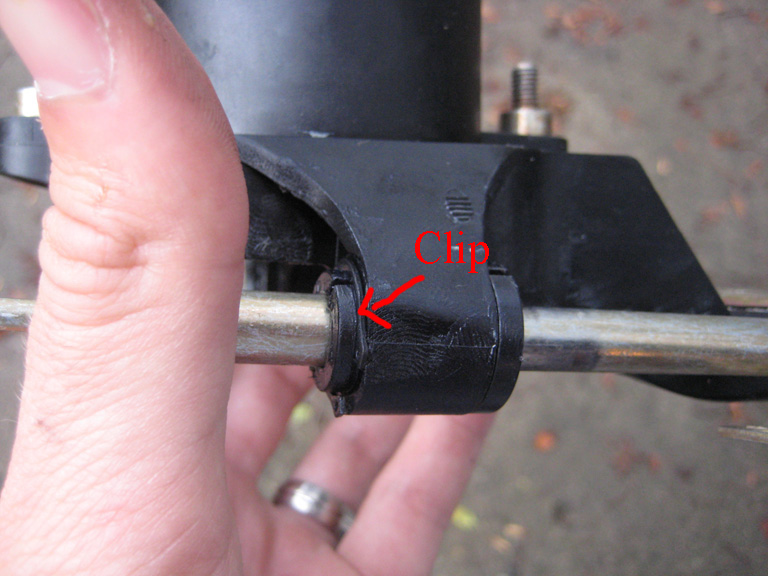
Slide the rod back into the shifter base, and use the supplied external retainer clip to hold it in place. You will see that the derlin bushing has a groove on the smaller end. The picture to the right shows how the clip is positioned on the bushing in the base You need to run the same process on the other bushing. |
 |
||||||||||
|
|||||||||||
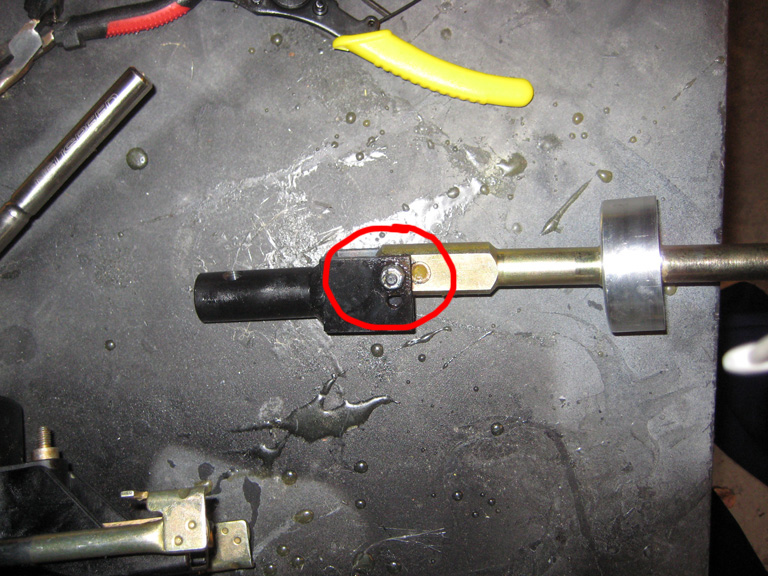 |
When you get both bushings replaced, it is time to install the shifter into the base. The shifter comes pre-assembled because technically you can slide the shifter into the base without disassembling it. I had some difficulties getting the bolt circled in the picture to the left through the base of the shifter. unbolted this, and then put it back together later. IF YOU DISASEEMBLE THE SHFITER, please be sure to note the orientation of all the parts so you can assemble it properly. |
||||||||||
|
|||||||||||
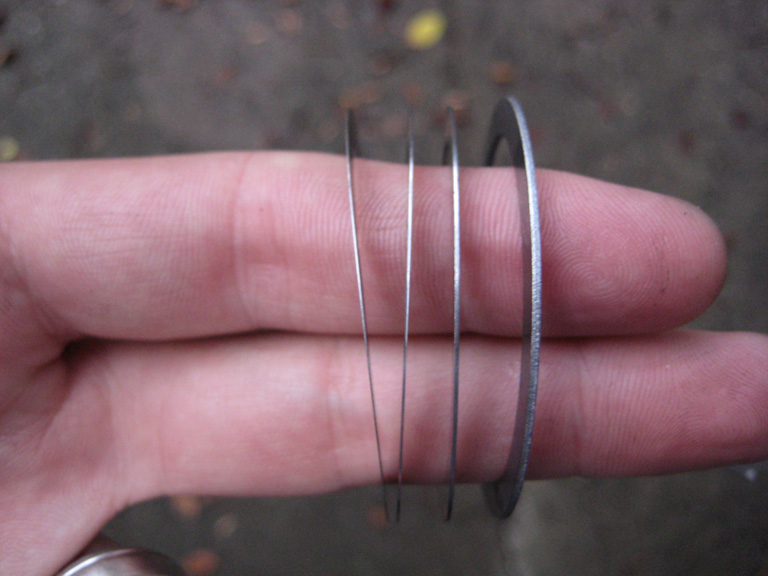 |
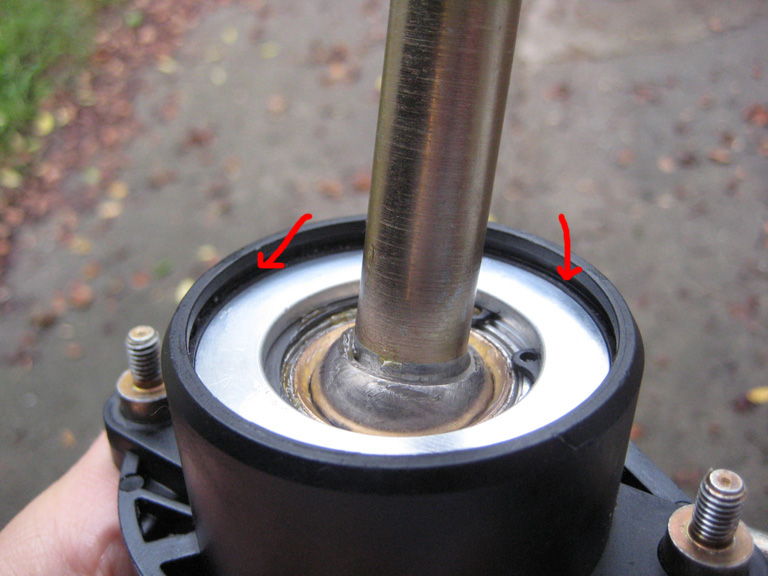
The JHM Shifter comes with 4 steel shims which go on the top ring of the shifter - under the stop circlip. The spacers are supplied because the plastic tolerances of the shifter base can vary. The shifter is designed to go with the thickest spacer, however if you cannot fit the thickest spacer under your circlip, then step it down a size. The idea is to get the fit of the circlip as snug as possible. If you need to, feel free to use multiple shims. |
||||||||||
|
|||||||||||
Here is the space between the top of the shifter ring and where the circlip goes - you will be filling this space with the shims. |
 |
||||||||||
|
|||||||||||
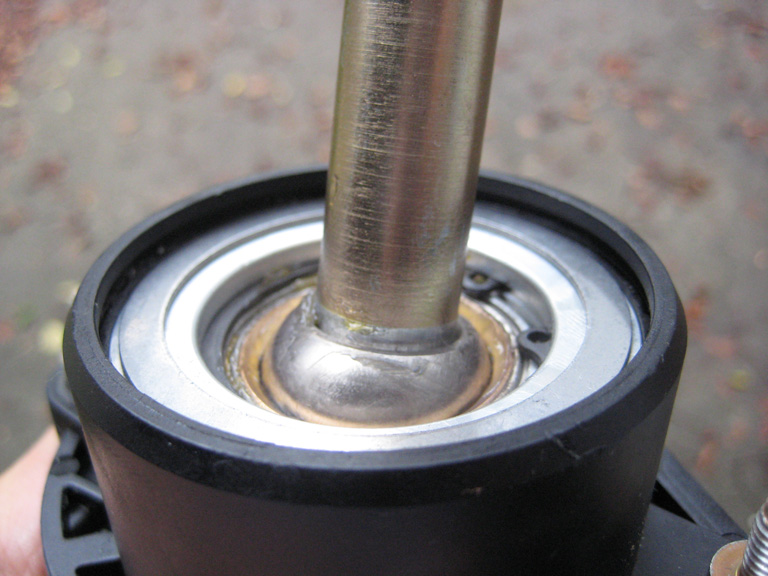
Here it is with a shim in place . |
 |
||||||||||
|
|||||||||||
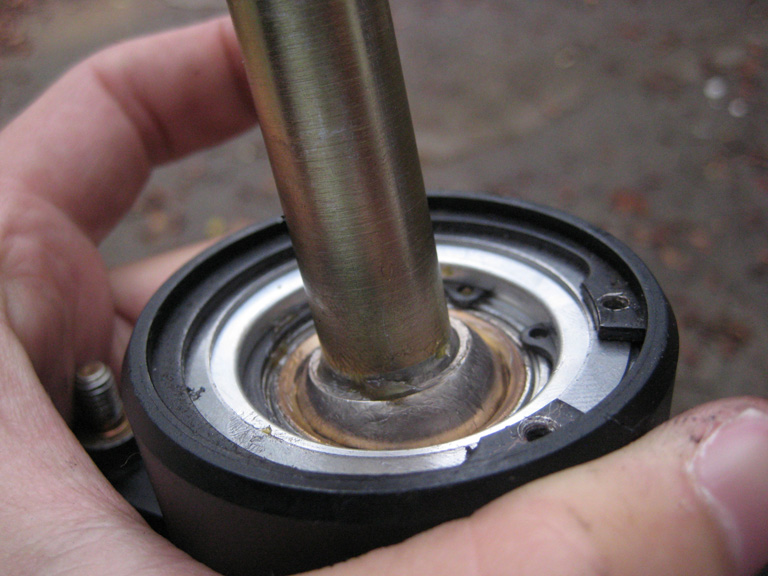
Here it is with a shim and the circlip: |
 |
||||||||||
|
|||||||||||
Here's what the assembled shifter will look like |
 |
||||||||||
|
|||||||||||
The installation of the assembly is just the reverse of the removal. There is nothing really exciting about it, but I will share some tricks you can do to make it easier. |
|||||||||||
On the install, you will see how nice it is to work with the magnetic retrieval tool instead of pliers or your fingers. When you put the shifter assembly in, I suggest you first insert and loosely tighten the adjustment screw/plate. To get it in there, I setup my tools like this: I have the 6mm Hex socket in the bolt, and I use the magnetic tool to hold the plate in place. This easily lets me get the bolt into place without dropping it. |
 |
||||||||||
|
|||||||||||
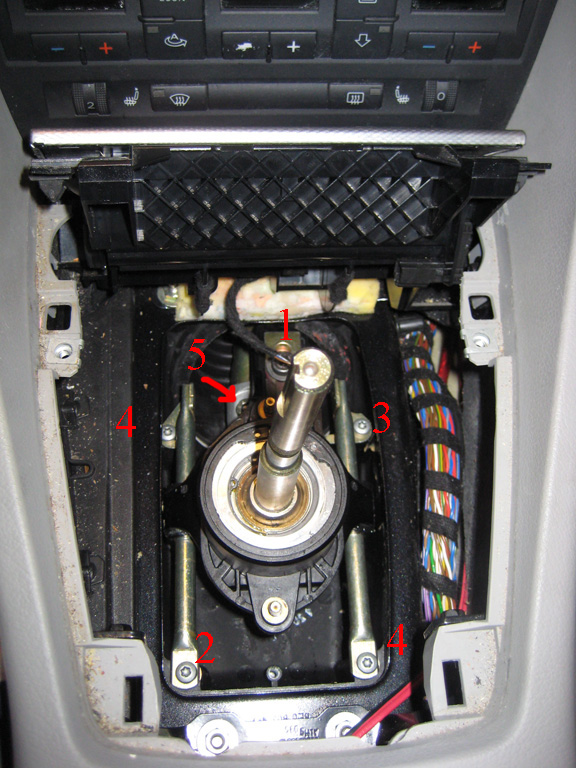
I would put all the bolts back in loosely first, then I would tighten them in the order shown in the pic on the right. I would save the adjustment screw for last. When everything is tightened up, center the shifter so that the bearing at the bottom of the shfiter is centered. Then tighten the adjustment screw. When the screw is tight, run through the gears and make sure they all engage. If you feel that it is not centered, then just losen the screw #5 and re-adjust it. Iterate on this until you are happy with the feel. |
 |
||||||||||
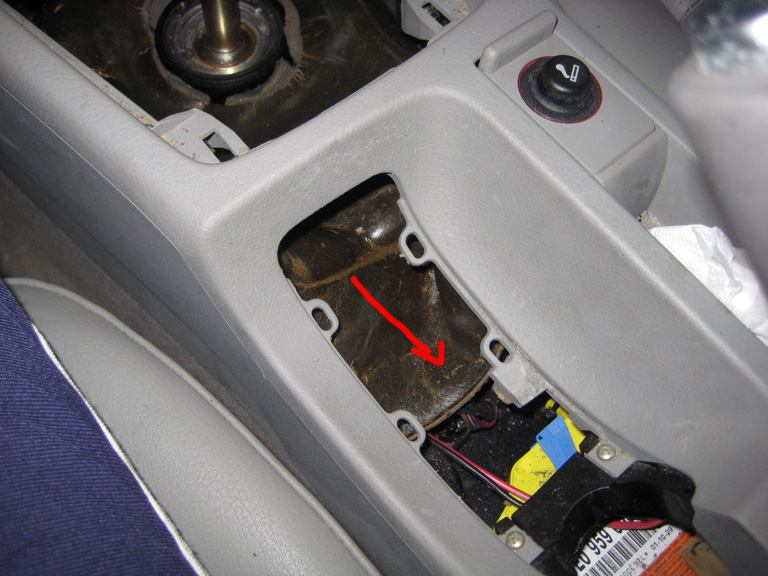
| One last install trick comes with the re-installation of some of the sound deadening. There is a large brown leather piece that needs to be put in. It will seem to be oversized and you will struggle to get it in and have it lay down smooth. In order to help pull the leatehr into the center console, you can remove the trim piece shown below. You do so simply bu pushing up on it from the inside of the console. This will allow you to grab the leather and pull it into place | |||||||||||
 |
 |
||||||||||