ABS Plastic Bumper Repair - B6 Audi A4
Prior Experience: Perhaps a little
Cost: approx. $?
Time: aprrox. a couple hours
| Discuss this mod - Here | ||||||||||||||||||
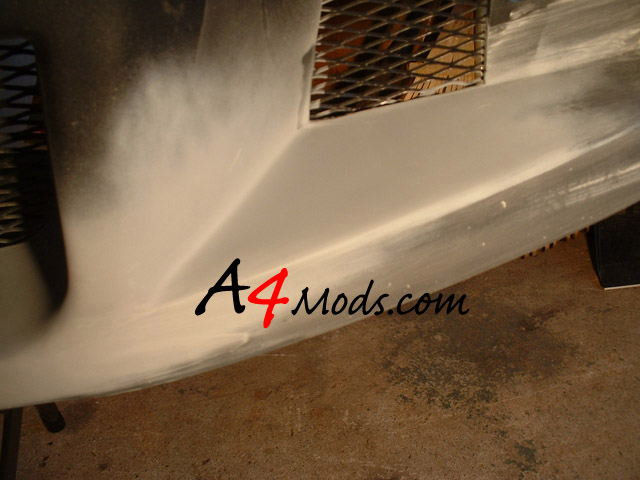
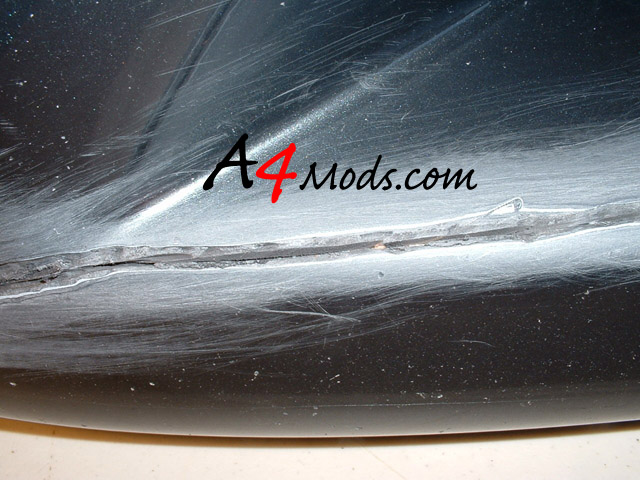
So after considering several different kits for my car, and reviewing my budget, I came across a Rieger full front bumper for sale in the AZ classifieds. After talking with the owner, I decided to take the 4 hour (trip from hell - he will back me on this) to Deleware from PA. I scored the bumper for cheap. I got the bumper, painted dolphin grey for $200 bucks. It was custom molded to fit, and was fitted with all the internals of a stock bumper - so the fitment is perfect (rare for a rieger product). The catch you ask? The bumper had a "mark" - also known as a massive crack across the front of it (I didn't know that this 'mark' was nearly as large as it was until I saw it in person). Anyway I decided it would make a good project, so I bought it anyway and taught myself how to do ABS plastic repair. Ready? | ||||||||||||||||||
 |
 |
|||||||||||||||||
| Before | After | |||||||||||||||||
SUPPLIES - Unlike the rest of my how-to's, this job needs items not readily available in your local parts store or home depot. I wanted to do this "Right" so I was sure to get the right supplies. For this your have to track down a local auto body paint supply store - they will have everything you need. The more common supplies can be had for cheaper at your local stores |
||||||||||||||||||
|
||||||||||||||||||
Prices are estimates - I didn't keep the receipts |
||||||||||||||||||
The first thing you want to do is sand down the entire length of the scratch - on both sides of the bumper with 60 and 200 grit sand paper. You want to get rid of all the high edges. Don't mind the dremel tool in the pic - that is for later. After you get rid of all the course stuff, you may want to move down to 400 grit, but it is not necessary. The idea is just to scuff up the areas so that the SEM adheres well. |
 |
|||||||||||||||||
 |
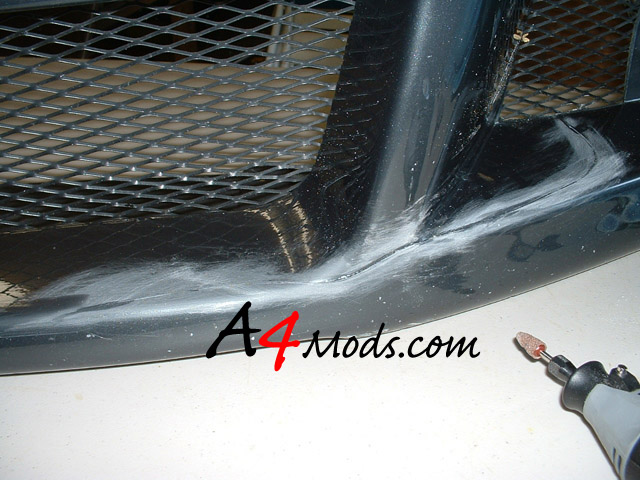
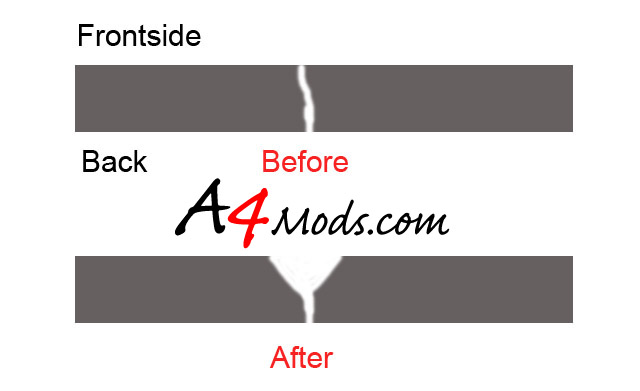
After the areas are sanded down, you want to take a grinding bit on your dremel (as shown to the left) and go through the entire crack. What you want to do is create a V grove on the surface that YOU WANT TO BE SMOOTHEST - aka the outside of the bumper. It seems counter-intuitive but believe me, its the right way to do it. You want the V to go about half way through the thickness of the bumper - DO NOT go all the way through. - Refer to the diagram below for clarification |
|||||||||||||||||
The reason we do this is because the SEM needs a larger than crack size surface area to adhere to. By opening up the crack, you will allow the SEM to make a permanent bond. NOTE: When I hit my bumper with the dremel tool, I actually melted the plastic and CLOSED the crack below the V. You DO NOT want to keep it this way - even though it may seem to be OK. You want to re-open it with a cutting blade if this happens. We want the SEM to do the work, not the dremel tool. |
 |
|||||||||||||||||
 |
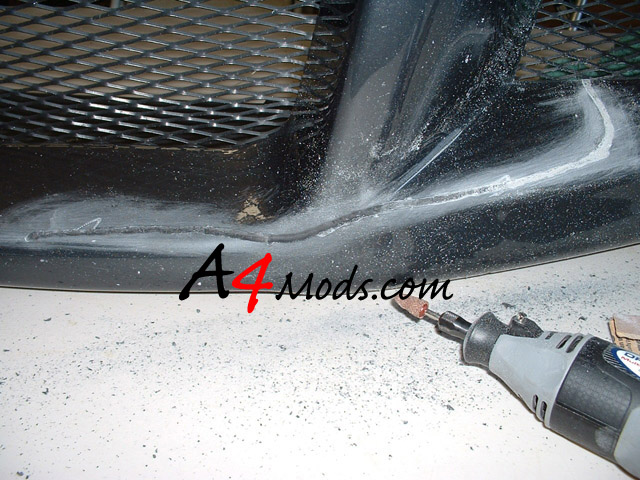
Here is a closer shot of my bumper after it has been sanded, opened to a V (melted in the process), and re-cut open with a cutting blade. Also I re-sanded the top with the 60-400 grit paper to smooth out the rough edges that came with making the V. NOW CLEAN THE SURFACE REALLY WELL The next step is to apply the SEM abs plastic repair Rigid urewled. |
|||||||||||||||||
NOTE on SEM: If you are reading this guide, I am assuming you are looking to fix a broken Rieger kit or something similar. I am also assuming that you do not intend on doing this often, and are also looking for a quick but permanent fix (assuming you don't smash a curb again). If you were going to do this often, or professionally, the recommendation would be to use DuraMIX for ABS repair. This product is made by 3M. Although the price of the actual bonding agent is about the same as the SEM stuff, the Duramix requires a special application gun that will set you back approximately $80. This is what the professionals will use. I however am not a professional, and decided to use the "harder to apply" SEM Rigid Ure-Weld. Both products do the SAME THING - its just a matter of application. For the SEM, you need some mixing cups and mixing sticks. You mix equal parts of the 2 part 'epoxy' together and apply it to the areas that need to be fixed. It cures in about 5 minutes and is sandable in about 15. I did not have a hard time using it, but I may require some practice. If you have not properly sanded and cleaned the surface, you will have adhesion problems. So please take your time to prep the area.... |
||||||||||||||||||
After familiarizing yourself with the SEM, its time to start applying. When you apply the SEM you want to make sure that the crack in the bumper is even (one side of the crack is not higher than the other) You may want to use tape or some other means to do this - depends on the application. With my application, I decided to leave some of the 'melted' areas mentioned earlier intact - this acted like little spot welds that held everything in place. I did it like this, but I am sure there are better ways. After everything is aligned, lay down your first coat of SEM. |
 |
|||||||||||||||||
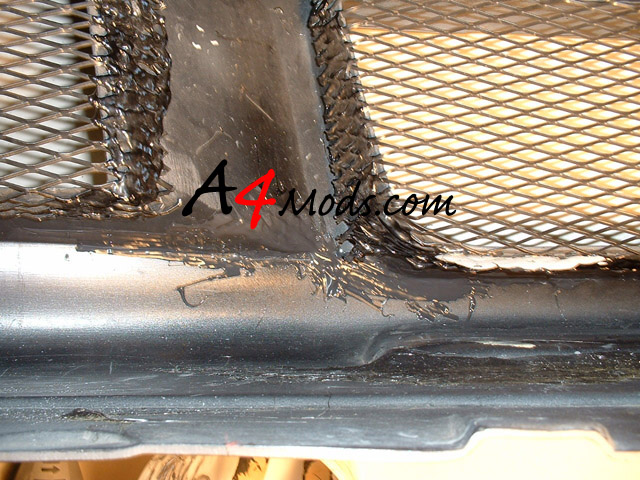
I chose to start with the inside of the bumper, so that I could get used to the application process. Also, the inside does not need to be neat at all, so I was able to really have at it. The pic is not the best, but you get the idea. AFTER The inside has cured completely you can move onto the outside (V side). You DO NOT need to sand the inside, as you will not see that part. Here is the application on the front |
 |
|||||||||||||||||
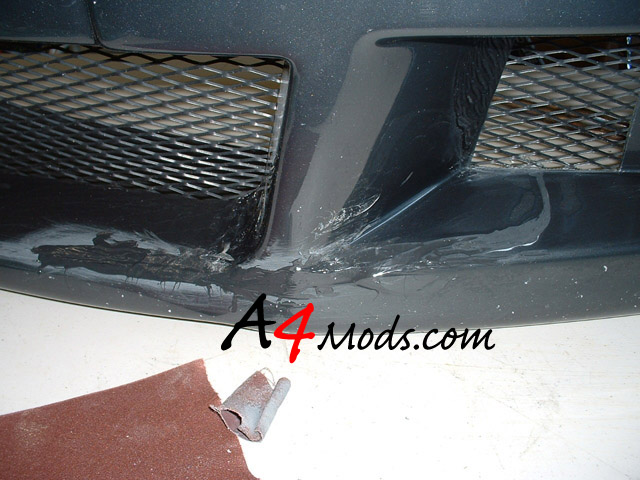 |
After the front cures, you want to start sanding it down. From this part on, the process will be sand, touch up, sand, touch up, etc.... If you are careful, and do not over apply the SEM, you wont have to sand too much. I usually started with some wet 60 grit and worked up to 400. Be careful at the edges of the SEM as it may lift if you have not let it cure all the way (it still may even if it has cured and your going crazy). The pic to the right is of the partially sanded SEM on the front side - you can see it becoming smooth on the right side. Continue sanding until it is flush all around |
|||||||||||||||||
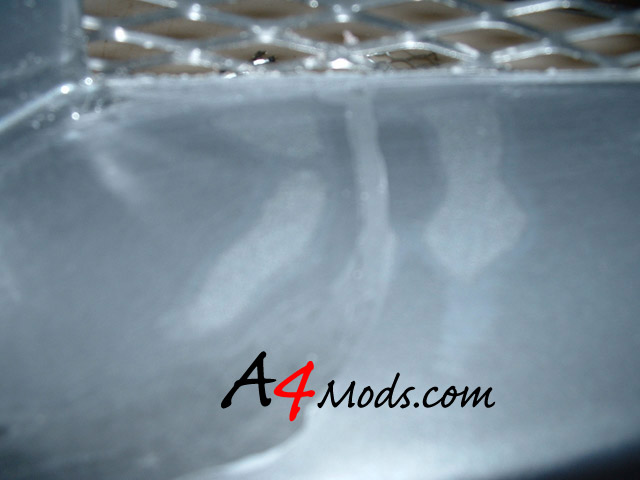 |
If you are patient and meticulous with your sanding, you bumper will look good. You should not be able to feel and surface imperfections that are larger or deeper than a surface scratch. To the left is a close up of one of the sanded areas. |
|||||||||||||||||
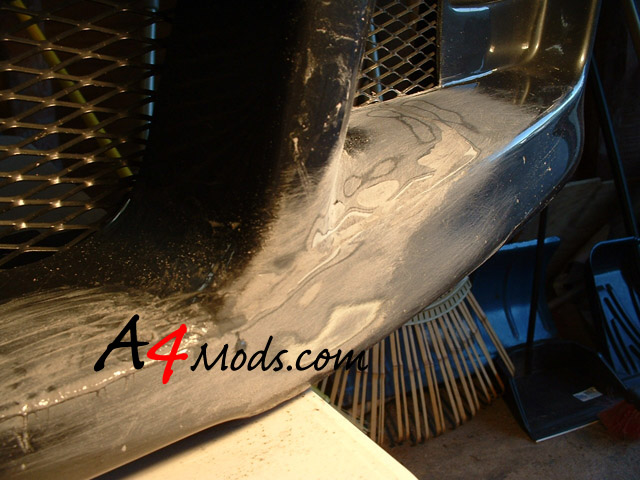 |
Here is the entire crack sanded down after the first application. Sanded from 60-400 grit paper. As you can see, there were spots that were sanded that were not part of the repair - this is inevitable when sanding by hand. This will be taken care of with the primer. |
|||||||||||||||||
 |
||||||||||||||||||
 |
After the areas are sanded down, you want to fill in any of the surface imperfections that you may have. Before I knew better (I haven't fixed it yet) I used some spot putty that I used on the rim repair to fill in various spots. Although I don't know why, I hear this is not good practice. I should have used the USC "ICING" that is available at the paint supply store. This stuff is a 2 part filler that sands very nicely. Its the 'icing on the cake' apparently. If you ask your paint supply store, they will know about it. Anyway, after you fill in all the areas that are low (hopefully not too many) you want to re-sand the putty or 'icing' so that it is flush again. |
|||||||||||||||||
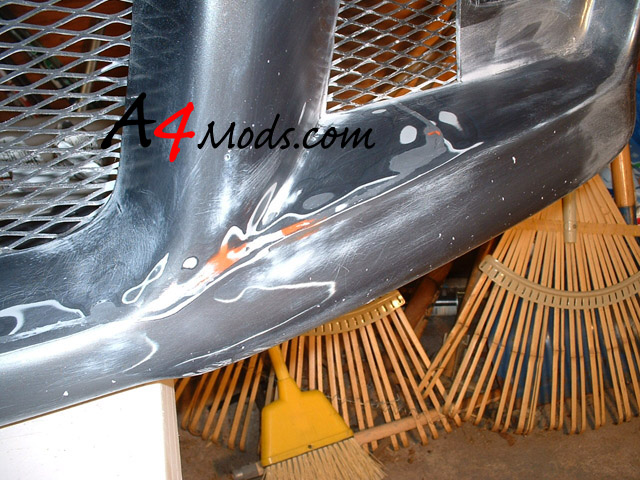
Up until this point, you can only tell the high and low spots from touch. This is very hard for us non-pros, so my next suggestion is to mask off the area of the bumper that you are working on, and spray the area with your Spot Filling Primer. This will not only show you where your imperfections are, the spot filler in the primer may even fix them. To the right you can see mine after the first application of primer. I assume that if you are considering this project, you already know how to use spray paint primer. |
|
|||||||||||||||||
 |
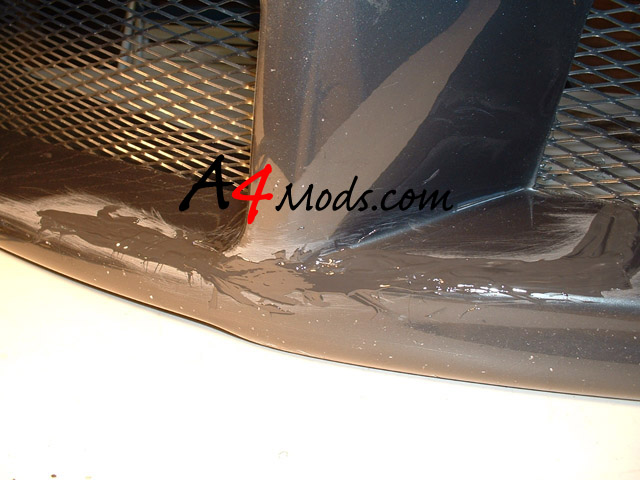
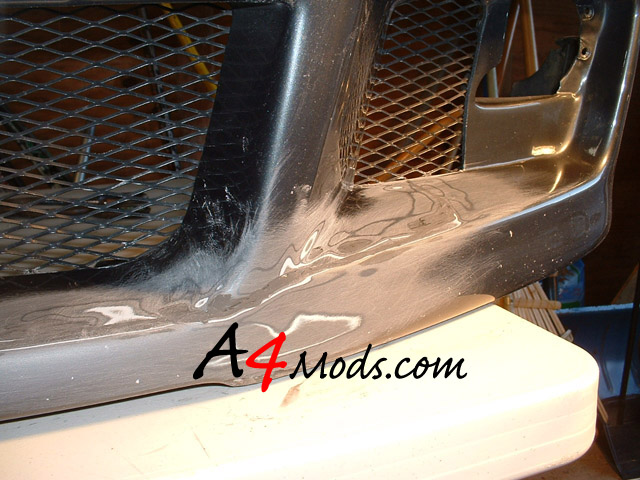
After my first application of the primer, I was very impressed with the results. There were only a few spots that needed help. Since the primer was sandable, I sanded it off to go ahead and fix those areas with my spot putty (what should have been icing). Heres is the pic of the completely fixed crack, before the final coat of primer. You can see the 3 tiny areas that needed help. Because I knew this would look good, I did not re-apply the primer because I was not going to paint it just yet. |
|||||||||||||||||
To this point: I have not re-primed or painted the piece. I am waiting until I have some time to go home and do it. From here you can either bring it to a professional to finish up ( knowing you just saved yourself like $150) of you can finish it up on your own. IF THE CRACK IS SMALL - there is this thing called a Preval Spray Gun (available at the body supply store OR lowes for about $8.) It allows you to add touch up paint to a jar, and spray it like a standard spray paint can. I would not suggest this for a crack this size, but for something smaller it would work great. REINFORCEMENT: It has been suggest that the back of this repair should be re-enforced with either a liquid fiberglass or with the chicken wire mentioned in the supply list. I would recommend the chicken wire for easy of use. What I would do is cut the wire into 1-2inch squares and lay it down on the backside of the repair Then I would apply generous amounts of the SEM to the chicken wire so that it bonds with the SEM that has already dried and cured. This will strengthen the hold significantly - although it is not necessary. I will be sure to update this when the project is totally complete and painted. |
||||||||||||||||||