B6 Audi A4 DIY Blackout Front Grille
Prior Experience: None
Cost: approx. $5
Time: 45 minutes
| Discuss this mod - Here | |||||||||||
|
So after being inspired by MOXY and RSZero1 on AZ, I decided do my own DIY blackout grille. It came out great, and was VERY VERY easy. I recommend this to anyone. | |||||||||||
 |
 |
||||||||||
| Before | After | ||||||||||
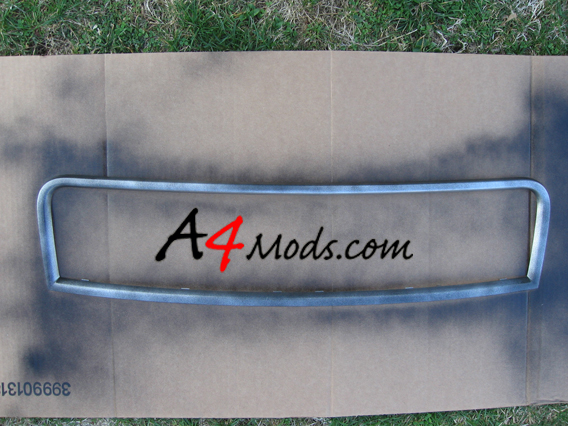
SUPPLIES - The supplies for this one are easy - a screwdriver and paint....perhps a sheet of sandpaper as well |
|||||||||||
|
|||||||||||
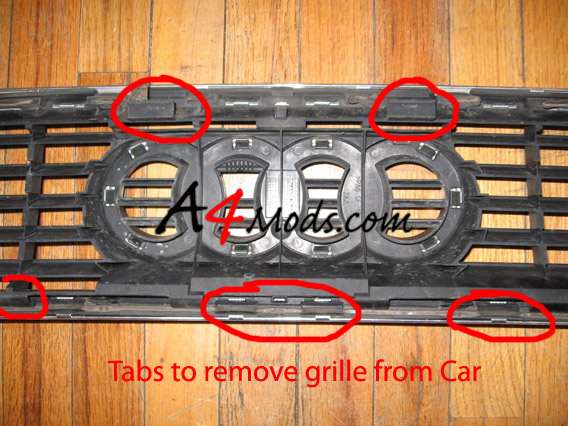
First we need to remove the grille from the car. Since it was sunny out, it was hard to get a picture of this process (all the pictures were completely backlit). I took some pictures inside which will hopefully help you out. When you pop your hood and look at it, you will see what needs to be done. Start on the drivers side, and push in the tabs on the side of the grill. Then while applying pressure outwards, work your way around the grill pushing in all the tabs. - A second person may be useful but is not needed |
 |
||||||||||
 |
The picture above and the one to the left show where these 'tabs' are after the grill is already removed from the vehicle. |
||||||||||
|
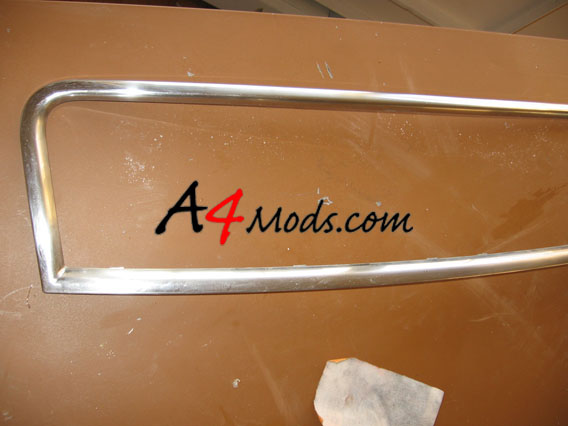
The next thing to do is to remove the chrome part of the grille from the black portion. This will make painting easier and less messy. This is probably the most difficult part of the whole mod just becaue you want to be patient. Don't force anything, and just work your way around the grill. I started by taking a screwdriver, and pressing the chrome tabs from the backside of the grill. The one I started with is in the picture to the right. |
 |
||||||||||
 |
When the grilles are seperated, we want to start to sand the chrome piece. This may not be necessary, but should be done to help the paint adhere to the surface. I used 200 grit paper, and would recommend you try 100 grit (I only had 200 laying around) Unless you go with really coarse grit paper, you probably wont see much of a difference. If you look close you should see the surface scratches you made, and the piece should be less shiny. NEXT CLEAN THE SURFACE REALLY WELL (just use soapy water and a good rinse and dry) |
||||||||||
|
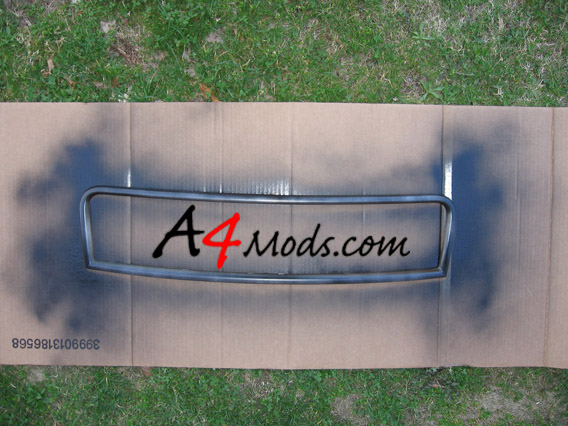
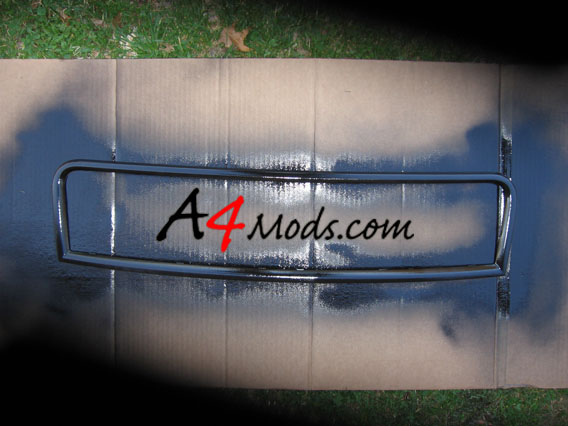
After the part is sanded, it is time to paint it. In all honesty, this paint was the easiest paint I have ever worked with. It seemed like no matter how I held the can, or what I did with it, the paint did not run. This is great if you are a rookie! The one thing you want to make sure you do is do MULTIPLE LIGHT COATS! |
|||||||||||
I layed the piece on some cardboard. This is a good idea because it lets the piece lay flat to prevent running. Also you can tell when your previous coat is dry by touching the surrounding cardboard...and NOT the piece iteself. The next couple thing will just be pictures of each coat. I let them dry for about 5 minutes each All in all, I think I laid 8 coats. I started really light, and got progressively heavier with each coat. |
 |
||||||||||
|
|
|
 |
|||||||||
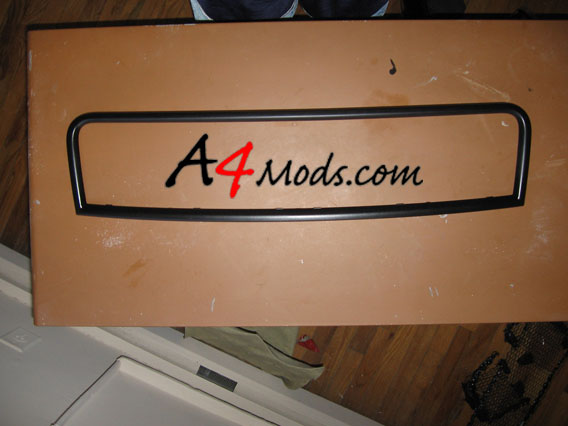 |
The finished product is shown here |
||||||||||
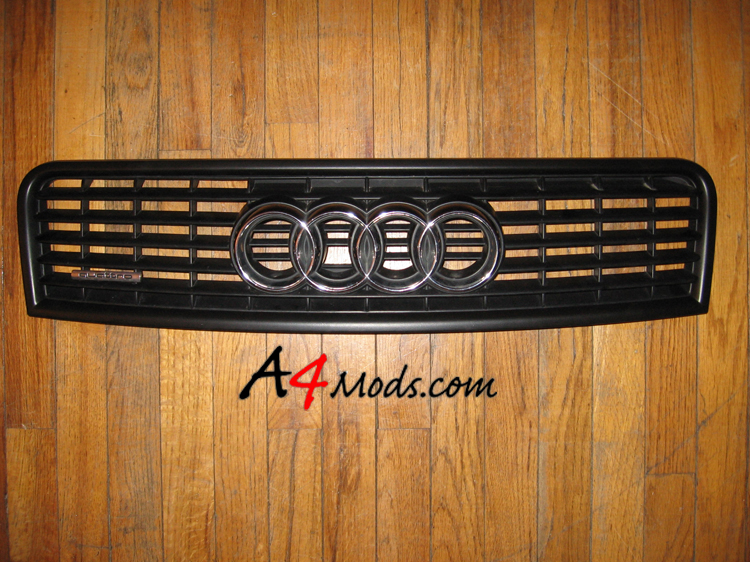 |
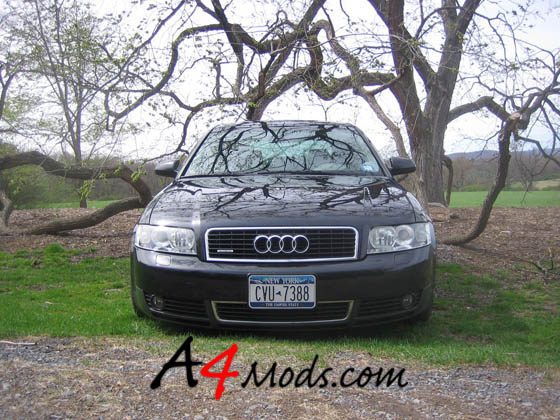
And here's what it looks like re-assmbled. |
||||||||||