Audi A4 Fuel Pump Replacement
This mod was performed by dougyfresh Discuss this mod - Here |
||
| Prior Experience: None |
|
|
| Cost: approx $400 | ||
| Time: 3 hours | ||
This DIY covers replacement of the OEM fuel pump with the 034 High-Output B6 Fuel Pump (with 040 option) from Deutsch Teile Haus. This DIY could also be used for removal and installation of an OEM fuel pump if so desired. It should also be noted that this DIY is specific to Quattro equipped vehicles. Front-Wheel-Drive (FWD) may be different in regards to location of the fuel pump within the chassis. Consult Bentley Service Manual for FWD models. Safety: |
||
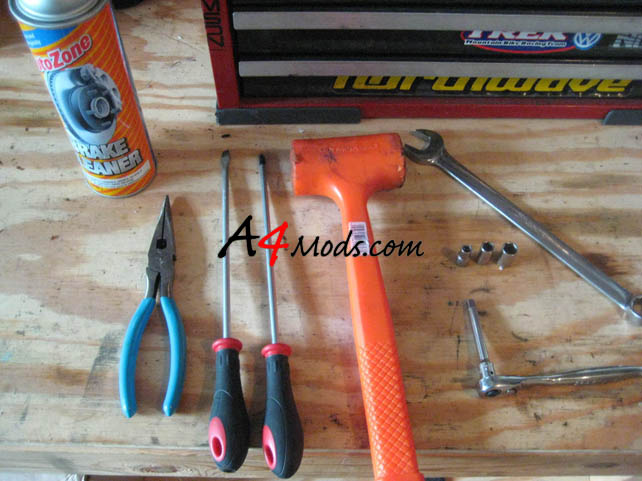 |
Tools Required
|
|
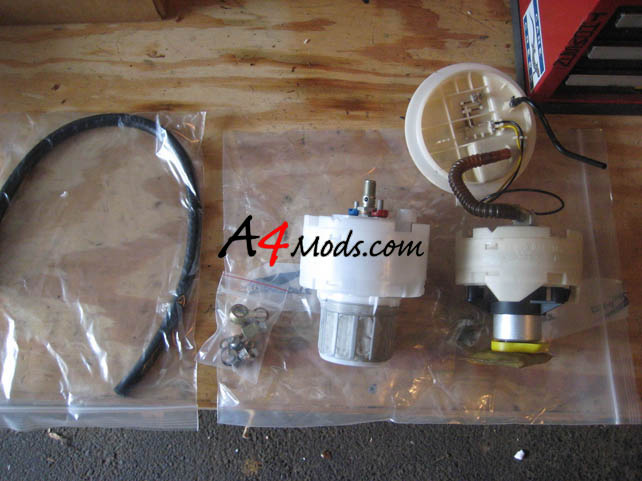
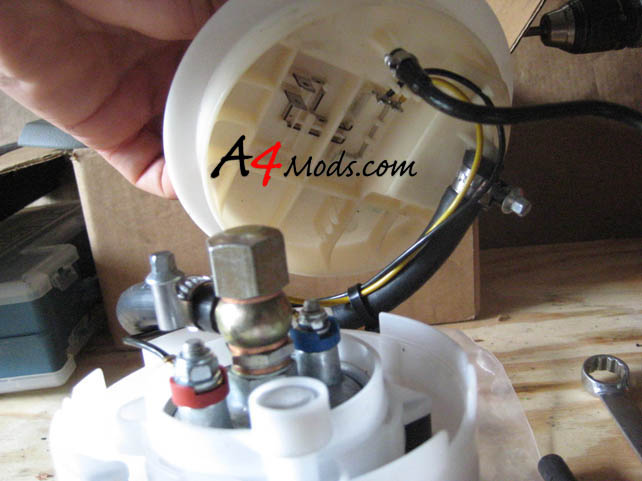
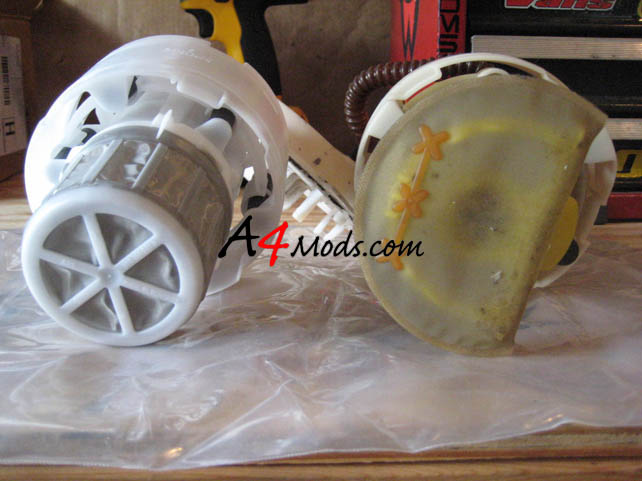
The 034 High-Output Fuel pump kit comes with the pump, a new rubber fuel line, new electrical connections, hose clamps and other associated hadware needed for the install. To the right is a picture of the stock fuel pump (right) next to the new high-output fuel pump with hardware kit (left). |
|
|
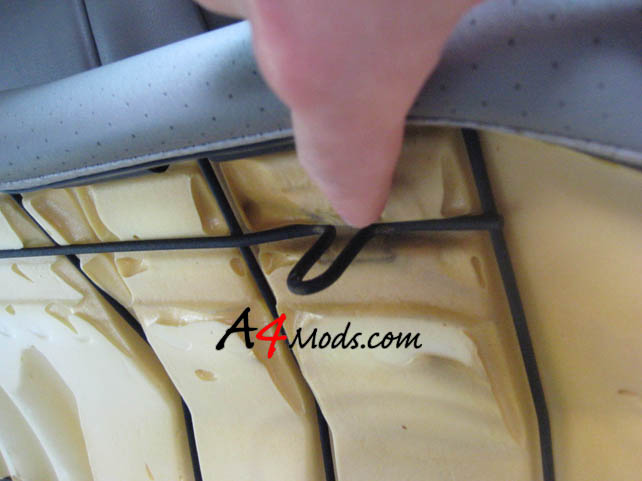
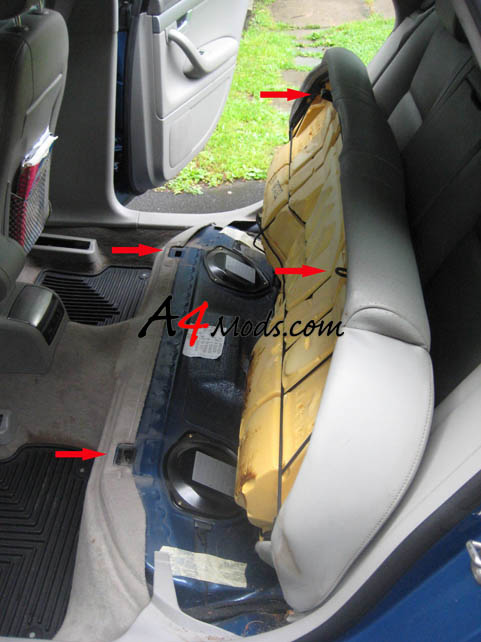
| On Quattro equipped vehicles, the fuel pump is located underneath the rear seat. The rear seat cushion is held in with two clips in the front of the seat on either side of the cushion. You have to pull up on the front side of the seat to unseat the clips from the body. | ||
 |
||
| Here are closer shots of the two clips: | ||
|
|
|
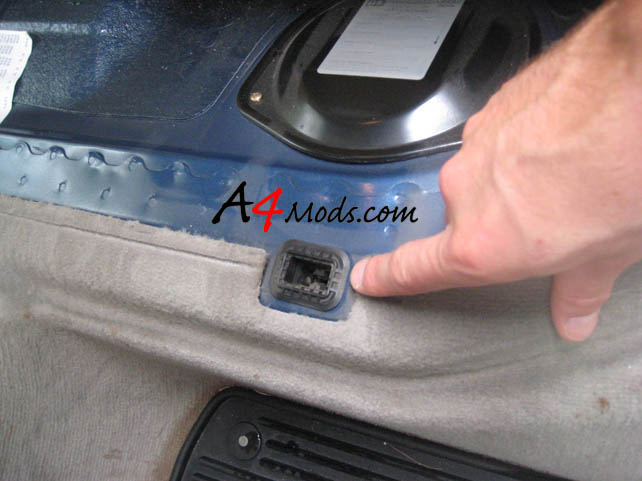
| Once the seat is released from the car chassis disconnect the seatbelt wires and heated seat wires (if equipped) at the connectors. Below on the left you will see the driver's side electrical seat connections, and on the right are the passenger side connections | ||
 |
|
|
| After everything is disconnected, remove the rear seat | ||
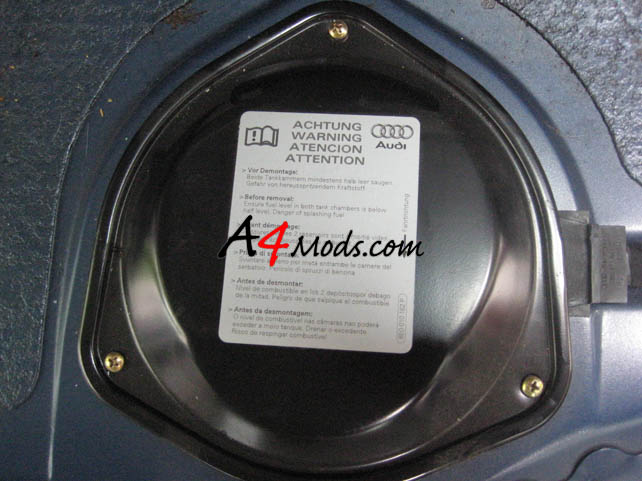
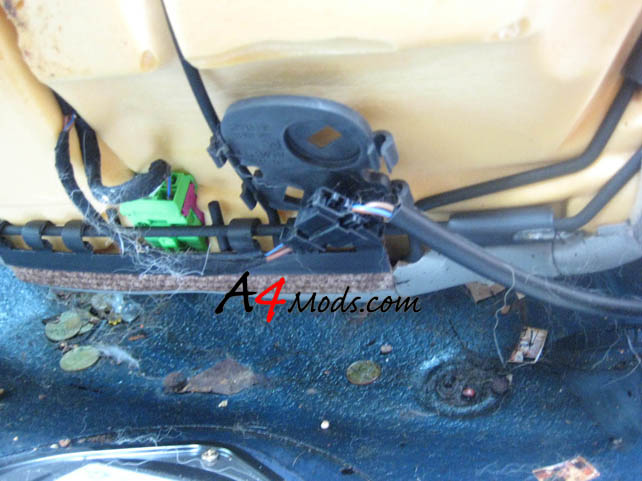
| After you remove the seat you will see two covers on either side of the chassis. The cover on the passenger side houses the fuel pump and fuel level sending unit and is pictured ot the right. Remove all three screws with a Phillips screwdriver. The cover can then be removed with gentle force. This cover provides access to the top of the fuel tank through the chassis. It also seals off the interior of the vehicle from the underside of the chassis. |
|
|
 |
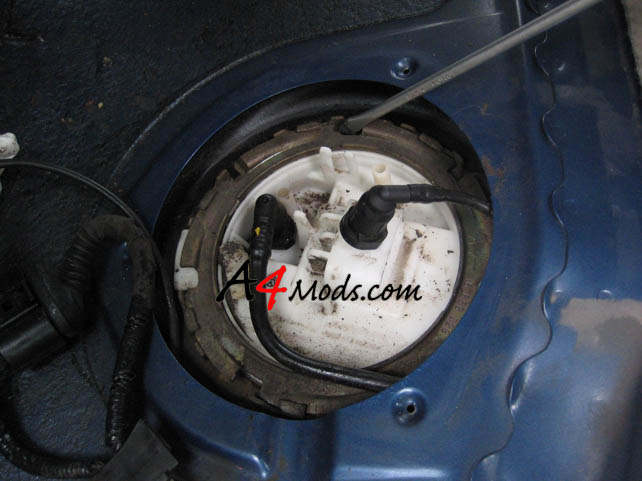
If the vehicle has some mileage on it the top of the fuel tank will be fairly dirty. It is recommended to clean this dirt off, to the best of one’s ability, otherwise it will fall into the fuel tank while removing the fuel pump. Carefully spray the top of the fuel pump location with Brake Clean to remove the dirt. Use paper towels to soak up the excess Brake Clean and dirt. The finished result will look something like what is pictured to the left.: |
|
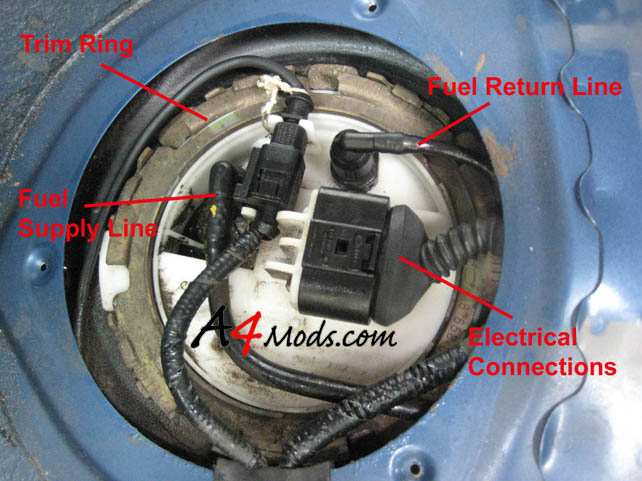
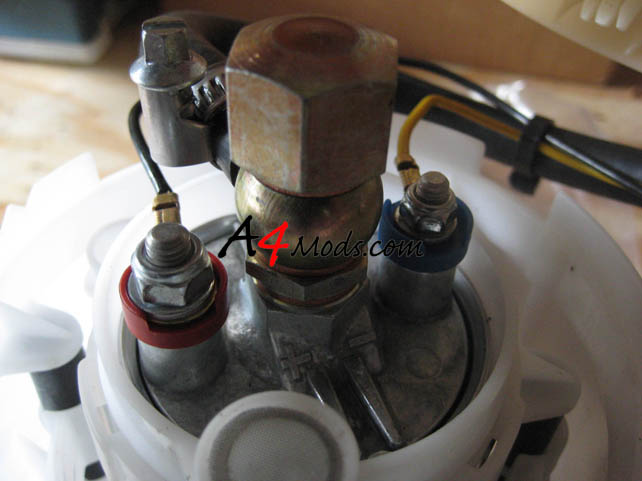
Note the various connections on the top of the fuel tank: The Trim Ring that locks and seals the top down onto the fuel tank, Fuel supply line and fuel return lines (fuel filter acts as the fuel pressure regulator) and Electrical connections. |
||
Disconnect the electrical connections and move them aside. Disconnect the two chassis fuel lines. A pair of needle-nosed pliers works well. The key is to push the round side (opposite of the flat side) inward and pull up on the chassis fuel line. This, in turn, releases the lock on the tab within the fuel tank cover. Be gentle for these fuel lines (like the ones on the fuel filter) can be brittle. |
 |
|
Now that the fuel lines and electrical connections are disconnected use the flat blade screwdriver and dead blow hammer to rotate the fuel tank cover trim ring counter-clockwise (to the left). This will relieve pressure on the seal and allow the cover to come off. |
|
|
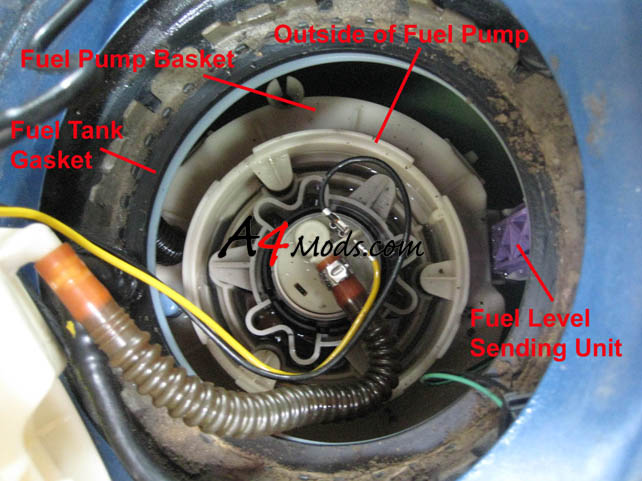
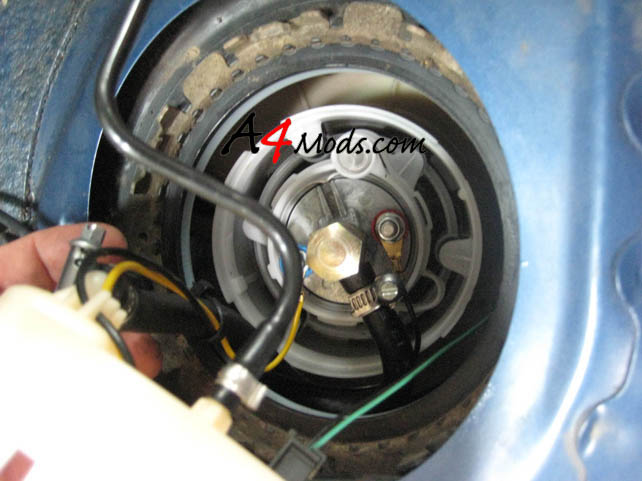
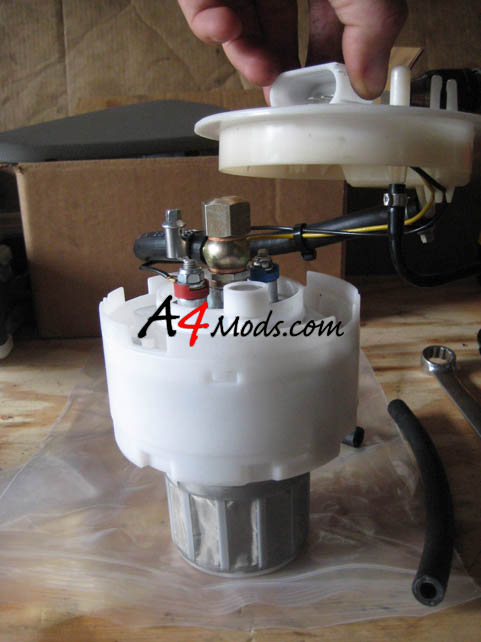
| Gently pry the fuel tank cover up to reveal the fuel pump and inner fuel tank | ||
There is a green and black connector on the underside of the fuel tank cover. This is for the fuel tank level sending unit. The fuel pump electrical connections and fuel supply line are also connected to the underside of the fuel tank cover. The fuel supply line is difficult to remove (one-time-use connectors hold the line onto both the pump and tank cover). The fuel pump can be removed with the fuel tank cover still attached via the wires and fuel supply line. Once out of the car the fuel supply line will be easier to remove from the fuel tank cover. |
|
|
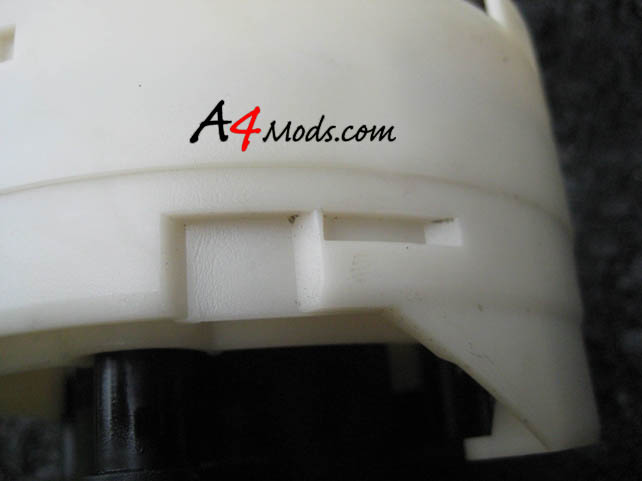 |
There are tabs alongside the outside of the fuel pump that lock the pump in place with the fuel tank basket. The fuel pump needs to be rotated counter-clockwise (to the left) to unlock it from the fuel tank basket. |
|
Audi makes a special fuel pump removal tool but the fuel pump can be carefully removed without the help of this tool. To remove the fuel pump without the Audi tool, use the flat blade screwdriver and the dead blow hammer in the same fashion as was used to remove the fuel tank cover trim ring. Insert the screwdriver onto one of the reliefs on the outer ring of the fuel pump. Be gentle with the dead blow hammer. It only takes a little effort to move the fuel pump. Once the fuel pump rotates counter-clockwise (about a centimeter) it can then be lifted straight out and removed from the vehicle |
|
|
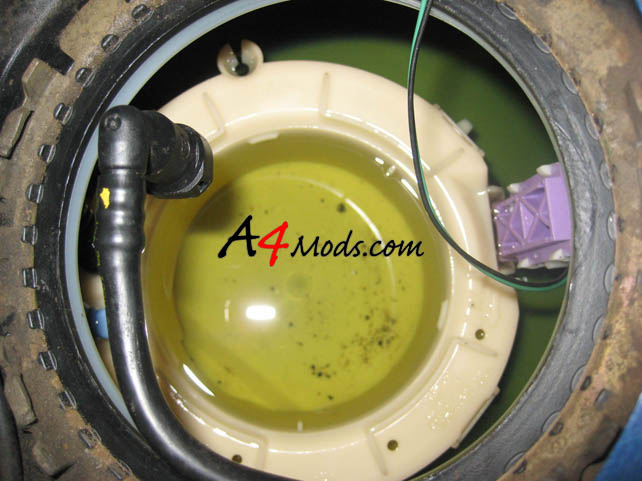
There may be some sediment in the bottom of the fuel pump basket that either already existed or was introduced when opening up the fuel tank. (see picture to the left). One method to remove this (if the fuel is around 1/4 full) is to use a few paper towels. Submerge your hand and a paper towel into the bottom of the basket and soak up and grab the sediment. It is recommended to wear a rubber/latex glove to eliminate the fuel vapor smell on your skin and exposure to any open cuts/bruises on your hand. |
 |
|
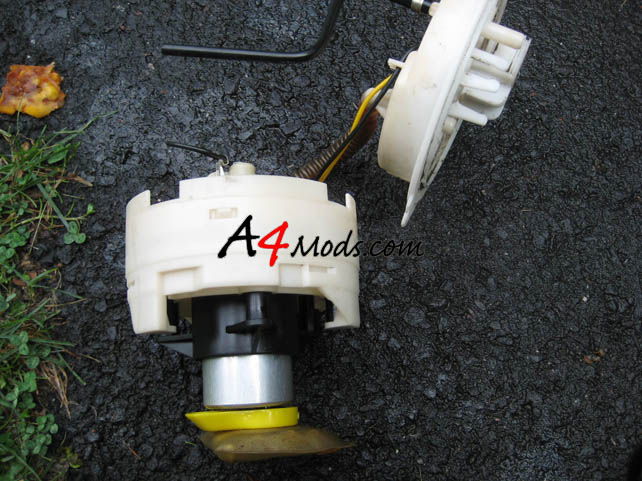
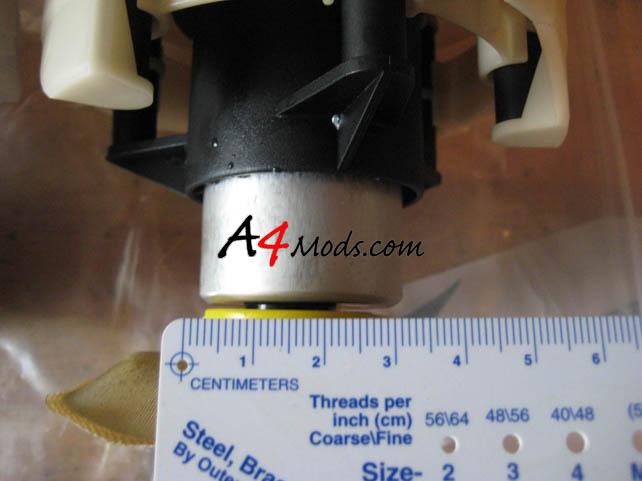
Now it is time to move onto prepping the new High-Output Fuel Pump and attaching the fuel tank cover to the new fuel pump. Note the size difference in both pumps. The new fuel pump is larger on the suction side yet still fits within the confines of the OE fuel pump basket. Check out the difference in the pictures below |
||
 |
||
|
||
|
|
|
Start with removing the fuel line from the OE fuel pump. Once that is removed set the OE fuel pump aside. Remove the fuel line from the fuel tank cover. Take the new fuel line supplied with the High-Output Fuel Pump and cut it to length. The OE length is around 17cm but I found the new, rubber, line is a tad too short at 17cm. Basically, once inserted into the fuel tank, the fuel line loops around on itself in a �U�. 17cm seemed to be right on the cusp of a potential kink in the line. I increased the length to around 20cm and the probability of a kink in the line is extremely low. Using the 6mm socket and the supplied hose clamps connect the new fuel line to the fuel tank cover and connect the other end of the fuel line to the supplied banjo fitting. Now that the fuel line is set up, it is time to update the electrical connections at the fuel pump. Note the positive wire on the OE fuel pump. The OE fuel pump is labeled ‘+’ for positive. In this particular case it was the black wire. The High-Output fuel pump uses different terminal connectors (supplied with the pump). Cut the OE fuel pump terminal connector off right at the connector. As much of the existing wire length as possible should be retained. Using the wire insulation stripper remove about 4mm of insulation from the end of the wire. The terminal connectors have two tabs that will be crimped on-top of the wire. One (closest to the terminal) is to crimp the exposed wire and the other is to crimp onto the wire’s insulation. You should crimp and solder the connections. It may not be 100% necessary to solder the wires, but it is highly recommended. Connect the wires onto the terminals of the fuel pump with the supplied washers and nylon locking nuts (8mm and 10mm socket). Insert one brass washer onto the fuel line on the fuel pump. Insert the banjo fitting and then insert the second brass washer and locknut. Tighten the locknut with a 3/4” wrench. Attach the wires alongside the fuel line with the zip-tie and cut the end of zip-tie off. The resultant set-up looks like this: |
||
 |
||
 |
|
|
| Note: If the fuel pump is being replaced with an OE Replacement fuel pump there is no need to replace the electrical connectors. If the fuel line can be removed very carefully it can be re-used with new hose clamps. Otherwise, a new fuel line will have to be procured and used. | ||
Installation of the new fuel pump is the same as removal. Insert new fuel pump into fuel pump basket and align the tabs of the new fuel pump with the basket. Then rotate the fuel pump clockwise (right) to lock the fuel pump into the basket. This image shows the High-Output fuel pump in the tank: |
|
|
| Slip the new fuel tank cover gasket over the fuel tank cover and seat it evenly on the fuel tank. Then insert the fuel tank cover onto the fuel tank. There is a tab in the cover that sits on-top of the tank and is only in one location for clocking purposes with the chassis fuel lines. Align the fuel tank cover accordingly. Insert trim ring and rotate clockwise (right) with the flat blade screwdriver and dead blow hammer. This seals the fuel tank cover in place. | ||
Connect chassis fuel lines as noted by their orientation upon removal. The chassis fuel lines just push down onto the fuel tank cover with gentle pressure. A ‘snap’ should be heard when they clip in. To verify they are fully seated, very carefully pull up on them. There should be no movement. Reconnect electrical connections. |
|
|
This is a good time to insert the key in the car’s ignition and rotate the key to the ‘on’ position. The priming of the fuel lines via the new fuel pump should be. If so, then the new fuel pump works and everything was connected correctly. If not, then go back and figure out what was done incorrectly. Once everything works, reattach the chassis cover with the three phillips screws. Reattach rear seat cushion by inserting rear portion underneath seat backs and then pushing down directly on-top of both front clips. The seat cushion should clip right in. Now that the fuel pump is installed it is a good idea to install a new fuel filter. This is especially important if the high-output fuel pump is installed. A fuel filter DIY is located over on Audizine Good Luck! |
||