Audi A4 DIY Black Out Headlight Housings - AKA Joey Mod
Prior Experience: Just a some spray paint skills
Cost: approx. $30
Time: 1 day if you work fast and are patient - plan on a weekend
| Discuss this mod - Here | ||||||||||||||||||||||
A very common mod among the Audi/VW/Euro scene is to color match or black out the headlight housings. Most vehicles - the A4 included - come with lots of chrome/silver on the inside of the headlights. This mod is usually very easy. On most vehicles you just put the headlights in the oven, pull them apart and paint them. Unfortunately the B6 A4 is not as easy. This write up is how I did the mod. It is by no means the ONLY way to do it, but its a good way. Before I start I will warn you that you WILL be modifying your headlights. It will be long and tedious work - but not difficult. If you are impatient and sloppy, don't do this mod. There is a good chance you will break something if you are not careful. I wrote 1 day as the time required for this - but realistically it should be done over an entire weekend. It is probably 8-10 hours of work - but it is not the type of thing you want to try and finish in a single day. Plan on having the car down (or driving without headlights) for a couple days. Props to all the people over on Audizine that helped answer questions I had on this. |
||||||||||||||||||||||
 |
 |
|||||||||||||||||||||
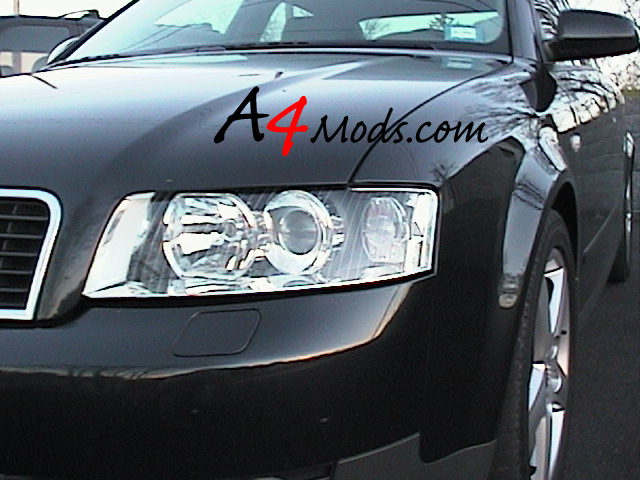
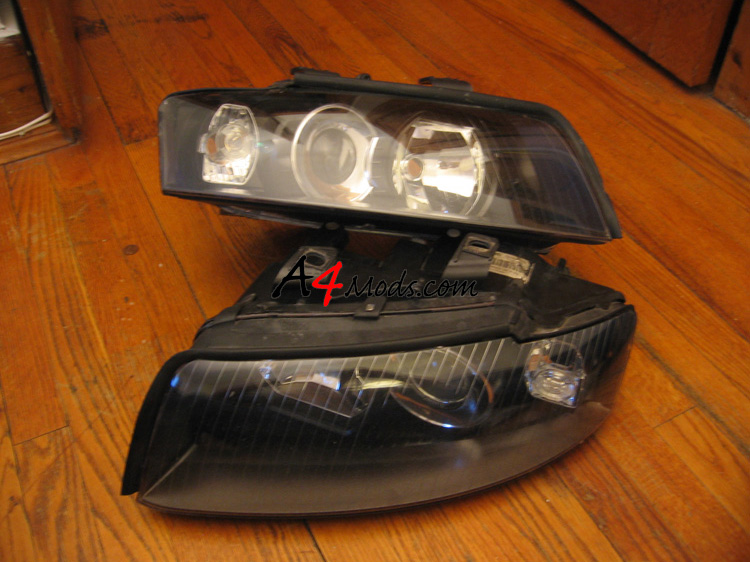
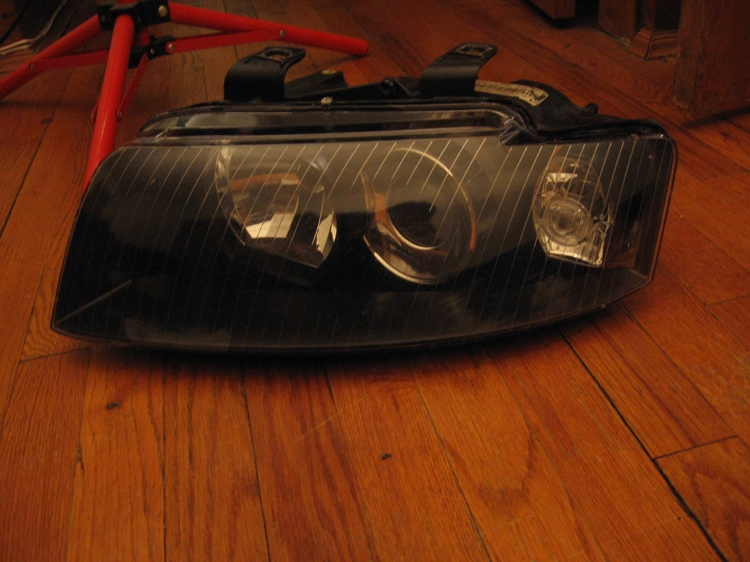
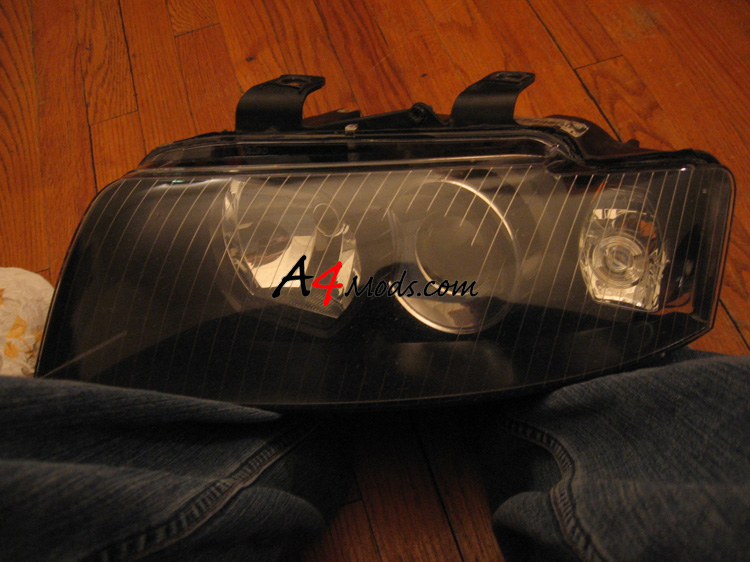
| Before | After | |||||||||||||||||||||
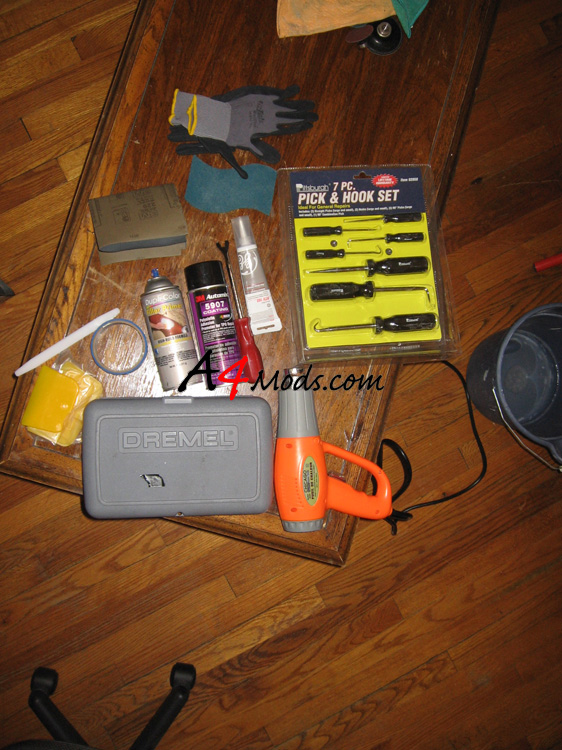
SUPPLIES -The supplies need are pretty straightforward with the exception of the plastic repair. For the plastic repair you can use any number of products. I recommend Duramix (used in this writeup) or SEM used in the original ABS Plastic Repair writeup |
||||||||||||||||||||||
 |
|
|||||||||||||||||||||
The very first thing you need to do is pull the headlights out - this is outlined in a couple places already on this site, so I am not going to go into it here. You can follow the Clear Corner Mod writeup to get the job done. |
||||||||||||||||||||||
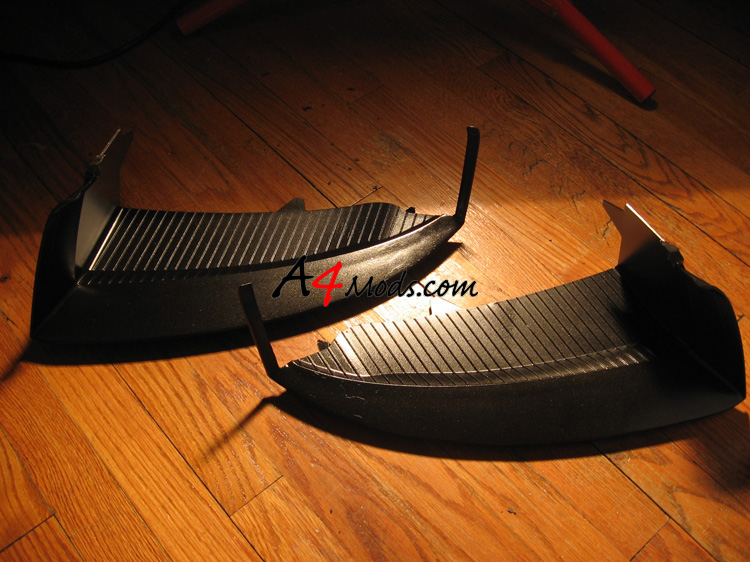
When you get the headlight out, remove the black rubber gasket surrounding the light |
 |
|||||||||||||||||||||
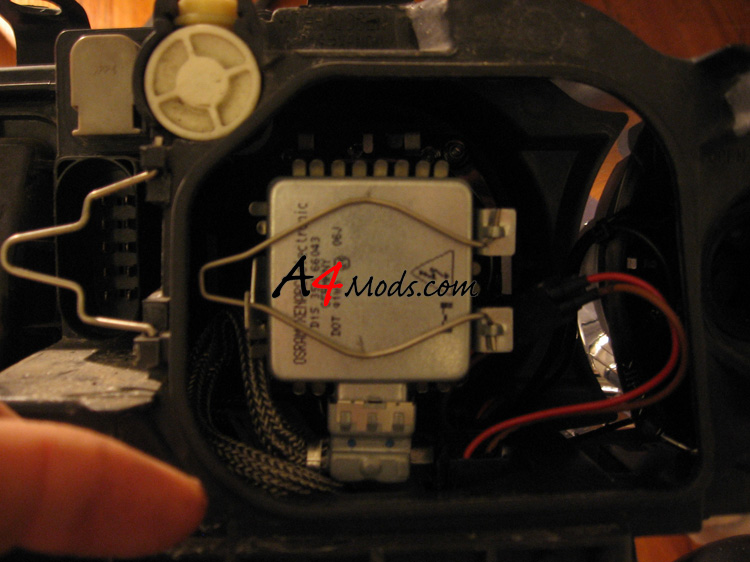
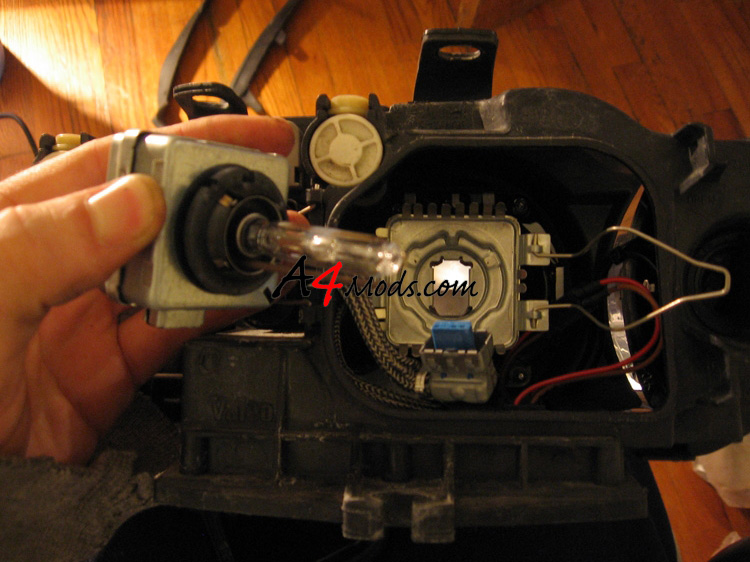
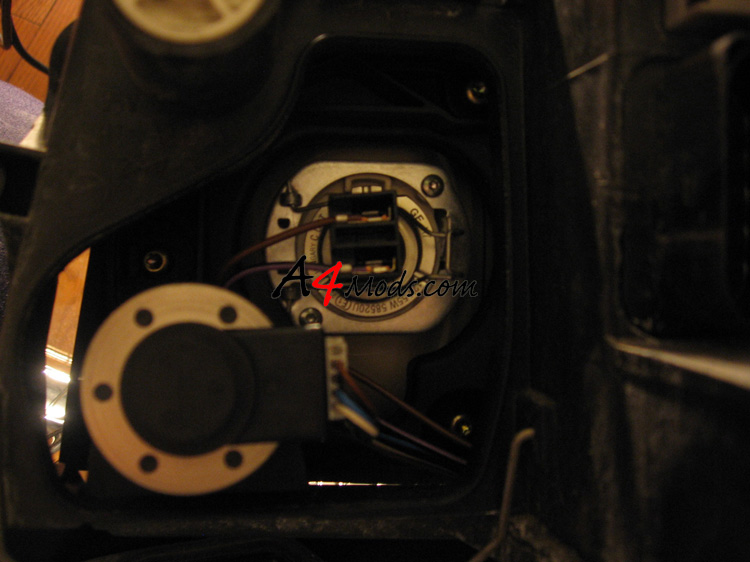
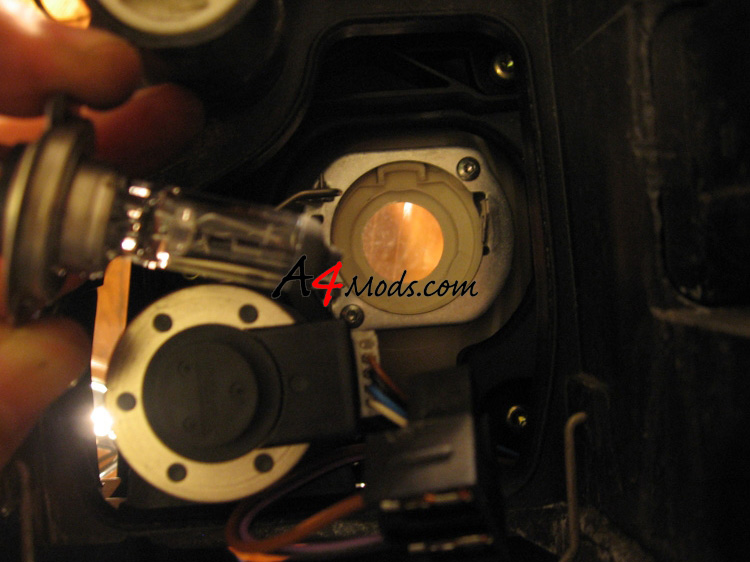
| With the gasket out, remove the bulbs - 3 in total. | ||||||||||||||||||||||
 |
 |
|||||||||||||||||||||
 |
 |
|||||||||||||||||||||
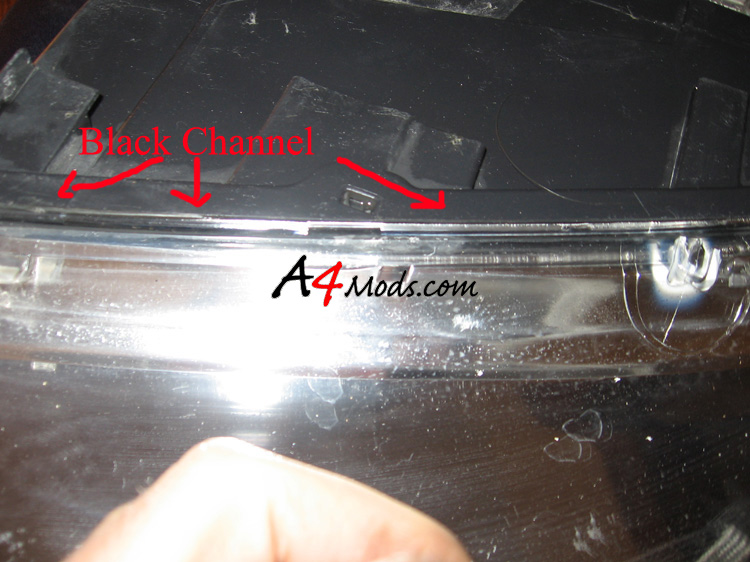 |
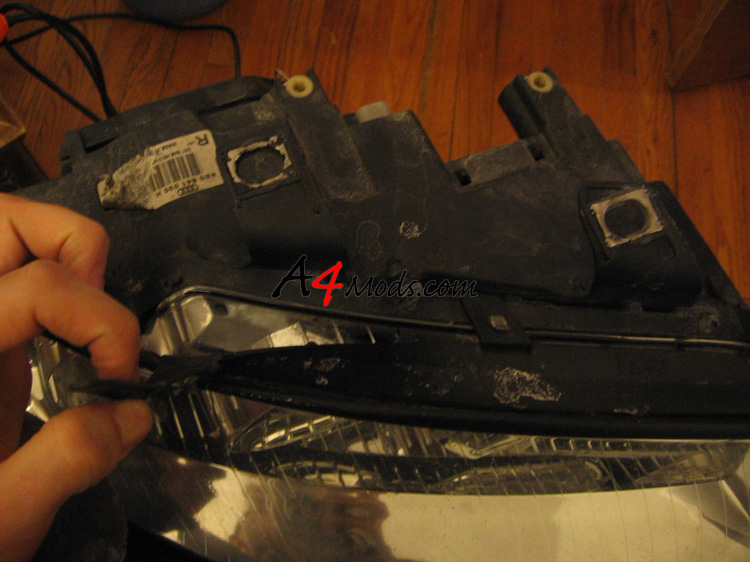
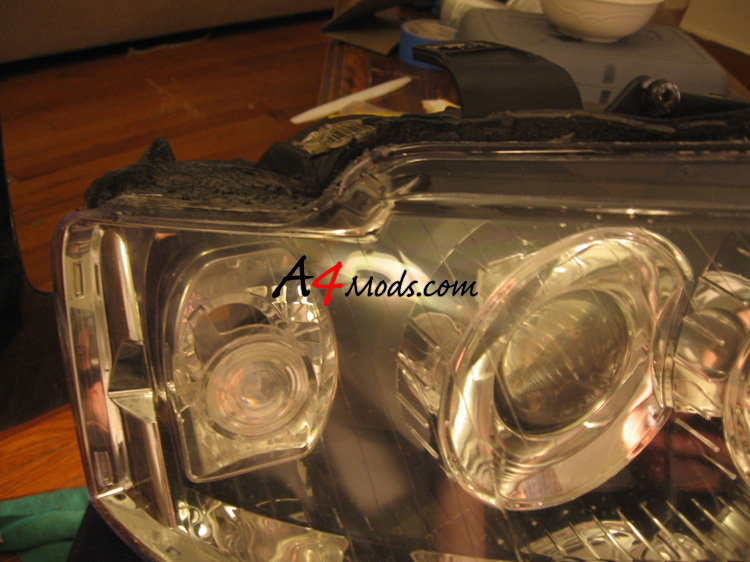
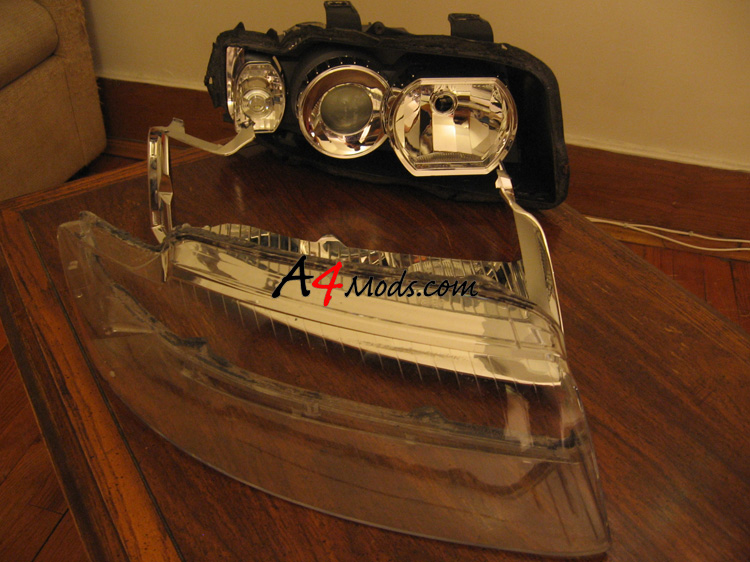
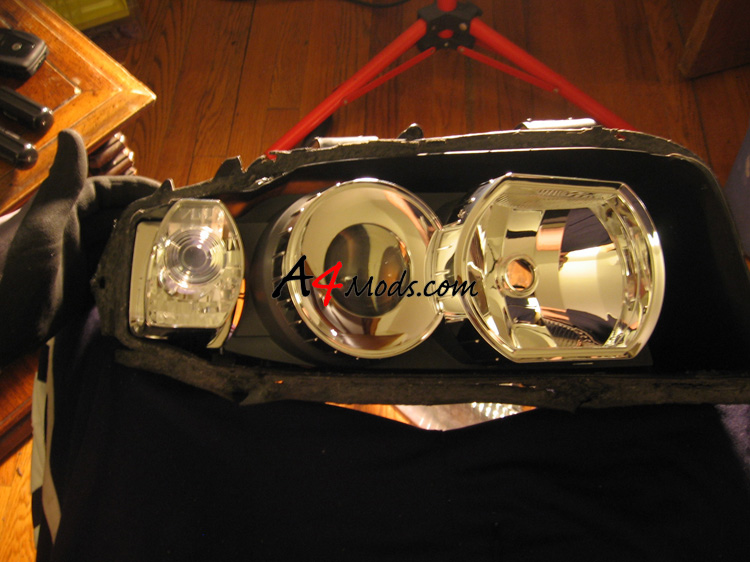
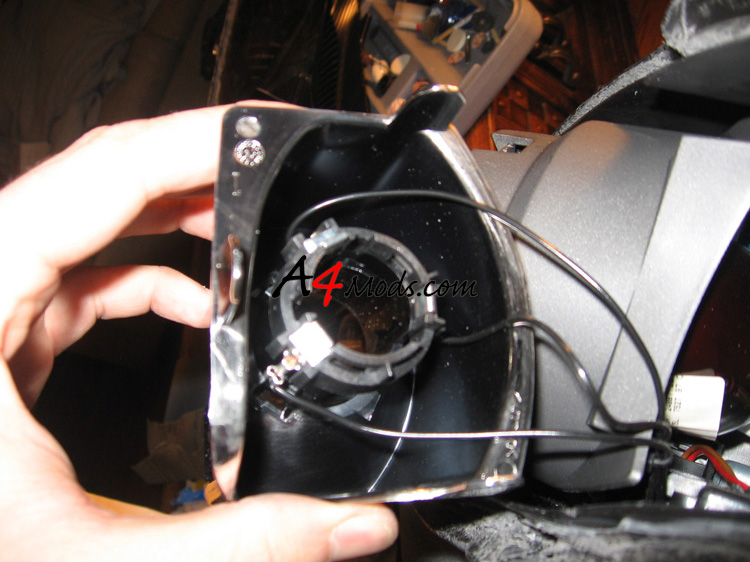
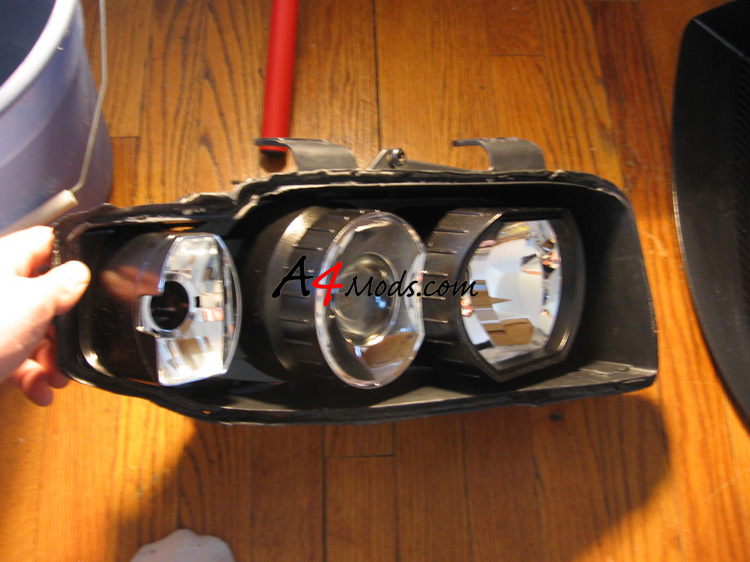
Here is a closer look at what we will be doing. The clear front plastic portion of the light is glued into the black plastic channel of the headlight. In order to separate the two, we need to break down all of the glue holding the two together
|
|||||||||||||||||||||
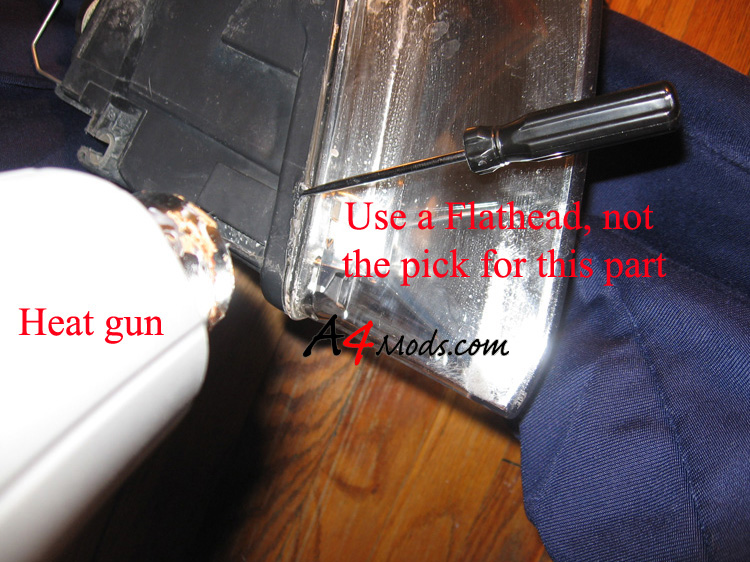
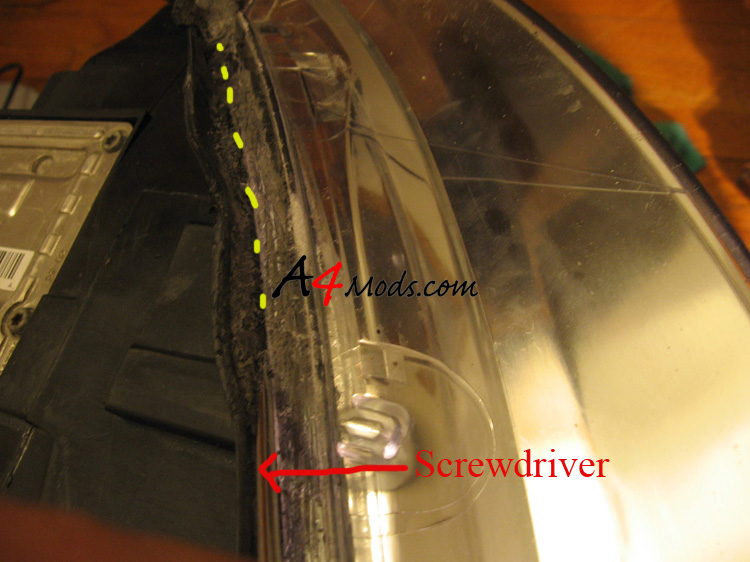
This part of the process is by far the slowest and most tedious. In order to break down the glue, you will have to heat the black plastic channel and pick at the glue with your choice of tools - the pick, or the flathead screwdriver. It is recommended that you start on the bottom of the headlight, as the bottom will not be seen when it is installed in the vehicle. If you screw up that part, no one will know. |
||||||||||||||||||||||
Start by running a pick along the seam between the edge of the channel and the clear plastic part. You then want to use the heat gun and the flathead to start to lift the channel up. The best technique that I found is about 20 seconds with the heat gun over a 4 inch section, then going through that section with the screw driver. |
 |
|||||||||||||||||||||
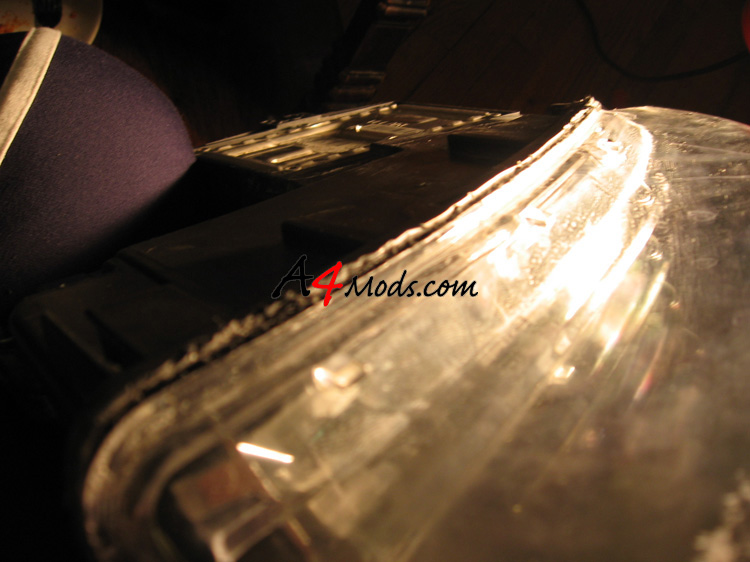
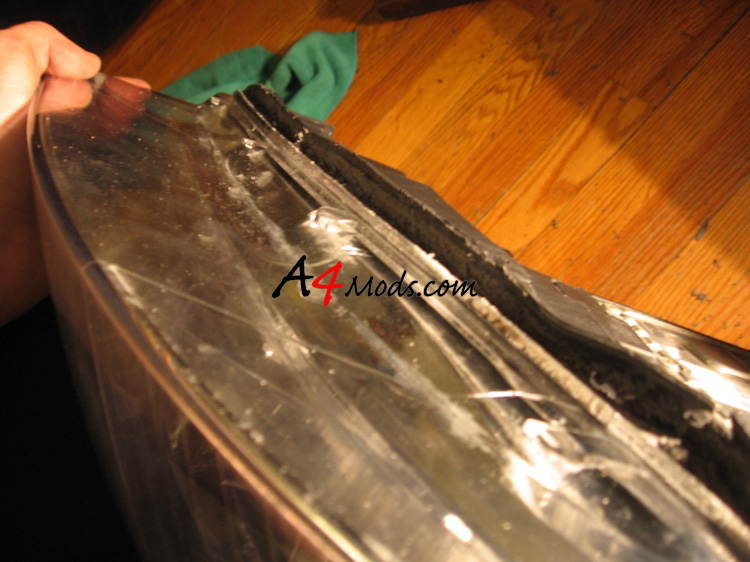
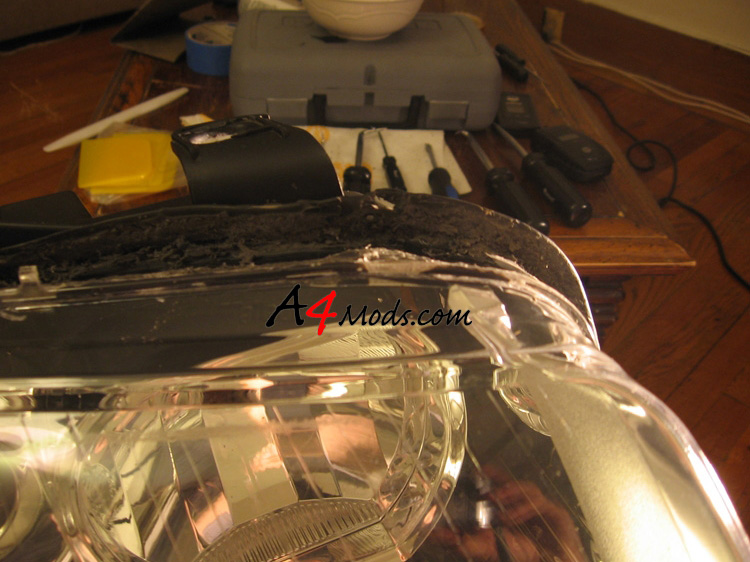
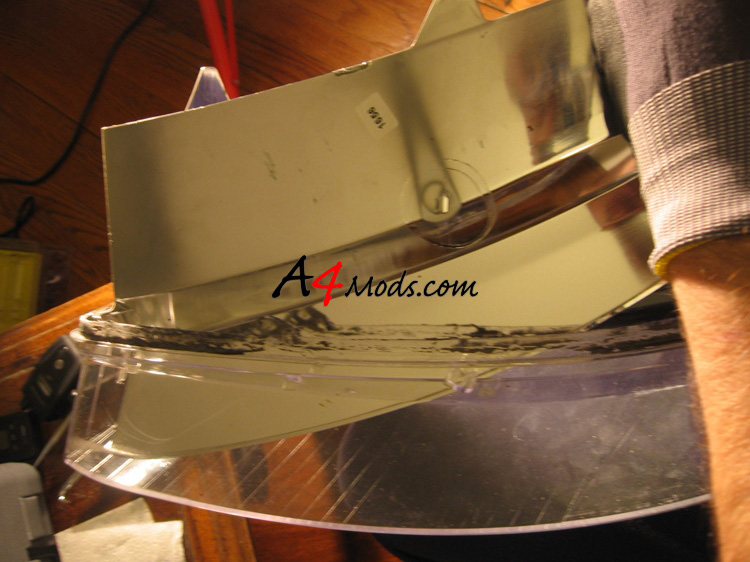
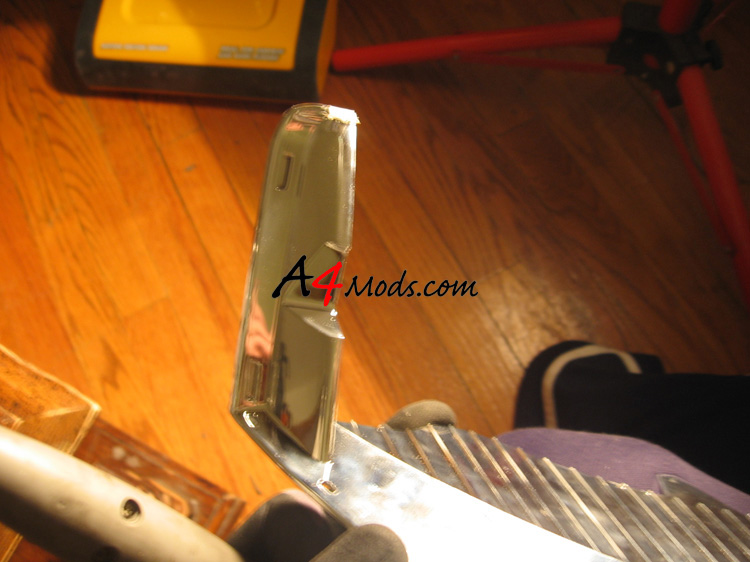
The amount of work will greatly depend on how well your headlights are sealed. Mine were sealed VERY well - so it took longer, and required more modification than I had expected. You will have to pass over each section of the light more than once. Here is what mine looked like after the first pass along the bottom |
 |
|||||||||||||||||||||
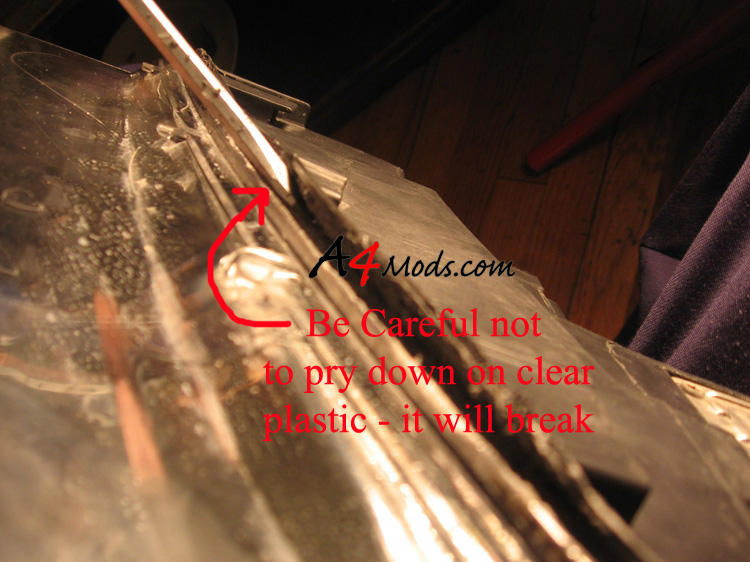 |
As you are going along with the screwdriver, you need to be careful not to pry it against the plastic portion of the light - it can crack the lens. |
|||||||||||||||||||||
 |
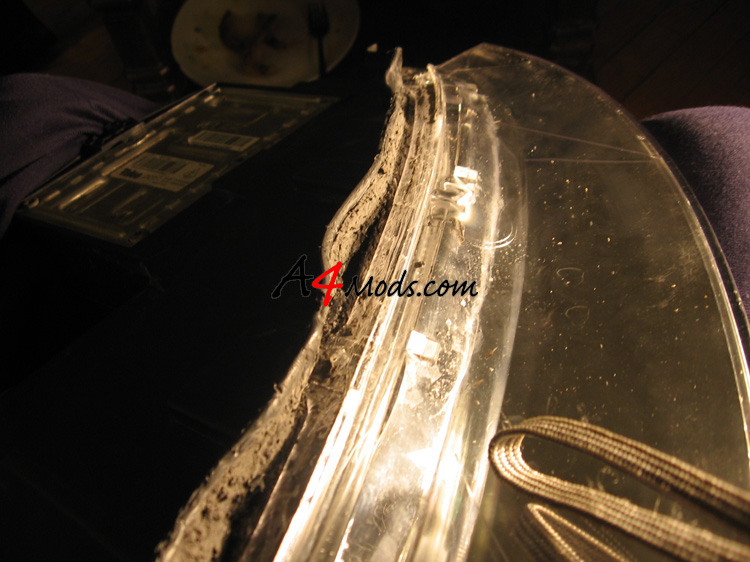
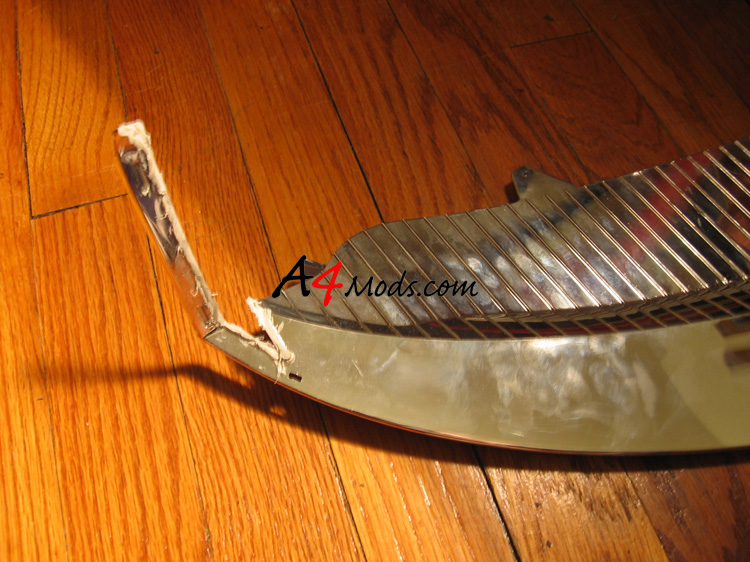
Here's what the bottom of mine looked like when it was pryed up completely |
|||||||||||||||||||||
 |
Even though it may look like you have all of the glue broken down, what you have to realize is that you have only done the top half of the channel. The clear plastic will also have some glue on the bottom side This is why it was necessary for me to lift the channel completely - so I could get a screwdriver UNDER the clear plastic to separate it from the housing I just worked my way along the clear plastic edge until it was free |
|||||||||||||||||||||
| After the bottom was completely done, it looked something like this. Didn't I tell you to prepare to modify those headlights? | ||||||||||||||||||||||
 |
||||||||||||||||||||||
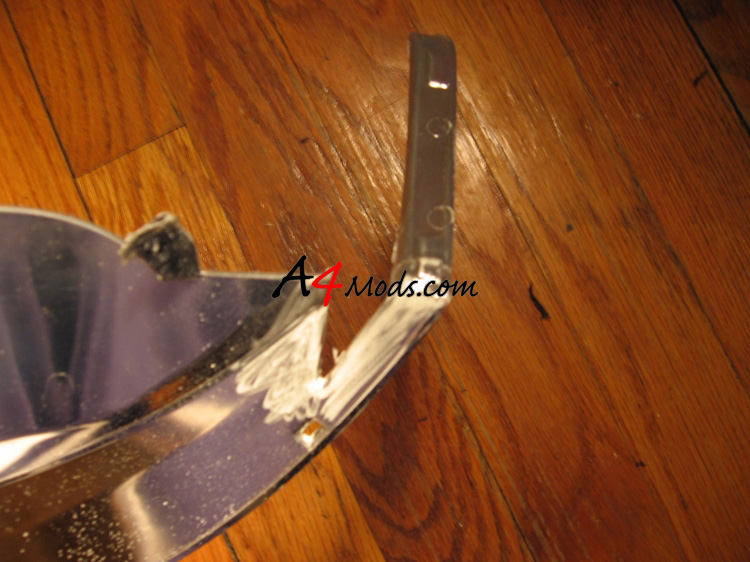
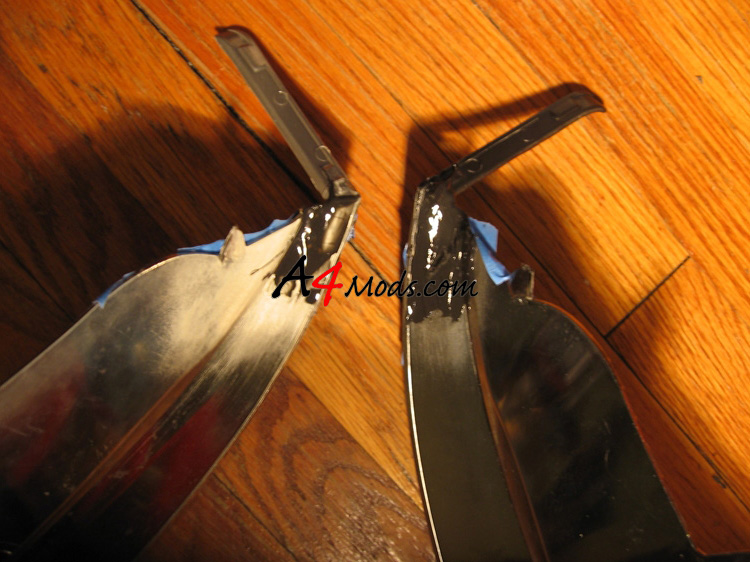
After you worked your way around the bottom, you can continue up the sides and to the top. There is no real easy way to do it - so just be patient. Be VERY cautious along the top and grill-side edges as these will be easily seen when your hood is popped! Here's how far I had to go with the top edges |
||||||||||||||||||||||
 |
 |
|||||||||||||||||||||
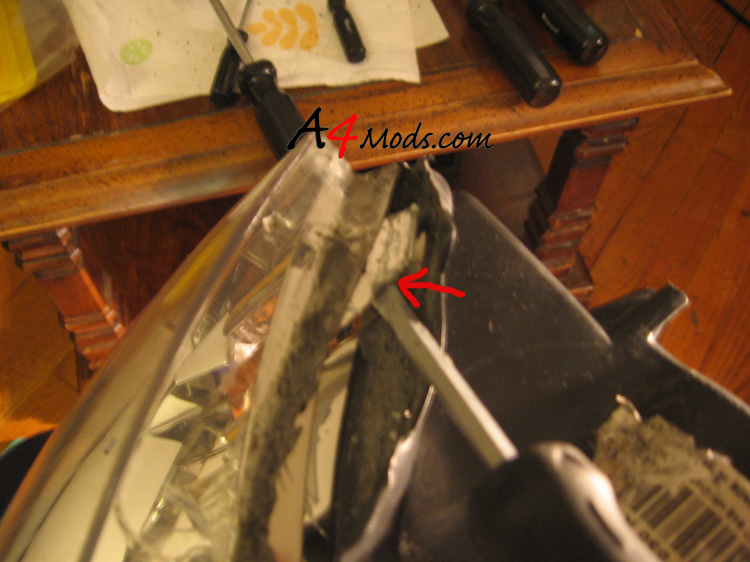
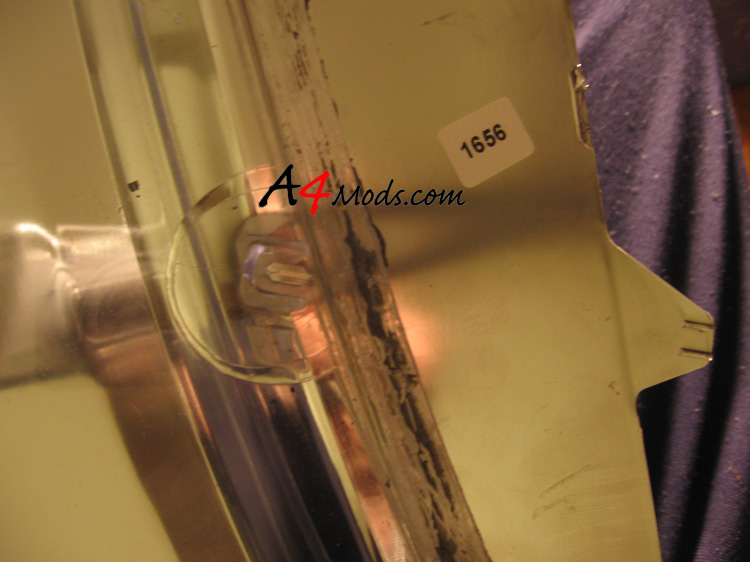
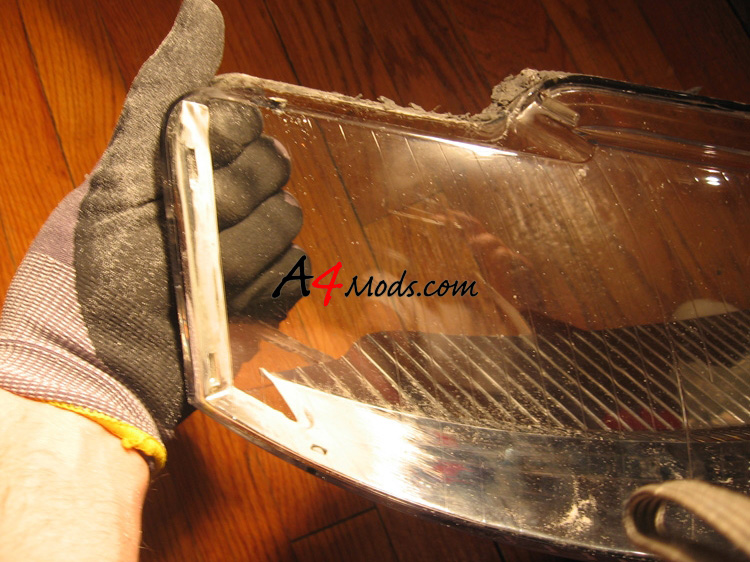
After you have gone completely around the headlight, you can start to separate the pieces. Be careful not to pull too hard - it will take some force, but not THAT much force. You may get to a point where there part of the internal chrome plastic is stuck to the top black channel as shown to the right. Just pry it out with the screwdriver. |
 |
|||||||||||||||||||||
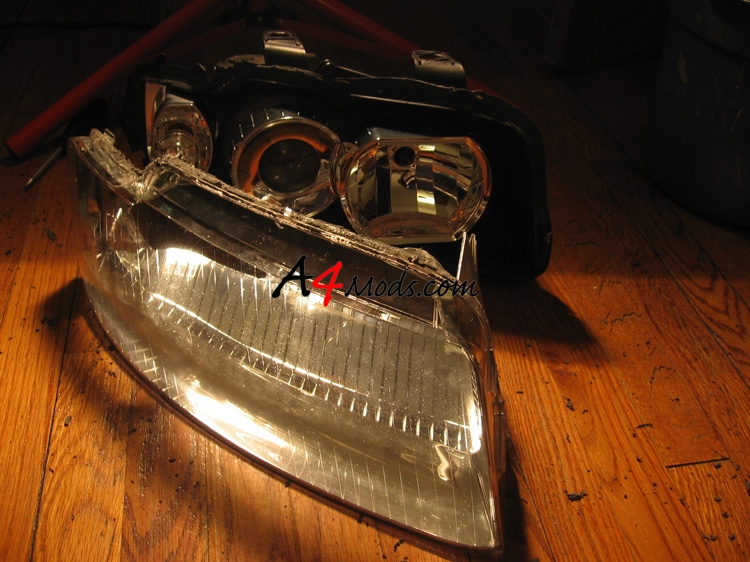 |
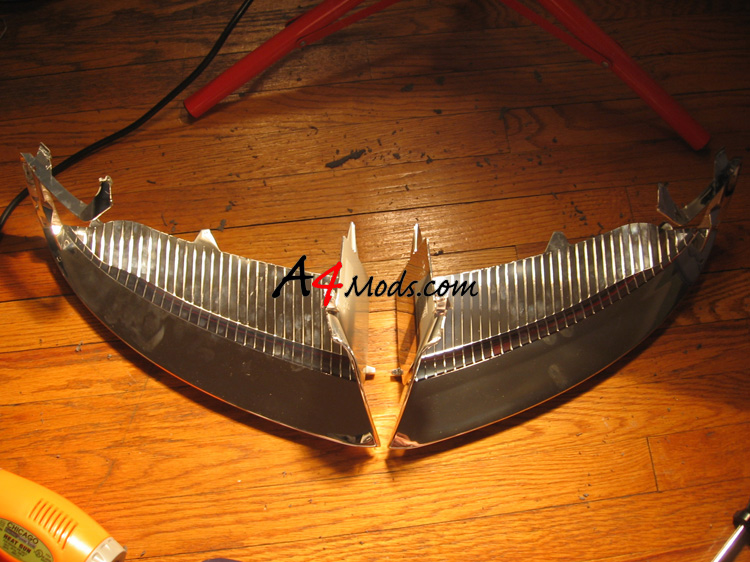
After all of that is done, it should pull apart in two halves |
|||||||||||||||||||||
|
||||||||||||||||||||||
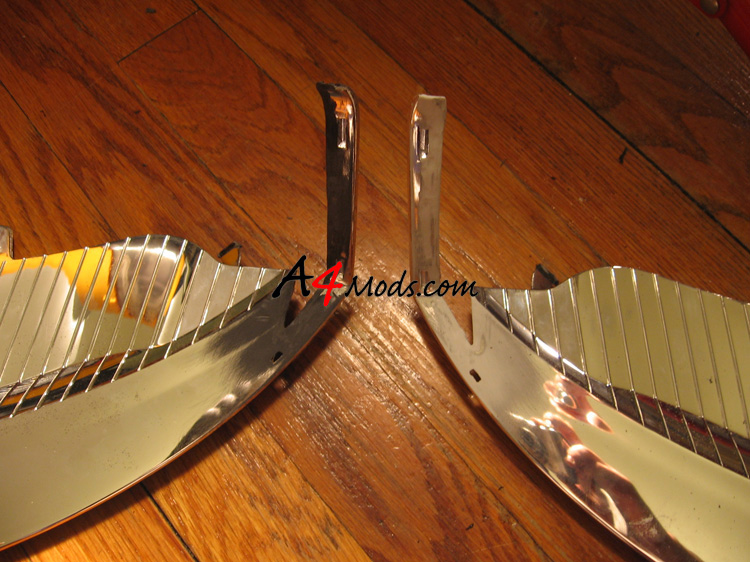
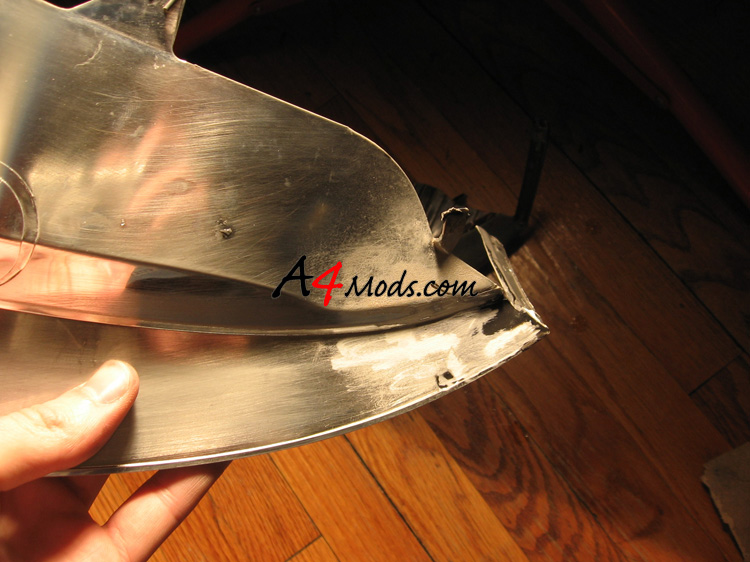
The picture to the right should give you an idea of how much of the black channel was lifted around the entire light housing. |
|
|||||||||||||||||||||
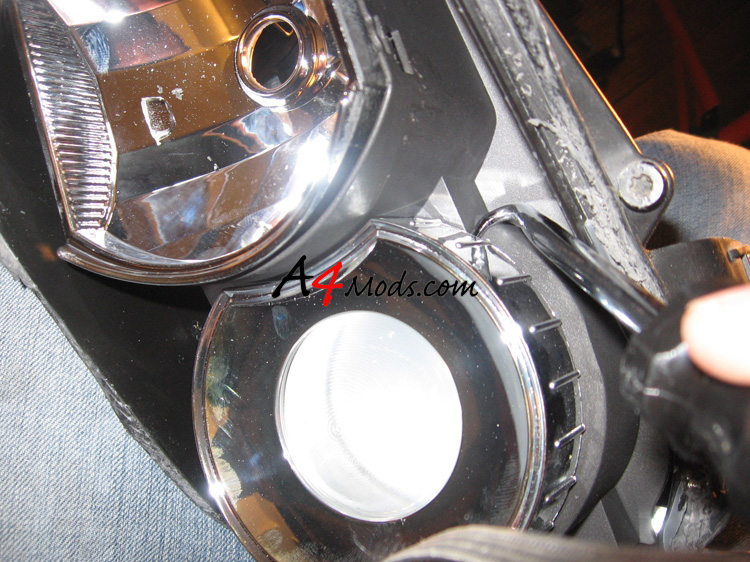
Now that the light is in two pieces, we need to take out the chrome part. This is done by first CAREFULLY pulling out the section that the amber reflector is (used to be) on. Then, if you inspect the bottom side of the clear plastic, you will see that the chrome is snapped in place .A light yank will separate the two pieces. This is shown below |
||||||||||||||||||||||
|
|
|||||||||||||||||||||
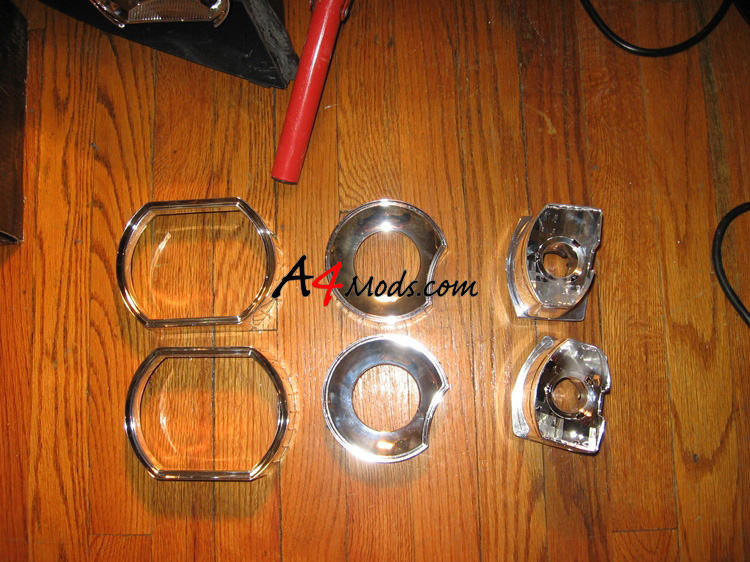
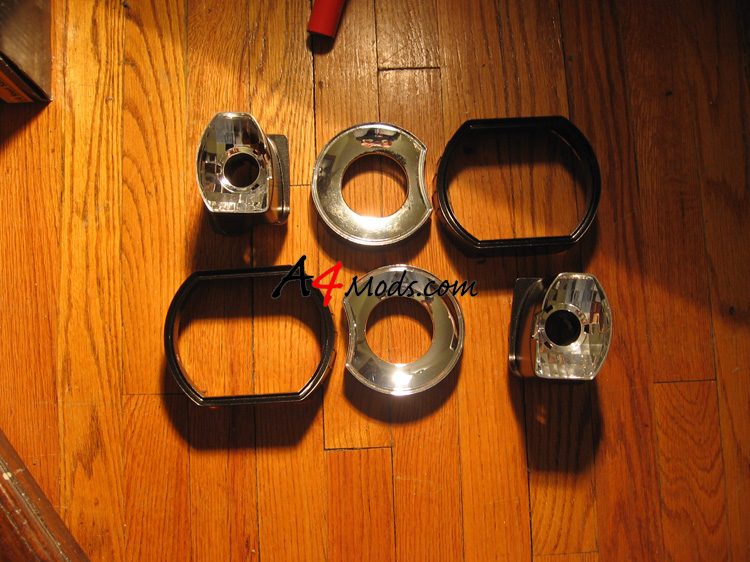
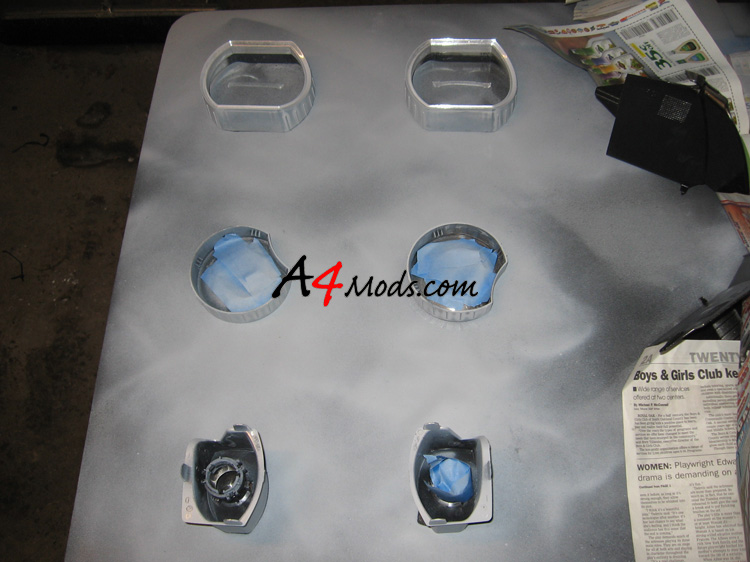
| When the three parts are separated it will look like this: | ||||||||||||||||||||||
 |
||||||||||||||||||||||
| I would also recommend that if you are going to paint the bulb-surroundings that you remove them now. I wasn't sure if I was going to do it, so I had to do may prep/paint in two different steps. Since it is easier to do it all at once, I will write it up that way. | ||||||||||||||||||||||
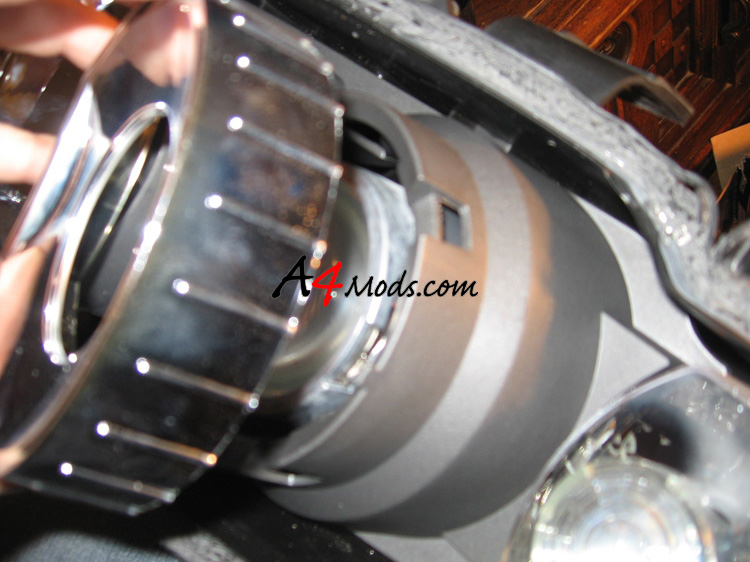
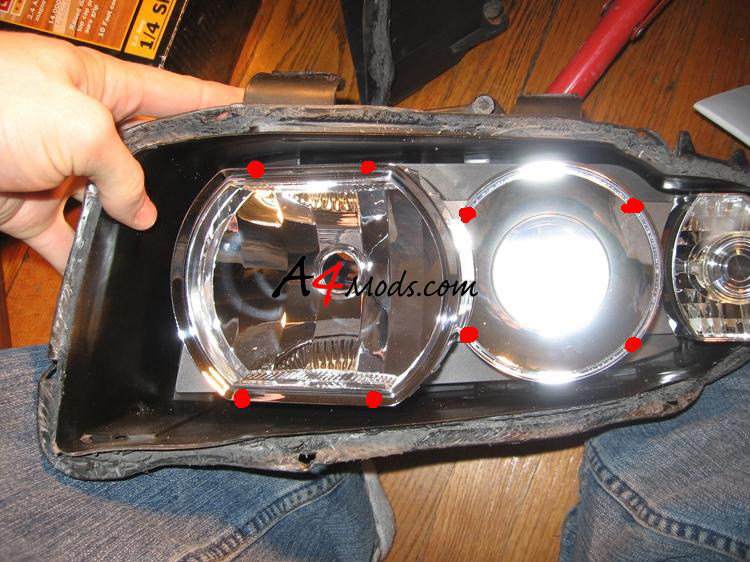
Each of the bulb surrounds are snapped into place. They do not feel like they can come off without breaking them, but with some patience and the right tools they come out. The picture to the right shows where each of the surrounds are clipped in place. There are 4 clips on each piece. |
|
|||||||||||||||||||||
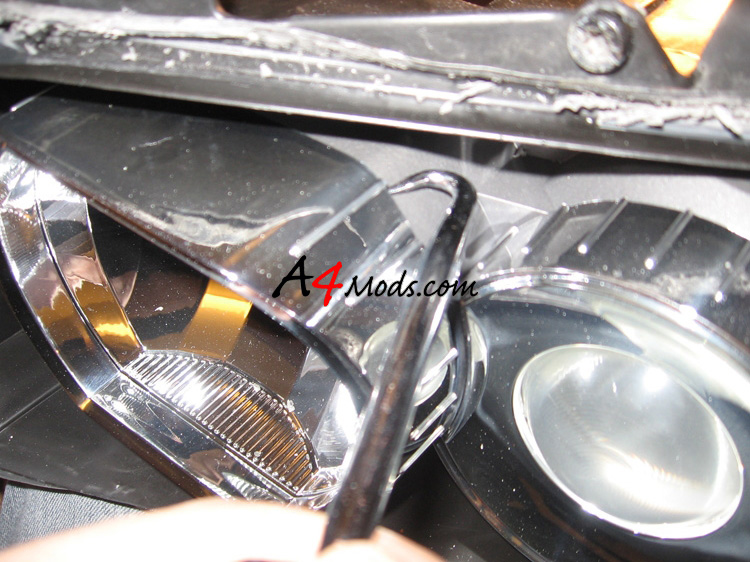
| You need to start with the grill side lens first. Start with your U shaped pick tool and wedge it by one of the four spots outlined in the previous pic |
|
|||||||||||||||||||||
Work your way around to the four spots to pop each section off. Be careful not to break the fragile plastic. It will take a couple minutes to get it ready to come off. When it does it will look like this |
|
|||||||||||||||||||||
 |
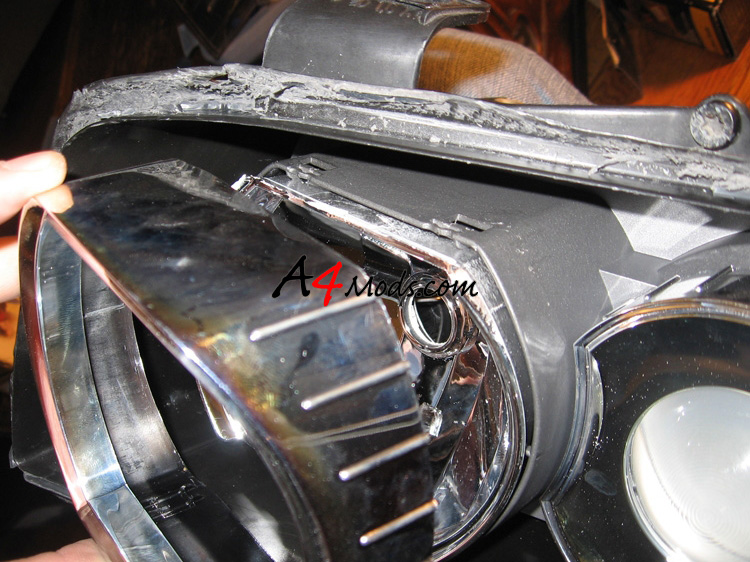
When that part is off, proceed to the projector surround. I found it was easiest to start popping it off in the spot shown here. | |||||||||||||||||||||
 |
When it is off it will look like this |
|||||||||||||||||||||
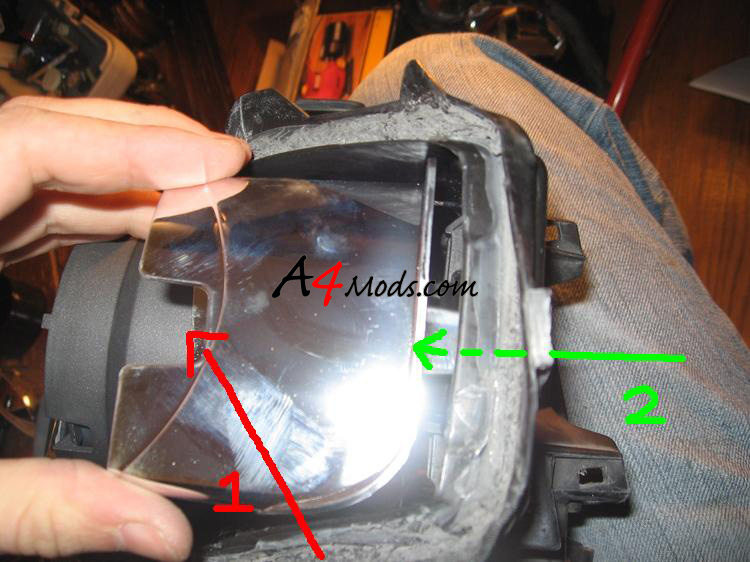
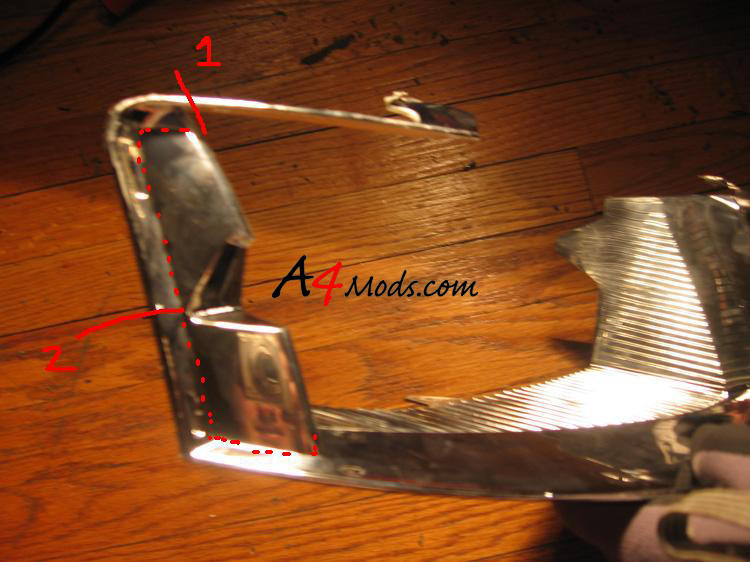
Moving onto the turn signal reflector. I did not find an easy way to remove this part. I'm pretty sure I broke something on each of the two. I didn't need to fix anything as they snapped back into place - but you may want to try a different technique. Regardless. First I pushed the reflector in the direction of arrow 1. Then I stuck my finger through the hole the bulb used to be in, and pushed in the direction of arrow 2. |
|
|||||||||||||||||||||
When it pops out you will see some wires come with it. If you get to this point, you can decide what to do. I just pushed each of the wires off the tabs they were holding onto. |
|
|||||||||||||||||||||
| Repeat this on both lights and you will have all the parts you need disassembled. | ||||||||||||||||||||||
 |
 |
|||||||||||||||||||||
Part 2: Prepping and Painting the Parts
Since I removed the amber reflector, I wanted to also remove the chrome part that it once attached to. This ends up leading to a lot of work, but is worth it. To do this I cut the plastic in two spots shown to the right. I used the dremel tool with a cutoff blade to do this.
|
|
|
| After the two cuts, the part will look like these two pics. | ||
 |
 |
|
Next go ahead and sand down the rough/melted plastic. I used a sanding attachment for my dremel, followed by some 220 grit sand paper. I did this on both headlight parts. Notice how one part had been made out of black plastic and the other out of white plastic... interesting no? |
|
|
Now is not such a bad time for a little test fit. |
|
|
 |
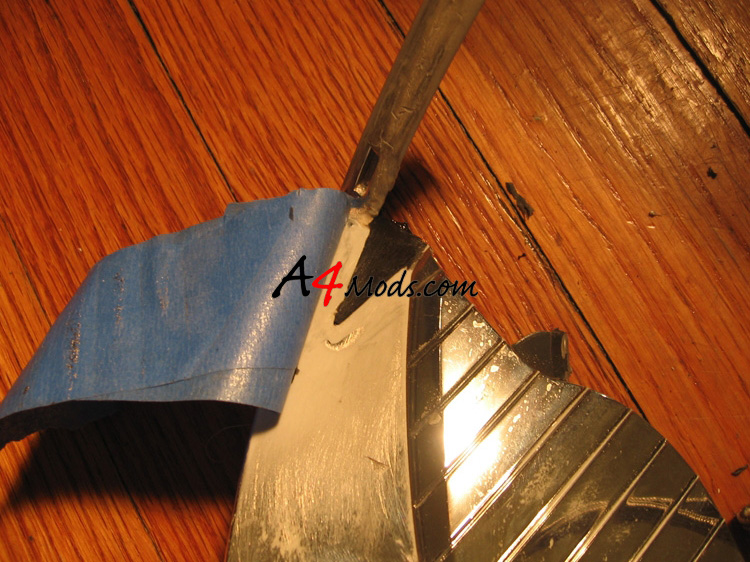
Obviously we cannot live with that V cutout in the plastic. You can use whatever method you prefer to fix the part. Some people cheap out and use bondo, etc. I do not recommend that. I would use a legit plastic repair such as SEM or Duramix for this. Since I will be applying the durmaix from the backside, I first roughed up the back with my dremel and sanding wheel |
|
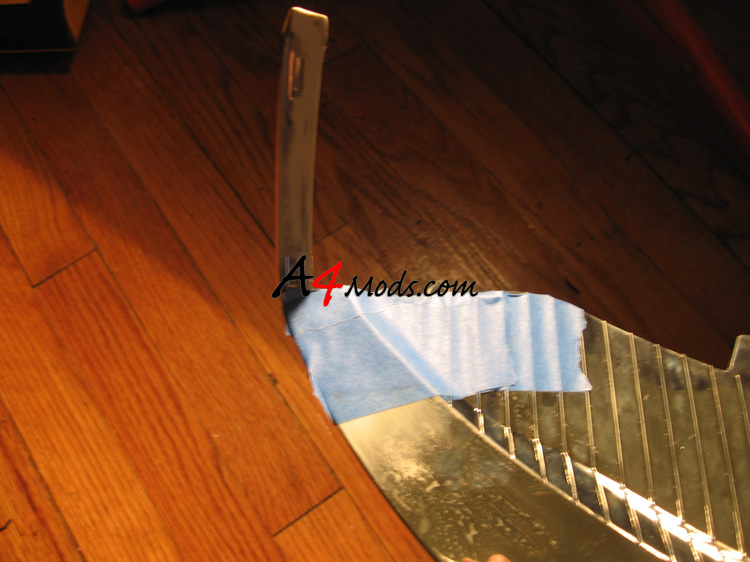
I then put some tape across the front side of the V. This will provide us with some backing. I used some blue painters tape. |
|
|
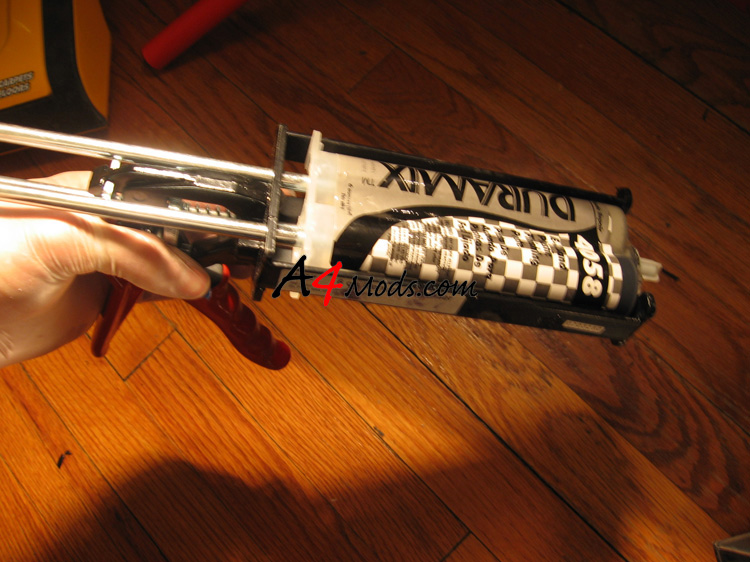
I used Duramix 4058 for the repair. This is really made for filling in surface imperfections - so its probably not the recommended product from the Duramix line. I used it mainly because it takes only about 3 minutes to dry and builds up quickly. You could probably use the Duramix 4040 if you wanted a faster acting product. Here is the duramix with the applicator gun.
|
|
|
The 4058 is a 2 part epoxy style plastic repair. I just squirted some out on a plastic plate and mixed it with a popsicle stick. I then applied it to the backside of the V |
|
|
 |
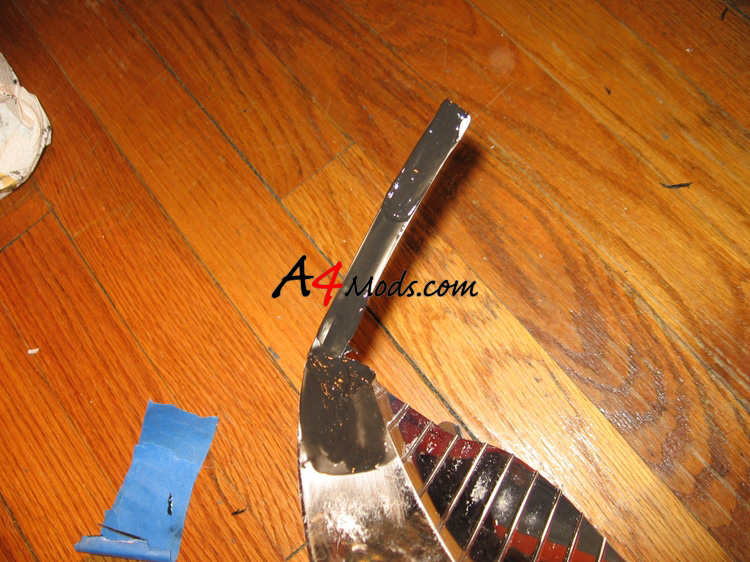
After it dried, I removed the tape from the front and viola! This stuff is no joke - it bonds to and actually becomes stronger than the plastic. |
|
 |
I then applied another light coat to the front of the part to fill in some holes that were there from the orange reflector |
|
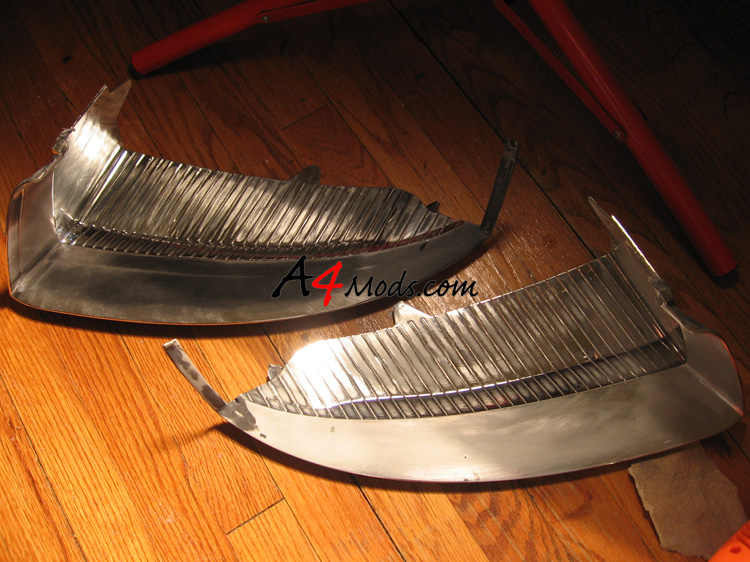 |
After I sanded it down and repeated the process on the other headlight, I was at this point. |
|
Since this plastic part has to fit nicely into the clear lens, I went back to the backside of the repair and ground it down with the dremel so it was more or less flush again. |
|
|
| After this work has been done, its time to start to prime these parts. The very first thing I did was sand/scuff them up with some 220 and 400 grit sandpaper. This will give the primer something to grab into. What I like about this sandable filler primer is that it easily fills in any pinholes or imperfections in the surface. HOWEVER, do not use it as a filler. Use a filler to fill real scratches. This is just makes those smaller ones easier to deal with | ||
After I hit it with the primer (2 coats) the two parts looked like this |
|
|
I went ahead and sanded them down lightly with the 400 grit paper. I paid special attention to the areas where I had done the repair work. |
|
|
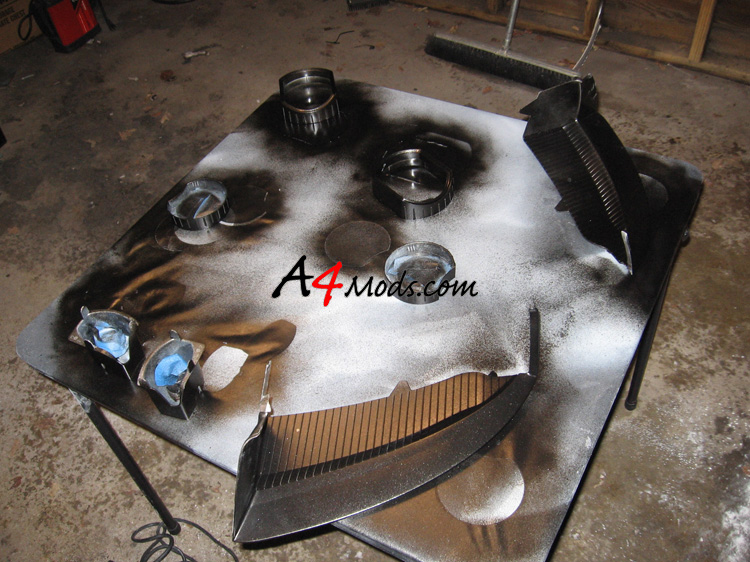
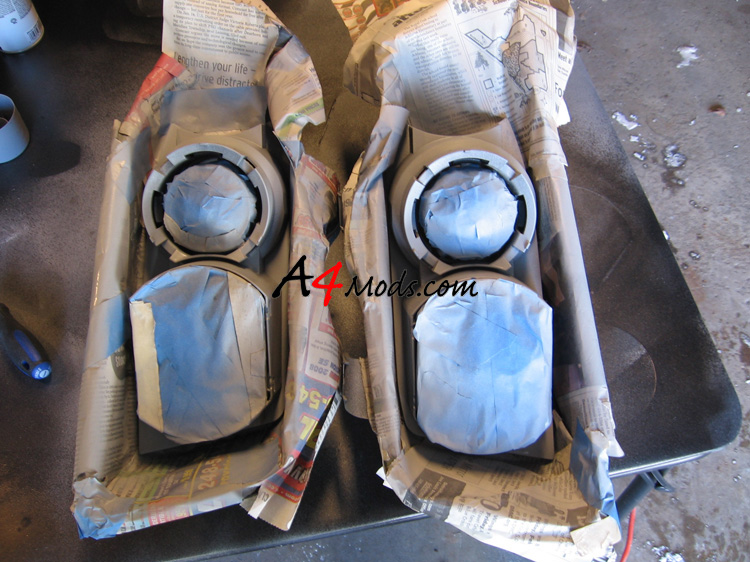
At the same time you should be priming your other parts as well. I did not paint any parts of these which were used to reflect light. I just painted the chrome outer edges of each piece. I laid them face-down and masked them off so I would not get paint where I didn't want it. |
|
|
 |
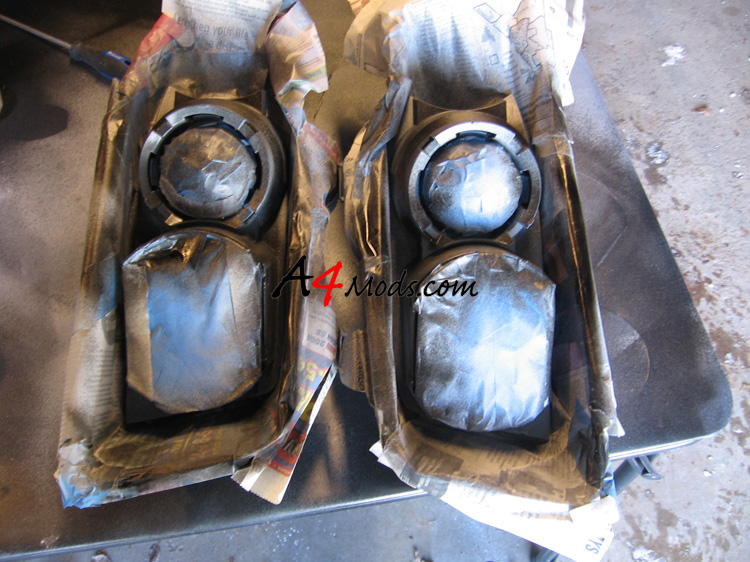
After the primer is on and you are happy with the surface finish, its on to paint. I used a can of dupli-color metallic black paint which is a very close match to my car. When looking through the headlight lens, I don't think anyone will be able to tell the difference. You should be using multiple LIGHT coats. You do not want to get runs in your paint after all of this hard work. |
|
| Do yourself a favor and let the paint have time to dry!. I know you will be anxious at this point, but trust me, the re-assembly will take some force so if your paint isn't nice and dry, you are going to get finger prints in it. If you have followed up to this point, you should have a pile of nice painted parts. | ||
 |
 |
|
| If the paint is dry, you can try some test fitting re-assembly. Damn that's going to look good. | ||
 |
 |
|
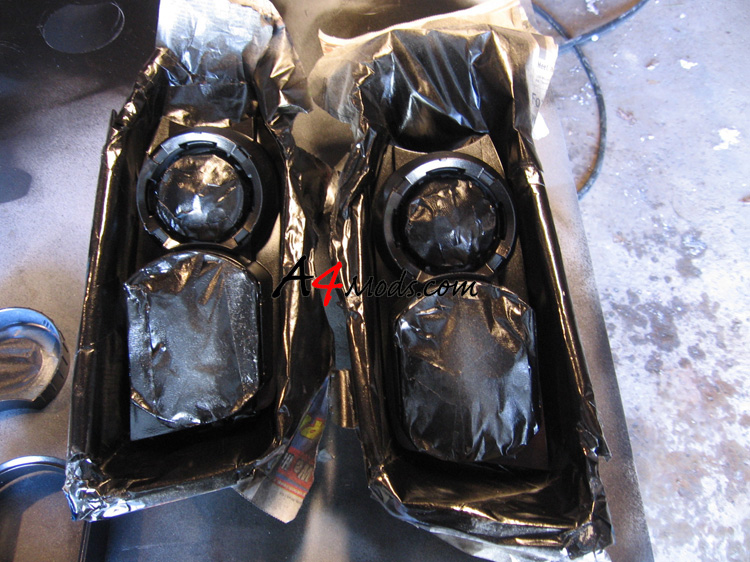
When I got to this point, I decided to post some pictures. Of course, although I was at the time happy with the way it came out, someone thought it would look better if I painted the grey part in the back of the original headlight. I hadn't even thought of it before then. After staring down the lights, I decided that I needed to paint the grey. I disassembled the lights again, and masked off the section I wanted to paint. As to not bore you, I will just show some pics. |
||
 |
 |
|
 |
 |
|
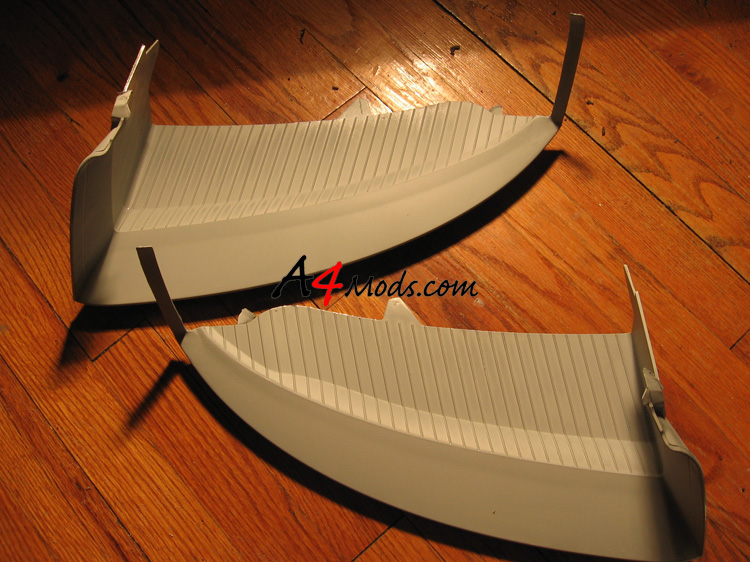
When they were all dry and assembled, they looked like this: |
|
|
Part 3: Reassembly
There are several steps to reassembling the headlgihts. The first, and probably most important is to remove as much of the old glue as possible. I didn't take pictures of this, but I shouldn't have to. I basically went around the edge of the lense and the headlight with a dremel tool to get as much of it out as possible. It made a huge mess, so be sure to be in a garage or something. When I was satisfied with the glue removal, I just hit the lights with some compressed air to get all the bits of glue out of them. NOTE: YOU MAY WANT TO DO THIS BEFORE YOU PAINT. It's not necessarey (I did it after paint) but if you mishandle a tool, you will scratch your new paint. After you have removed as much glue as you want, it is time to go around and bend down the channel so it looks normal - not all flared out. To do this, get a glove on one hand and start heating the channel. Be careful not to melt it. Once it is warm, press down on the channel to flatten it out. The key is to continue pressing it until it cools. Once it cools, you will see it will take its original shape again. |
||
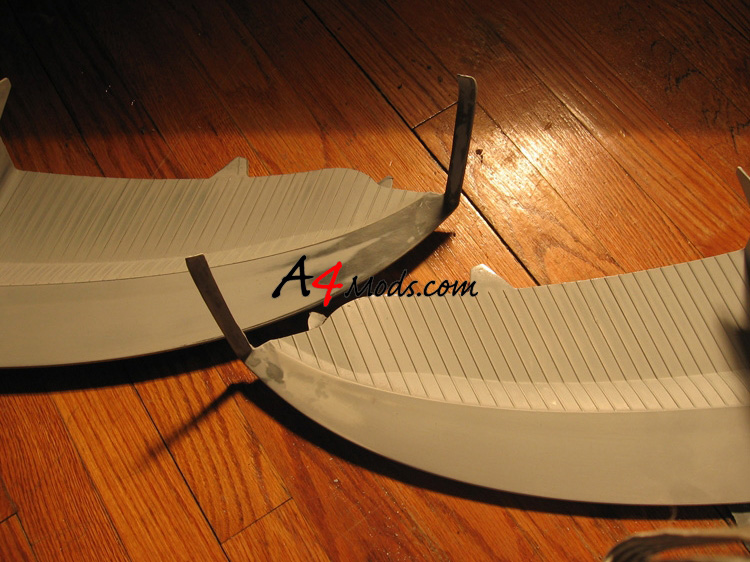
I only took one picture of this. To the right you will see both healights. The one in the back is after my first time around the lights re-forming the channel. The one in the front is still deformed You may have to go around the lights a couple times to get them the way you want. |
|
|
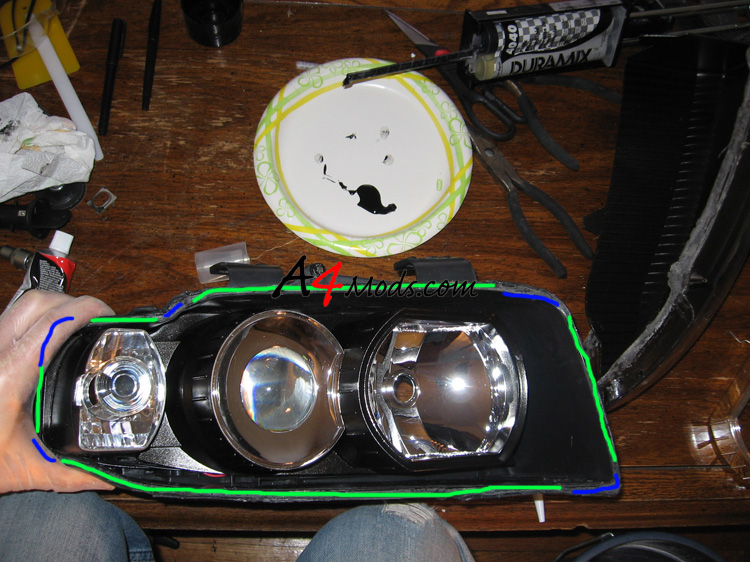
To bond the lights back together I used a combination of RTV 103 Silicone Rubber Adhesive Sealant and Duramix 4048 Plastic Repair. Realistically you can probably use any type of selant product you like for this. I knew that I did not want to permanetly seal these lights (no real reason, just my preference) so I knew that I could not use the Duramix all the way around. The advantage of the Duramix is that it is permanent and it is very fast drying. The RTV is slower, but can be seperated if needed. |
||
I decided to use the duramix at the corners of the light and the RTV for the long sections. In the picture to the right the green would be RTV, the blue would be where I used Duramix. Since I was using the duramix which dries in 1 minute, I did not have to worry about clamping the headlights. I held pressed them with my hand for a minute or two - then the duramix held them closed while the RTV dried. |
|
|
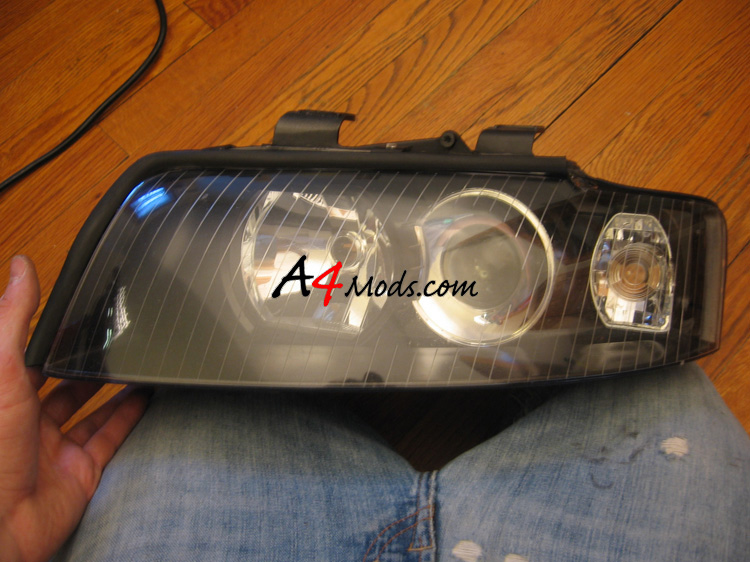
| When they are all dried, they should look something like this! | ||
 |
|
|
| Just re-install the bulbs, and pop them back in the vehicle and you are good to go! | ||