Boost Gage Pod for Audi A4 - Second Attempt
Prior Experience: Sub Box Build and My First Pod Attempt
Cost: approx. $20 plus leftovers from previous fiberglassing
Time: aprrox. 1 or 2 days
| Discuss this mod - Here | ||
 |
 |
|
A while ago a decided to make a gage pod out of fiberglass for my autometer boost gage. I put together a writeup which really was just OK. This writeup will be complimentary to the original one, so I suggest you read that one first. It can be found here. In either case I suggest you read both in their entirety before you start. If you are completely new, some of the more basic techniques of fiberglassing are discussed in the Sub Box Build I was never really happy with the finished product. When finishing a project like this, there are two ways you can go. First, you can cover the product with some cloth material which will match the interior of your car. I TRIED to do this, however I could not find a material match that would make me happy. The material method was what I used on the first build. What's nice about covering the pod with the material, is that the finish of the actual fiberglass work does not have to be perfect. Any imperfections in the surface will be hidden by the material, thus making the job 'easy.' Since I was not happy with the way the material matched my interior, I decided to paint the pod. The orignal pod I made was not fit for painting because I was relatively sloppy with the fiberglass, etc. The pod design itself was not appealing when painted either. Therefore I decided to make a new pod, using new methods with a painted finished product in mind. The project was much more time consuming since getting a paintable surface is not very easy. For the painted piece I wanted some clear cut edges as well which were not present in the first build - you will see what I mean in a minute.
|
||
SUPPLIES -The supplies for this project are the same for the original pod with only a few exceptions. In this build you will need a piece of poster board, as well as some spot putty and scratch filling primer. The poster board you may have laying around the house, and the spot putty and filling primer could be left over from the rim repair. In addition to these supplies you MAY need some bondo body filler, but hopefully not.
|
||
| As before, the first thing you need to do is pull the A-pillar out of the car, and prep it for fiberglassing. | ||
I used blue painter's tape to mask off the area of interest. If this is your first time glassing, or your still not comfortable PLEASE MASK OFF THE ENTIRE THING. Masking tape is much cheaper than a new A-Pillar! |
 |
|
| Since a couple months have passed since the first build, I read that it is useful to use aluminum foil to help release the fiberglass from the pod. I decided NEATLY tape down some foil - feel free to skip this if you dont want to do it. It did help a little though. | 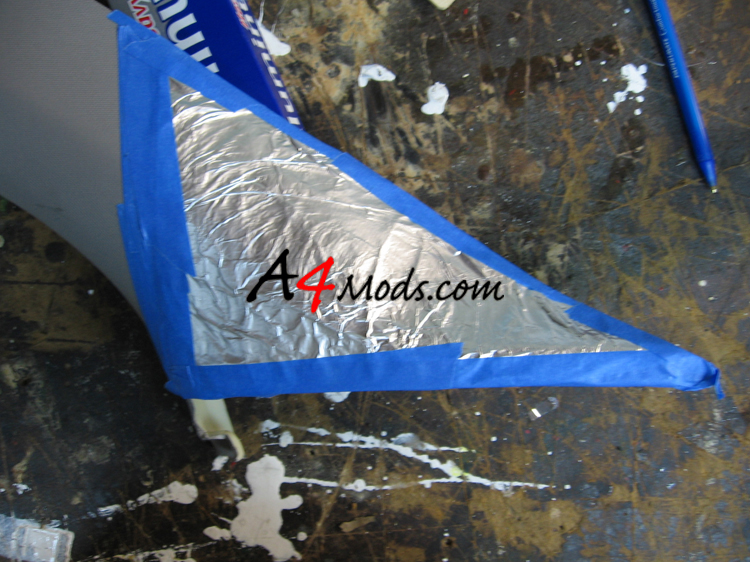 |
|
 |
The first bit of fiberglassing is to just lay down a single layer of glass over the masked off area. For this entire project I used fiberglass mat. In order to keep it neat and in the area of interest, you should cut/tear out sections of glass similar in shape to the area. Like I said, I only used one layer of glass for this part. |
|
 |
When that part dries, it will pull off very easily. You can see that when I glassed it, I just glassed right over the edges. |
|
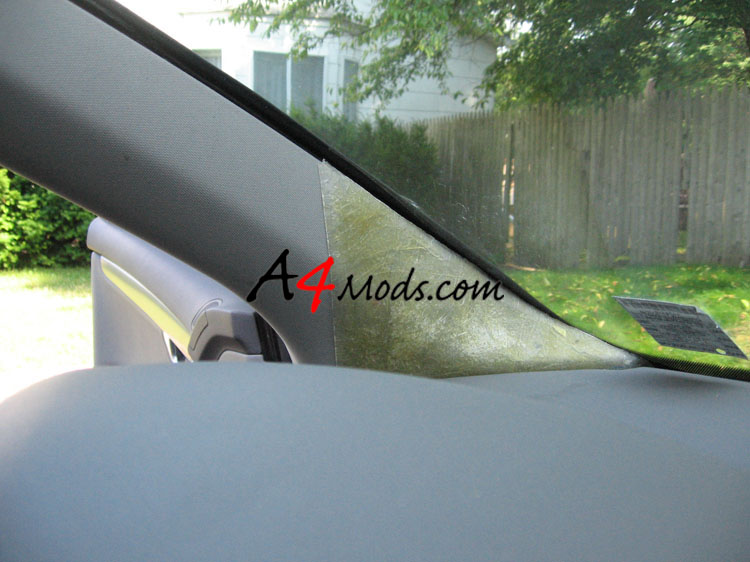
Since it was only a single layer of glass and resin, it can easily be trimmed with a pair of scissors. So I trimmed it down to whatever size I felt was appropriate. After it's trimmed down, its not a bad idea to go test fit just this part in the car to make sure it looks right. |
 |
|
| Here are two previews of the piece fit in the car. | ||
 |
 |
|
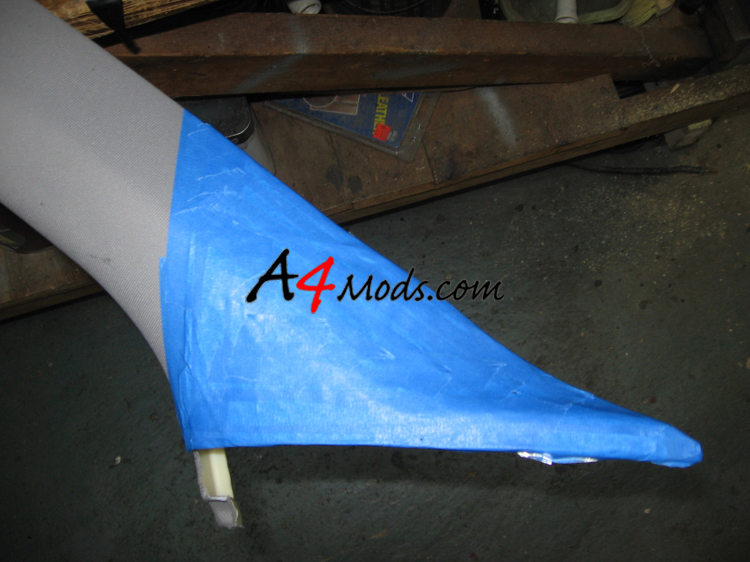
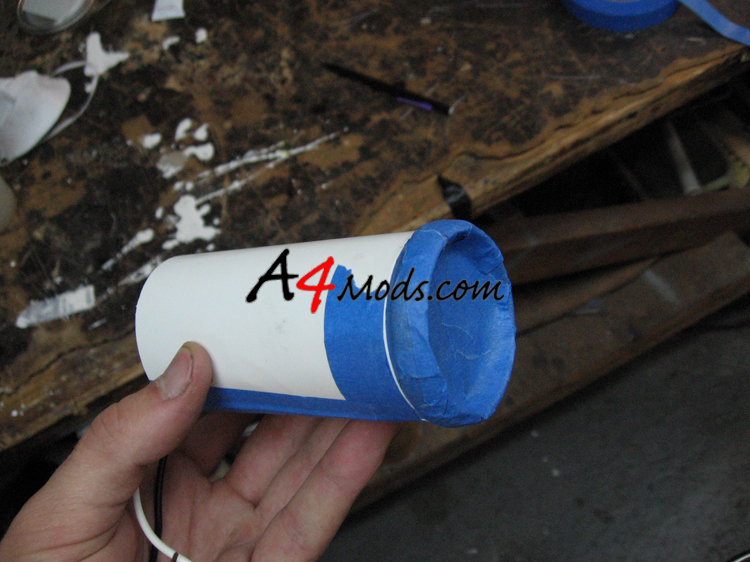
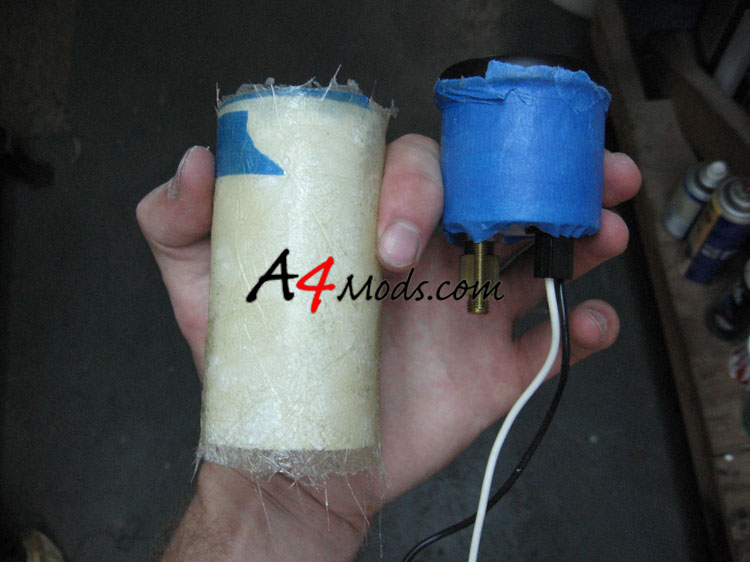
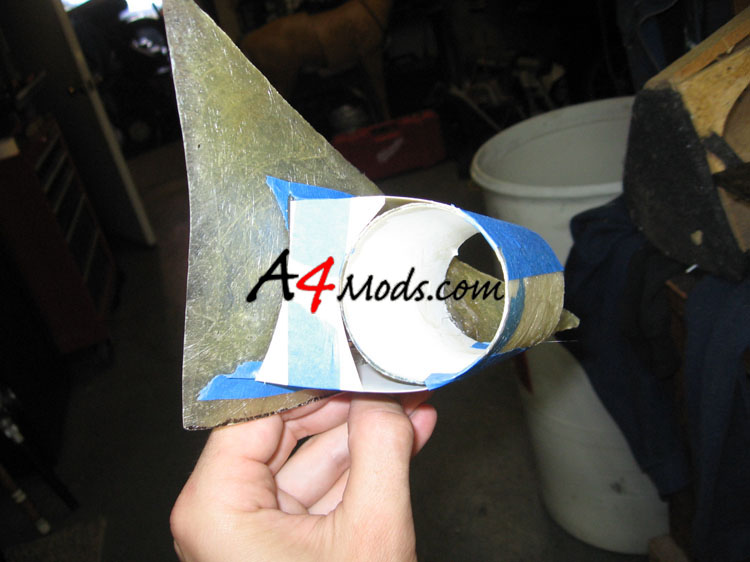
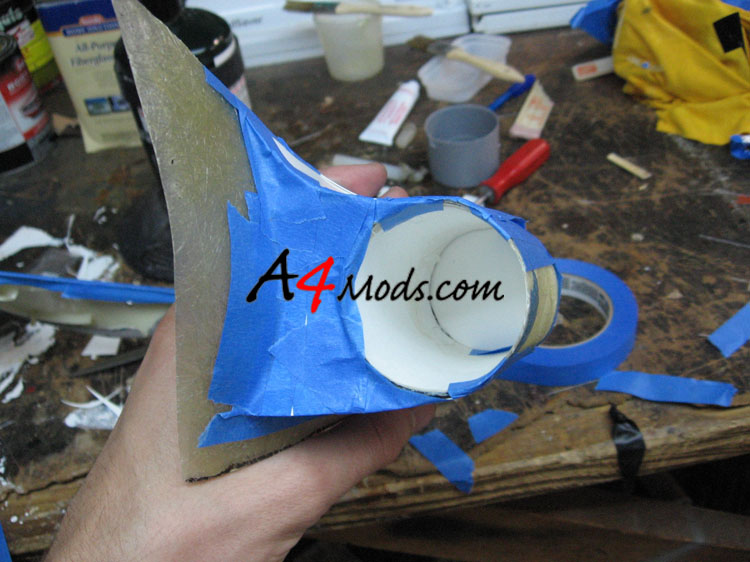
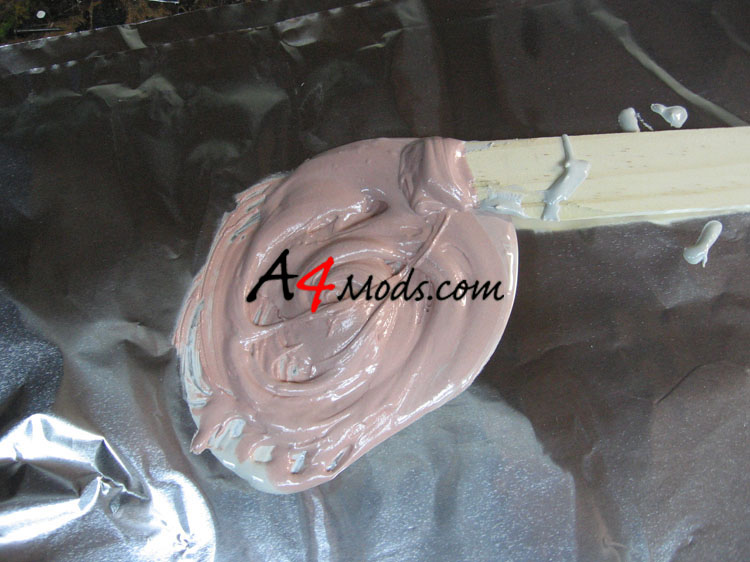
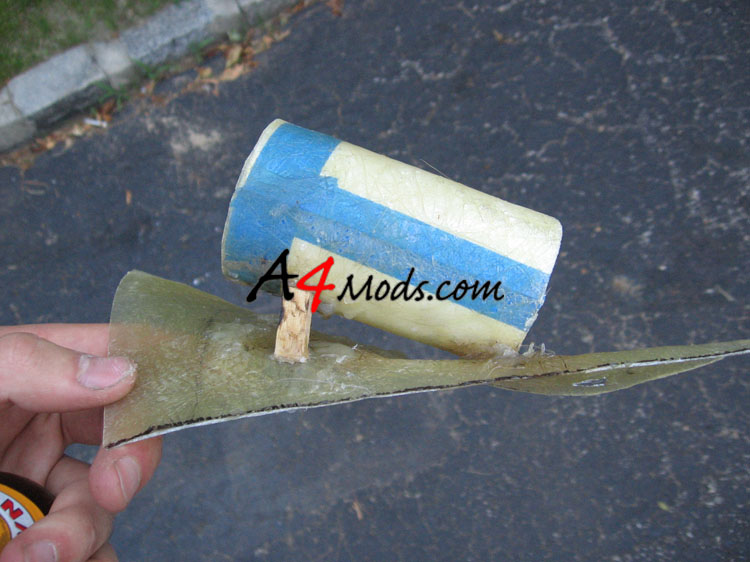
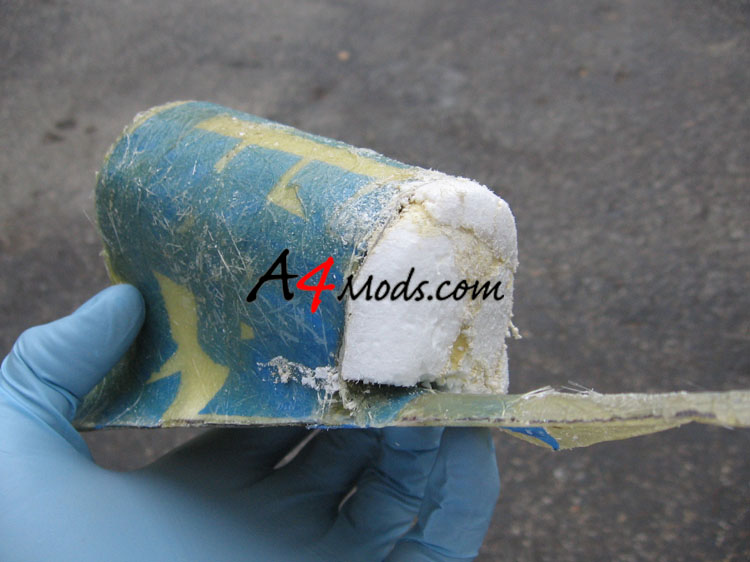
Instead of using the PVC pipe as in the previous pod, I decided to design the pod using the poster board mentioned earlier. The first thing to do is to make a fiberglass cylinder that will fit the gage and all the required connections. This was done by masking off the gage, wrapping the gage with a single layer of poster board, and then applying a single layer of fiberglass mat over the poster board. The layer of fiberglass is THIN AND NEAT. Do not glob on the resin, and do not overdo the fiberglass. This part is under NO stress, so its not necessary. The more mess you make now, the bigger of a pain it will be to prep the part for paint! The next four photos show these steps:. |
||
 |
 |
|
 |
 |
|
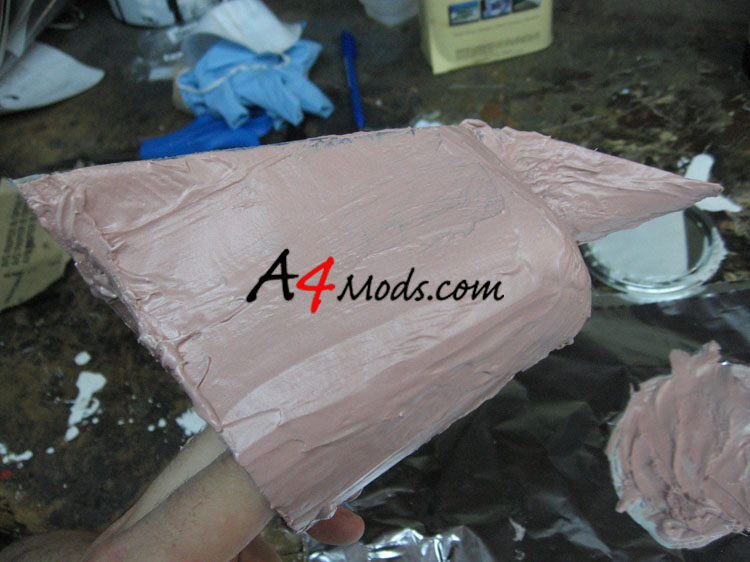
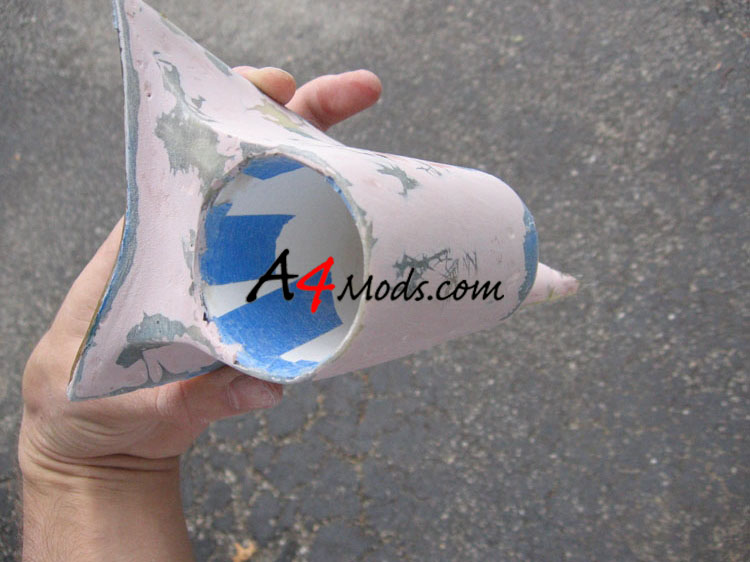
After you have your cylinder trimmed (once again with scissors), it's time to position the cylinder on the base. This is done in exactly the same manner as in the original build. I used hot glue and several small pieces of wood. The process was repeated/tweaked until I got the gage sitting where I wanted. |
 |
|
 |
|
|
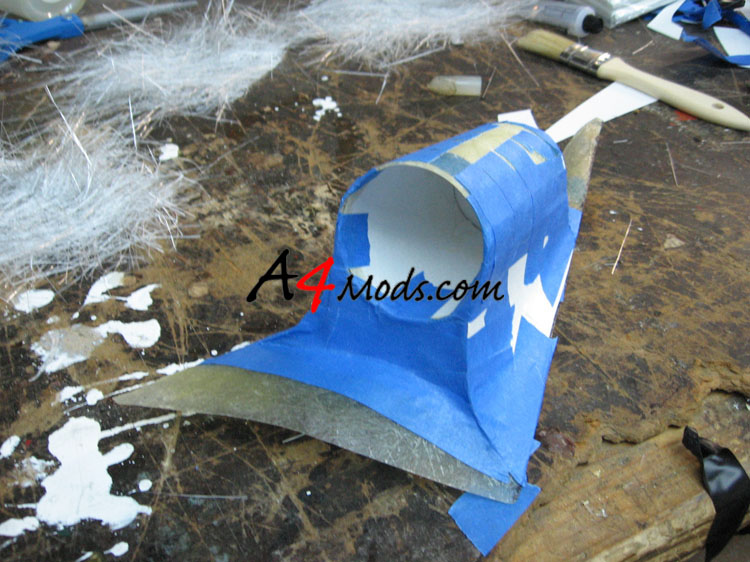
Now that you have the cylinder positioned on the base, it is time to start designing the shape of the pod. This was done with poster board and the blue painters tape. You can see this process below |
||
 |
First, I used the posterboard to great some edges along the cylinder. I initially thought a straight edge to the base would look good, but then decided against it. I went with a flared look. |
|
 |
 |
|
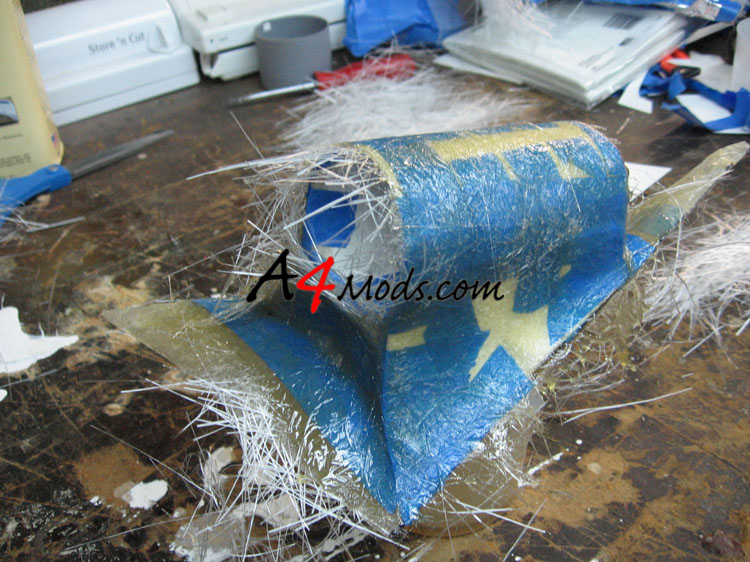
After the main shape of the pod was created, I fiberglassed over the paper. Since I knew I wouldn't want the back completely straight, I only glassed the front and sides in this step. you can see this in the two pictures below |
||
 |
 |
|
In order to get the curved shape I wanted on th rear, I used some spray adhesive and glued syrofoam to the rear of the pod. Then with 100 grit sand paper, I sanded the foam to the general shape that I wanted. This is shown to the right. |
|
|
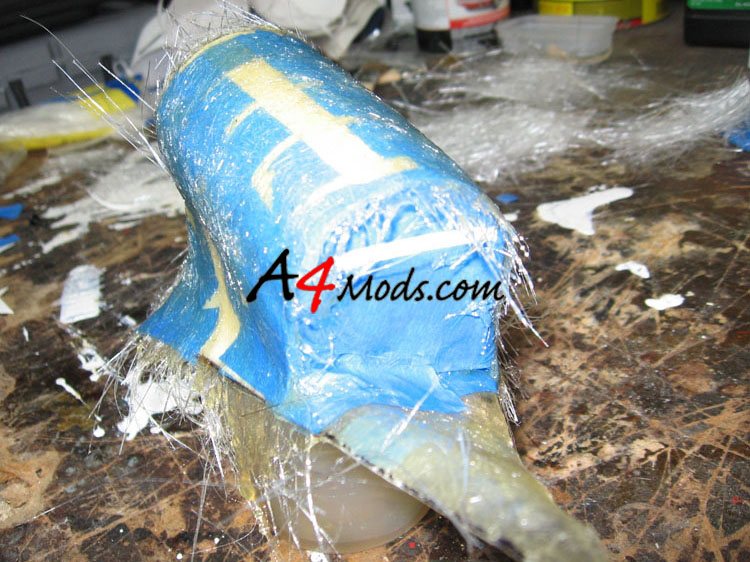
| I then taped and fiberglassed the rear section of the pod | ||
 |
 |
|
|
||
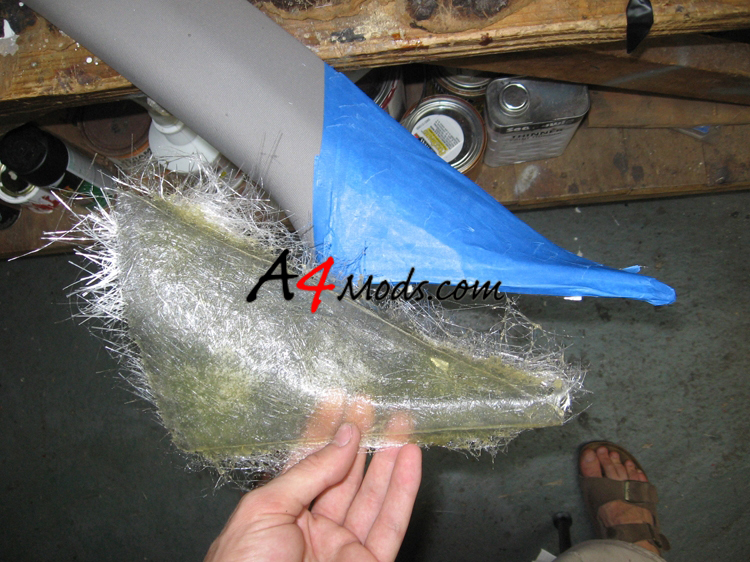
| After the rear section was fiberglassed, I trimmed it again with scissors. | 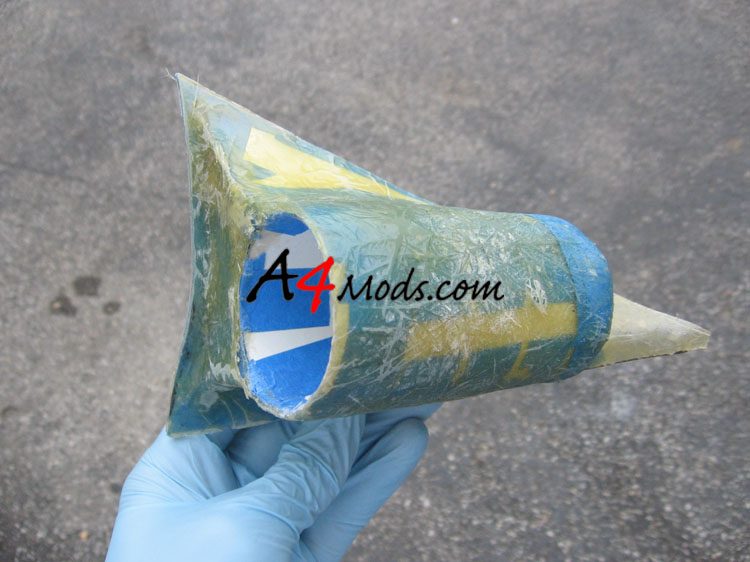 |
|
| Before I continue, I want to point out some mistakes that I made that later caught up with me. I want to point these out, so you dont make the same mistakes. First, I just want you to look at the two pictures below. | ||
|
|
|
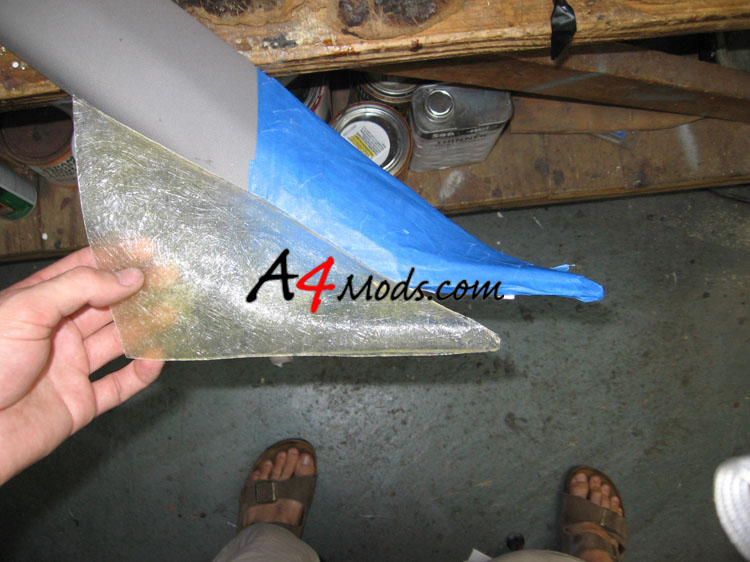
| Before "Final" Trimming | After "Final" Trimming | |
What you will notice is that I trimmed the front of the pod into the section where the blue tape is. By doing this, I (unknowingly) trimmed out the section of the fiberglass that was sealing the the cylinder/posterboard part to the original base that we had made. I originally didn't notice, and I went on to complete the pod. After it was all painted, I went to push the gage into the pod, and the two parts seperated! I ended up with a big crack along the bottom of the FRONT of the pod. Needless to say I was furious. I ended up re-doing a large portion of the work to fix this. I will show the fixing process in a section towards the bottom of the page. Since I am giving you the heads up now, I will assume you will not make the same mistake, so I will just move on. The pictures of the pod from this point forward, were after I corrected this error. |
||
|
||
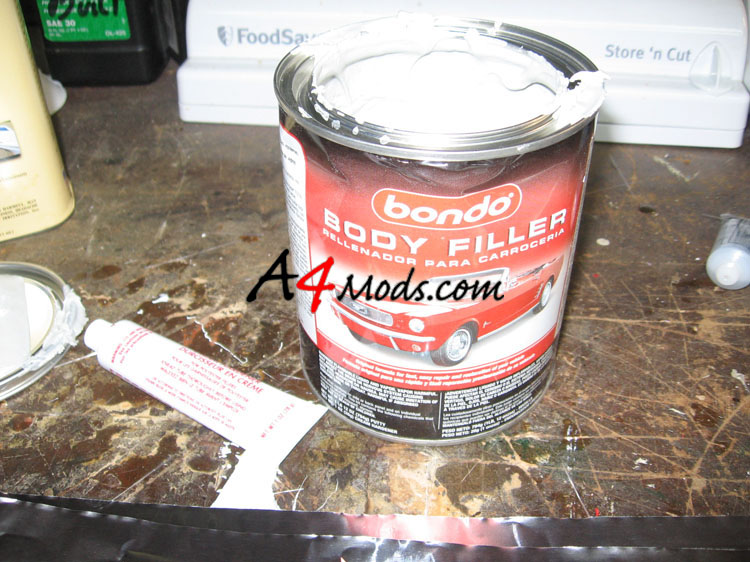
In order to prep the part for paint, it is necessary to fill in the low spots around the pod. Depending on how neat you were with the fiberglass, you may be able to get away with using spot filler in selected spots. Since we only used one layer of glass, and I never used Bondo filler before, I figured I would give it a shot. Not only can it fill in the low spots, but it can also add some rigidity to the part. I know this may be overkill, but I wanted the experience with the filler Heres the bondo body filler: |
 |
|
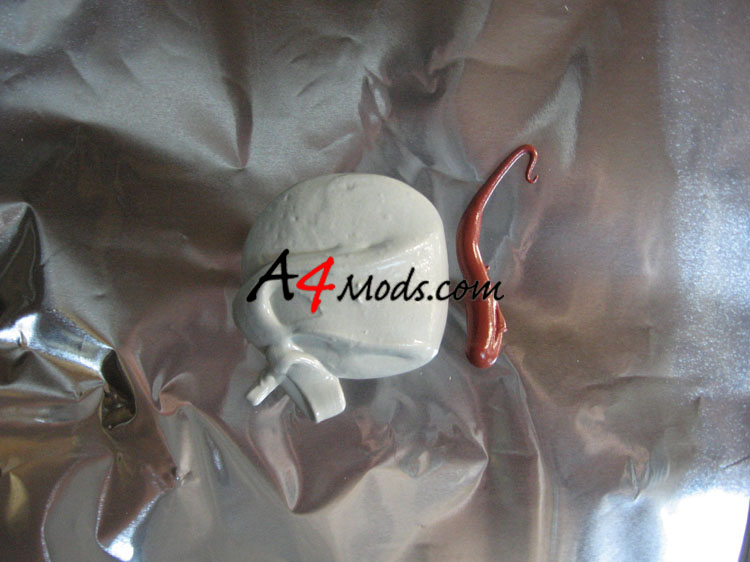
| According to the directions, you should used a small circle of the filler, and mix it with a line of hardener of length equal to the diamter of the circle. | ||
 |
 |
|
|
||
I then applied the filler to the part just by spreading it on with my finger. You will find two things about this filler: 1) It is THICK: even applied with my finger, you can see how thick it is 2) It dries FAST. You have about 3 minutes to work it around before it is rock solid, so work quickly. Here is the part covered in the bondo filler |
 |
|
|
||
|
After you apply the filler, and it solidifies, you have to sand it down. This filler is SERIOUS! I had to use 80 grit paper to knock it down to shape. Expect to spend atleast a half hour sanding to get to this point! | |
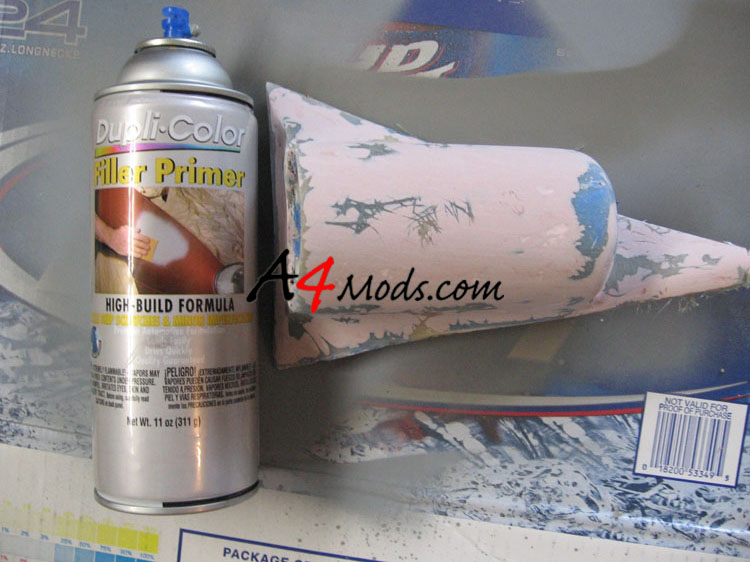
Since I am no expert at body work, I still have a hard time telling when a part is perfectly smooth. There is no doubt that if you can see a problem on the unpainted part, it will be 1000 times worse once the part is painted. However I cannot always see the problems before paint. In order to help me out, I used some gray filler primer to bring out (and hopefully correct) some of the problems. I simply sprayed the part with a layer of the primer, then sanded it down. |
||
|
||
 |
 |
|
|
||
|
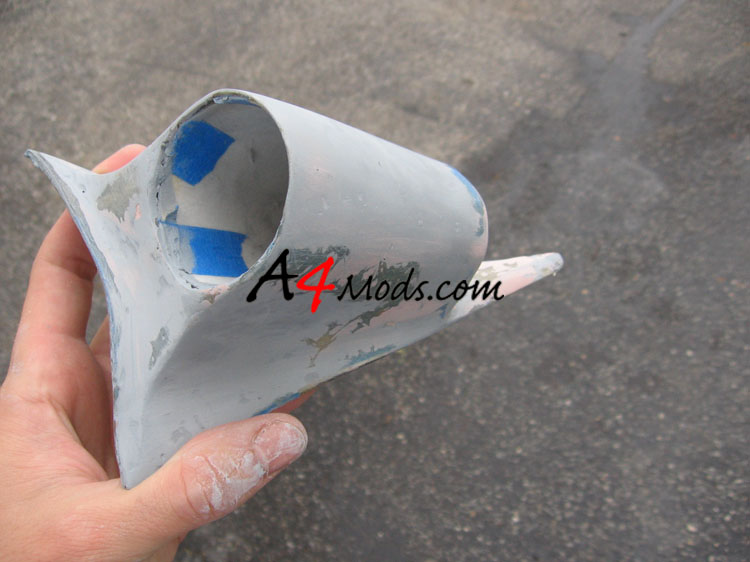
After the primer was sanded, the obvious problems popped out like a sore thumb. Here is one that needed to be fixed. If the problems are small, I suggest you forget the body filler, and use the spot putty. The spot putty fills these types of blemishes nicely, and can be sanded easily with 400 grit paper. |
|
Since I wanted to be SURE to get all the poor spots, I put a thin layer of spot putty over everything and then sanded the part again. Here are two pictures with the spot putty, and after it has been sanded with 400 grit paper. |
||
 |
 |
|
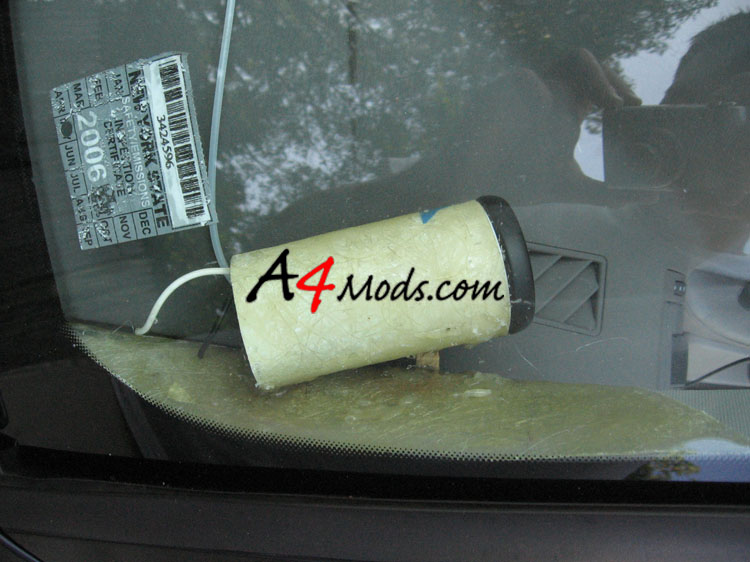
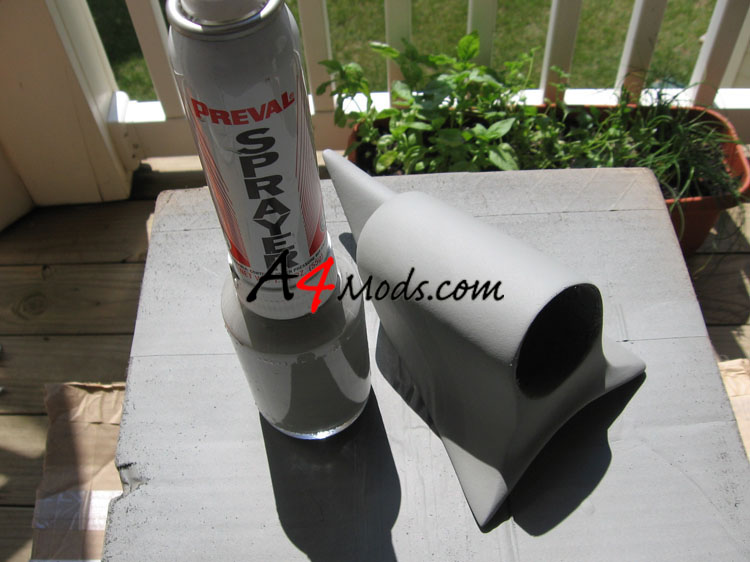
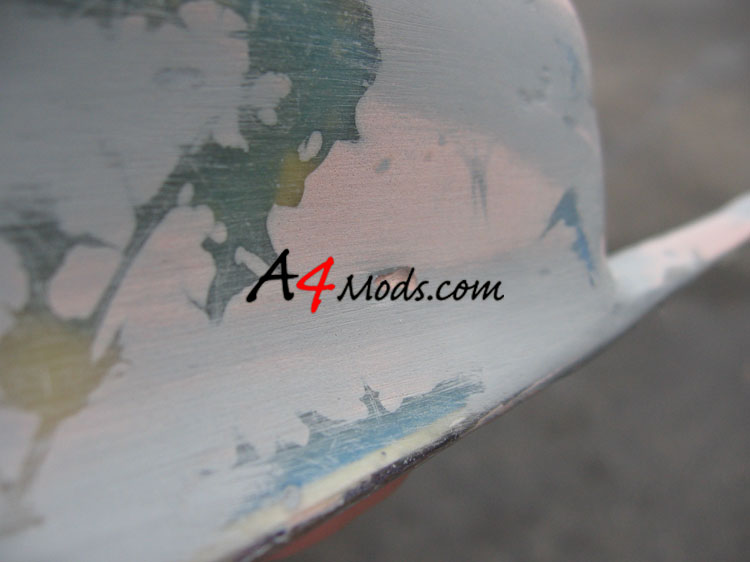
At this point you should have (virtually) completely smooth part. It consists of fiberglass, bondo and spot putty. All that is really left is painting. I suggest you first re-apply a light coat of filler primer, and lightly sand it down as a last touch. DO NOT used the primer to fill large holes like the one shown previously - that is just a terrible idea. Since I have a platinum interior, the paint match is not easy. I tried two different paints to finish the product. The first was the closest match I could find in a hardware store. I purchased it from ACE hardware, and it was called something like Slate Grey Rust Stop or something. It matched very well, but I knew I could get a better match. The second method I tried was a direct paint match from Home Depot. I went there with a piece of my interior, and went up to all of the the color 'squares' in the paint department until I found the best match. I had the guy at the counter mix me up a quart (which is WAY too much, but the smallest unit they mix) of the paint. I then purchased PREVAL SPRAYER, to apply the paint. Any Home Depot or Sherwin Williams carries these sprayers (Lowes does NOT). I poured some of the paint in the Preval cansiter, and thinned it with water (latex based paint). NOTE: The amount you have to thin the paint is completely trial and error (the box directions are completely off). After testing on some cardboard, and practicing with the Preval, I moved onto the pod. Here are some of the painting shots: |
||
 |
 |
|
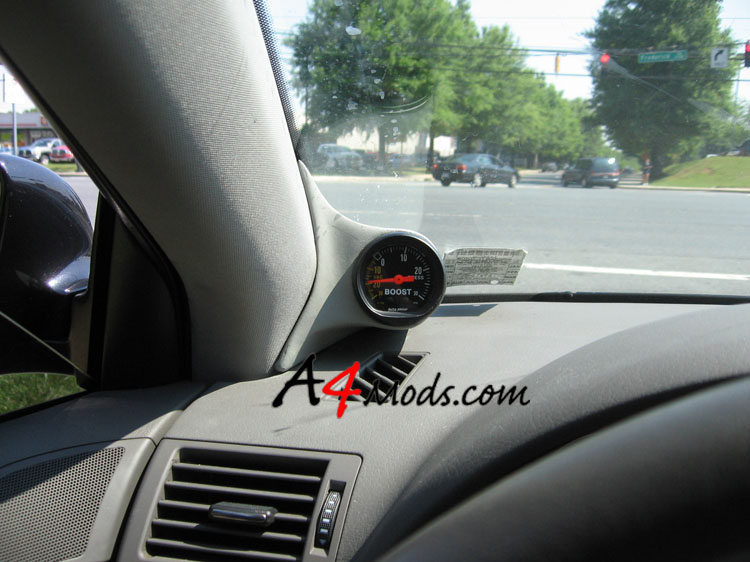
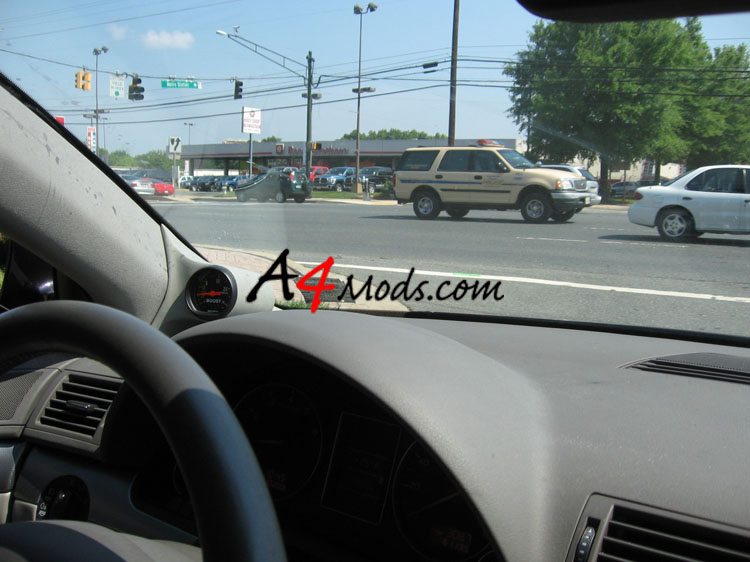
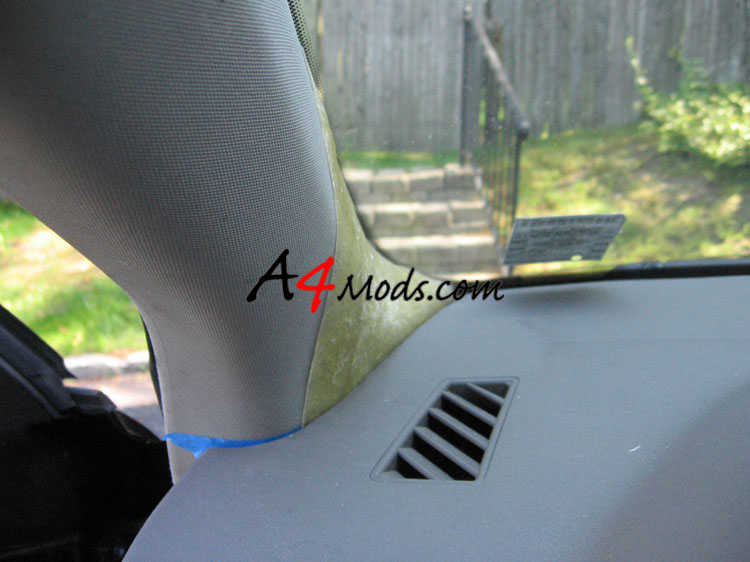
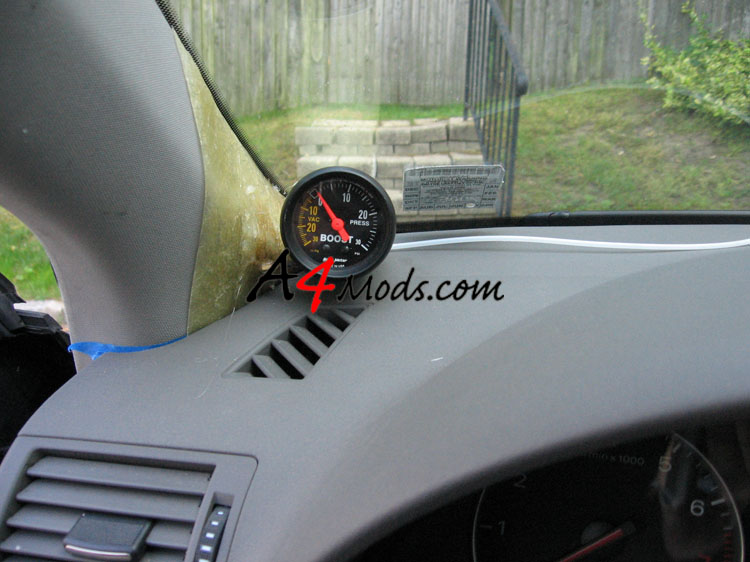
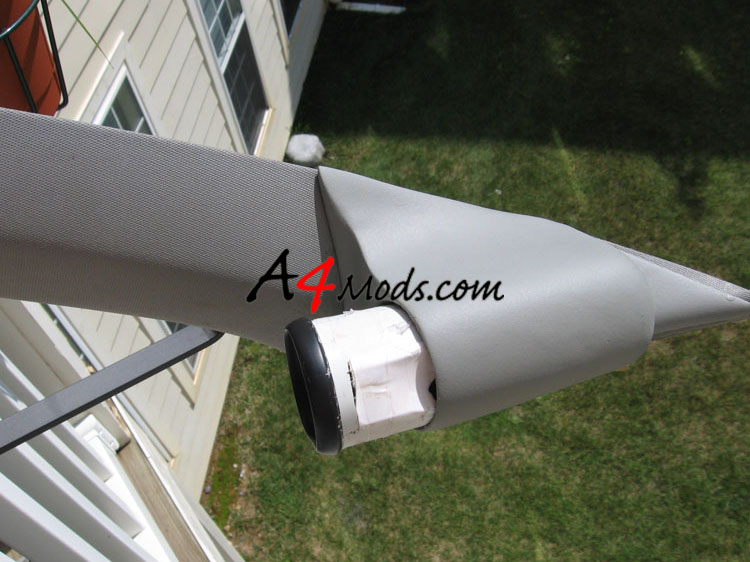
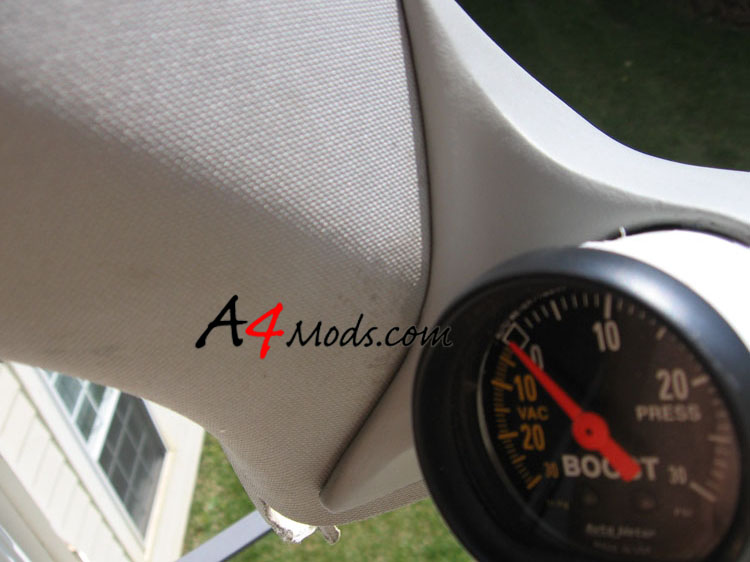
I used two screws to mount the pod to the A-Pillar (I know, I know...I put holes in the pillar!). Here are some pictures of the paint match, and the installed product |
||
 |
 |
|
|
||
|
|
|
Section Two - Fixing the Mistakes
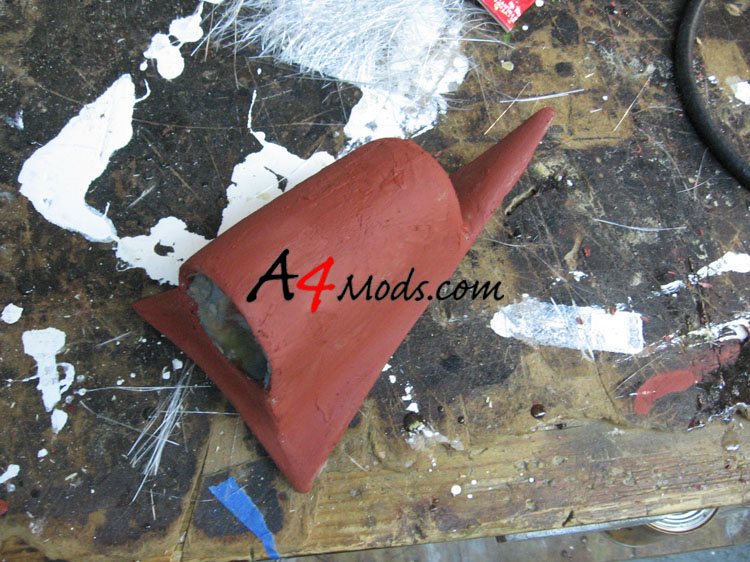
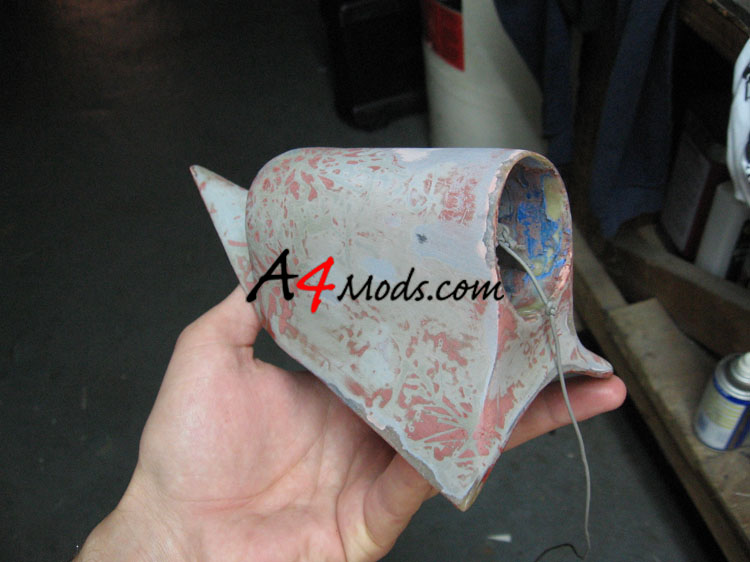
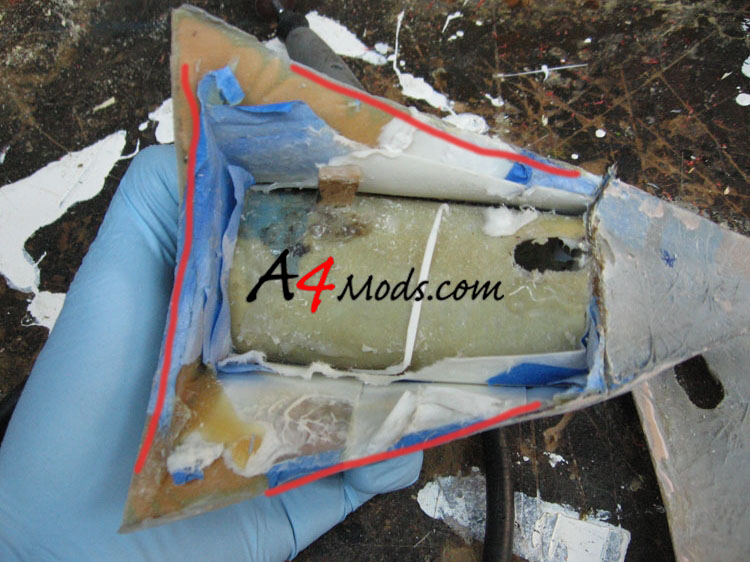
Problem #1 Since I over-trimmed the pod, the top portion was seperating from the base. In order to fix this mistake, I decided to completely seperate the two pieces but pulling/cutting the base. You wont have to do this, since I warned you in advance, however I figured I could show it here since I took pictures anyway The picture to the right is of the pod with the base cut off. The areas highlighted in red are where the pod was beginning to seperate. As you can see, there is a layer of tape down in these areas. |
 |
|
| You'll notice that I didn't cut off the rear section of the base, since it had been permanently bonded with the first time around. After I cut off the section of the base, I went through the inside of the pod and cleaned out all the tape. After the tape was cleaned out, I put a layer of resin and a small amount of glas matt on the areas marked in red and on the base piece. I then just clamped the two pieces together and waited for it to dry. This successfully corrected the problem | ||
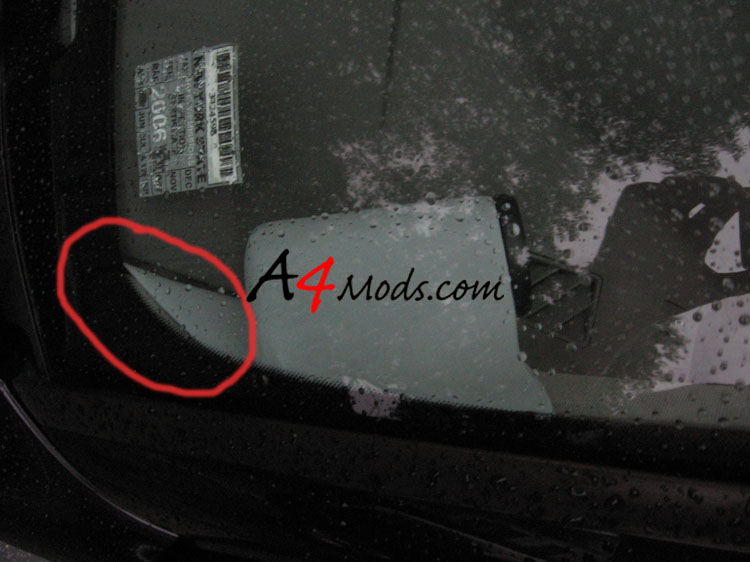
Problem #2 Another thing I want to bring up is the addition of the rounded section at the rear of the pod. I initially layed the cylinder on the base so that it would lay as far back in the windshield as possible. This gave me a near perfect fit for the A-Pillar. AFTER this initial layout, I decided to add the rounded part. Because the pod was now longer than originally intended, it no longer fit all the way back in the windshield as I originally wanted. The result? A non-perfect fit in one corner. This, however, is something I can live with. The pictures below will clarify. |
||
|
 |
|
| Original Layout | Final Layout (Pre-Paint) | |