Curbed Rim Repair - Audi A4
Prior Experience: None
Cost: approx. $30-$40
Time: aprrox. 1 day
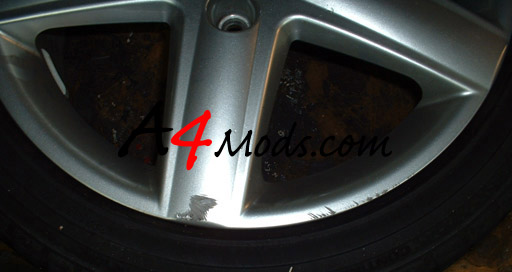
So I was driving down a 1 lane road in north Baltimore when a cop pulls out behind me. He's right on my ass with sirens blaring, so I try to pull over. Knowing I will block traffic, I tried to pull over as far I possible. The result: wrecked my rims on the curb. Worst part was...cop passed me - screwed up my rims for nothing!
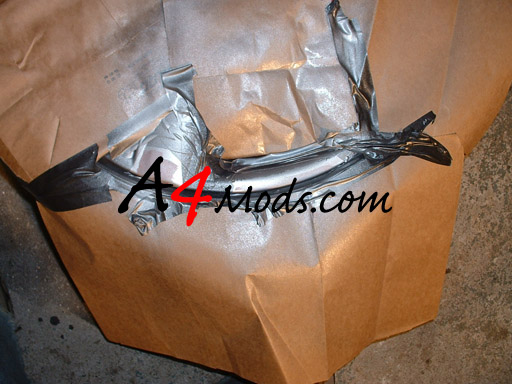
I obviously couldn't leave them like this, so I decided to read up on how to fix them. This technique can be used for almost all German rims since the color is the same. Here are some before and after pics.
 |
 |
|||||||||||||||||||||||||||||||
| Before | After | |||||||||||||||||||||||||||||||
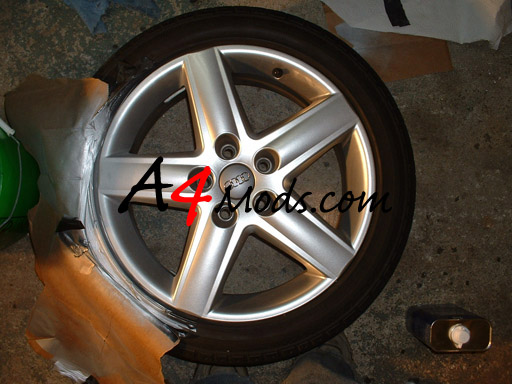
Although it is not "perfect" it is much much better. I am no professional and my patience is limited, so with even more time, more bondo and more sanding, it could certainly be perfect. It was a good project and saved a ton of money. So here's how to do it: |
||||||||||||||||||||||||||||||||
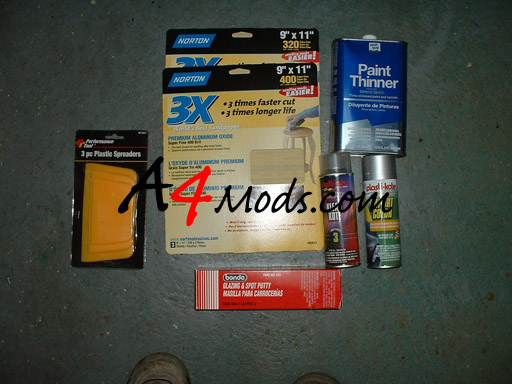
SUPPLIES - I purchased the supplies at Pep Boys and Home Depot. Although I cannot find my receipt, everything was basically 5 dollars or under. The total was about $30-$40 |
||||||||||||||||||||||||||||||||
|
 |
|||||||||||||||||||||||||||||||
UPDATE: In this tutorial I did not use primer. The second time around I used some Plastikote GRAY, sandable primer made for filling scratches. Although not 'required' this made the job much easier and efficient. Do yourself a favor and pick up a can of it at your local auto store. |
||||||||||||||||||||||||||||||||
The basic technique is to sand down the high spots, fill in the low spots, use additional putty to recover the shape of the rim, then paint and clear coat it. It is really that easy, so don't be concerned if you have never done anything like this. Ready?? |
||||||||||||||||||||||||||||||||
| The first thing you want to do is to clean off the rim the best you can. I first cleaned them with my regular rim cleaner and then went over the area to be painted with paint thinner. Because of the way you will have to paint, make sure that you clean off at least half of the rim. The damage area has to be as clean as possible otherwise the bondo will not stay - so please take your time with this part. |  |
|||||||||||||||||||||||||||||||
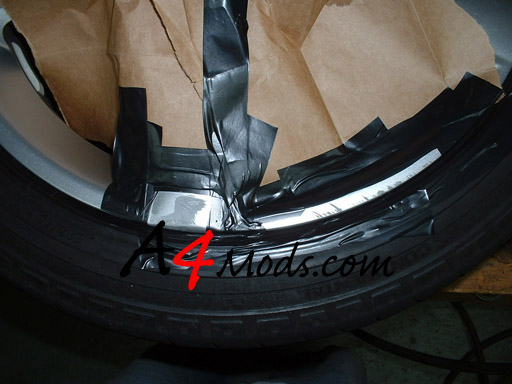 |
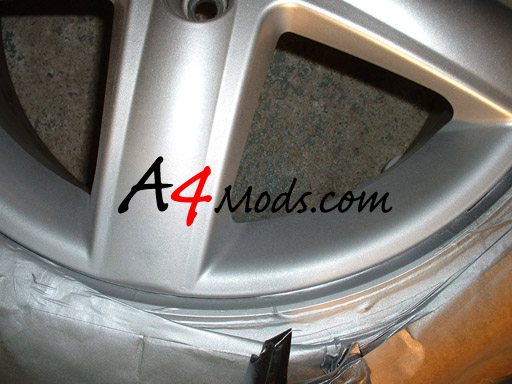
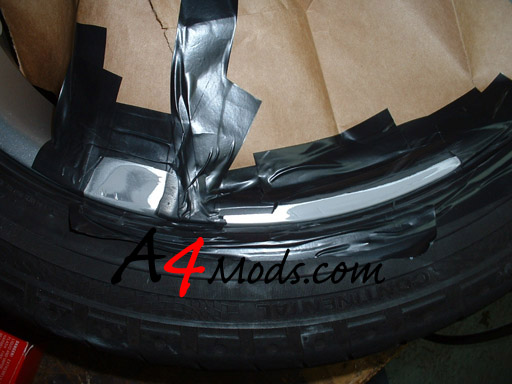
After the rim is cleaned up, I recommend you mask off the damaged areas. When you are sanding them down, you do not want to touch areas that have not been hit by the curb - this will make you job harder. Here is the rim cleaned up and masked off for sanding and bondo: |
|||||||||||||||||||||||||||||||
Next you want to hit the damaged area with the 320 grit sandpaper. I recommend using a sanding block if you have one handy, if not dont worry its not necessary. After you get all the rough spots done, move onto the 400, and then the 600 if your that determined. You can see that the areas are completely smooth. You will be surprised how quickly 320 will tear through a rim. This is why the areas should be masked off. |
 |
|||||||||||||||||||||||||||||||
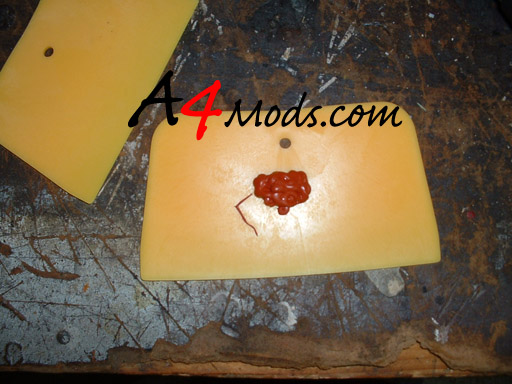
Now on to the bondo. I noticed that it works a little better if it is warmed up a bit. If you want you should leave it out in the sun for an hour or so to get it soft. You want to apply very thin layers at a time. First you should put some putty on one of the plastic spreaders and use another one to take a little off at a time to apply it to the rim. Follow the directions on the tube and allow each layer to dry before applying the next. You should sand each layer and wipe them down before applying the next. Since it was raining out, I used a heat lamp to speed up the drying. |
 |
|||||||||||||||||||||||||||||||
 |
 |
|||||||||||||||||||||||||||||||
Keep applying layers until all the cracks are filled. Re-generate the shape of the rim the best you can and be sure to sand the edges smooth with the rest of the rim (so that you cannot feel where the rims stops and the bondo starts) The better you apply and sand the bondo, the better the final product will look. |
||||||||||||||||||||||||||||||||
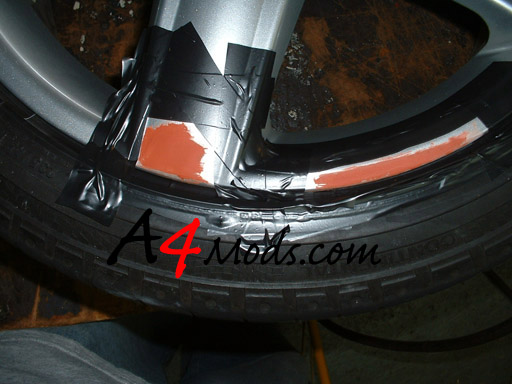
UPDATE: When this tutorial was originally written, I did not use any primer. The rim came out good, but it took a lot more effort than it should have. Here is my new suggestion. Go and buy some Plastikote primer. They have primer that is specifically made for filling small cracks and scratches. This primer is sandable and makes blending edges extremely easy. The second time I repaired my rims I used this primer on many of the spots that were small scratches, and avoided using bondo all together! It will also give you a preliminary idea of how your patchwork looks. If it looks bad, you can sand the primer down before you apply the paint. |
||||||||||||||||||||||||||||||||
PAINTING - After everything was sanded and ready to go its time to start painting. The first time around, I applied all layers of paint with the masking still on. PLEASE DO NOT DO THIS -- it came out terrible and you could see a distinct line where the masking ended and the rims started - I have no Idea what I was thinking when I did that. The idea is to feather the paint across the nearby portions of the rim so that it become evenly blended with the surrounding areas. Continue layer paint until you are happy with the look. I used almost an entire can on 2 damaged rims. You'll have to make your own judgement here. This was after my coat: |
 |
|||||||||||||||||||||||||||||||
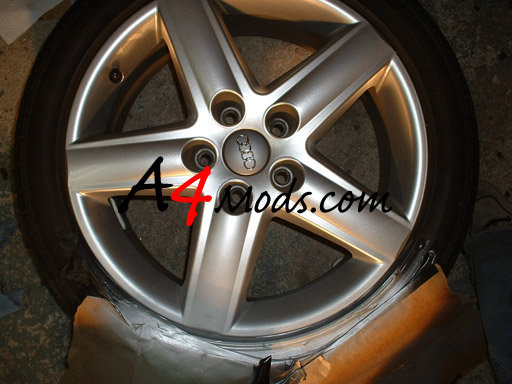 |
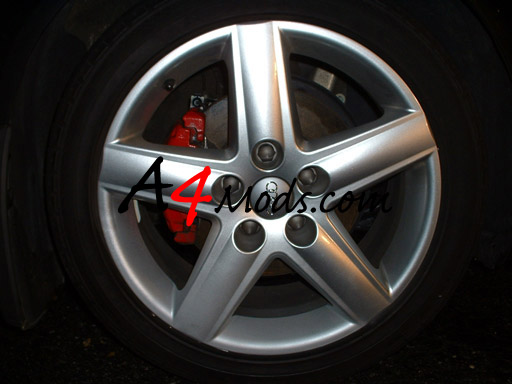
This is what it looked like after all of the layers were down. I then hit it with 2 layers of clear coat (pictures would be useless) and it was done. Try to be as careful as you can to not get any on the tire. I messed up a little and hit the tire -you can see it below. I had to take some graffiti remover (which is nasty stuff) and wipe it down. This the last picture I have and I still had some paint on the tires. Its almost impossible to tell where the rim was damaged. The only way that you can tell is to touch the rim. It is rougher than the stock finish. I imagine this could be fixed with some wet-sanding, but I was too lazy for that. I was very happy with the result and now I know that a little curb damage is no big deal. |
|||||||||||||||||||||||||||||||
 |
 |
|||||||||||||||||||||||||||||||