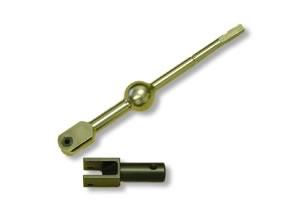
Archive: Neuspeed Short Shifter Install - Audi A4
Prior Experience: none required
Cost: approx. $129
Time: aprrox. 2 hours
| Discuss this mod - Here | ||||||||||||||||||||||||||||||||||||||
I ended up ditching the NS short shifter for the better, more stable JHM Soild Short Throw Shifter After hearing great reviews on the Neuspeed short shifter on both AW and Audizine, I decided to pick one up from North American Motorsports (http://www.namotorsports.net/) for $129 shipped. After installing it, I have to say it was well worth the money. At first I thought it was a little too short, but by the second time driving it, I was sold. Below are the side by side comparisons of the height difference....this was the best I could do with a poor camera...look at the climate control buttons for height reference. |
 |
|||||||||||||||||||||||||||||||||||||
|
||||||||||||||||||||||||||||||||||||||
Ok, this mod is pretty easy, but it will certainly be easier with the correct tools. Although I have listed a 6mm Hex key wrench, perhaps it should be more specific. Make it a very long 6mm hex key wrench - especially if you have big hands like I do. Even better yet, if you can find it, just get a 6mm hex attachment for your socket wrench - it will save you a hell of a lot of time, and a lot of scraped up knuckles. |
||||||||||||||||||||||||||||||||||||||
Ok so the first think you want to do is lift up the plastic piece around the stock shifter (its just 4 clips around the outside - you can put your hand down by the shift boot and yank it up) You want then lift the shift boot over the shift knob to expose the clip circled to the left. This clip is what is holding the knob on - I simply cut it with a pair of snips, but you may be able to loosen it with a flathead screw driver. Either way, you will not need it (the new shifter comes with a new clip). After the clip is removed, pull UP on the knob, and it will slide off... |
||||||||||||||||||||||||||||||||||||||
After you get the shift knob off, you want to remove the insulation and soundproofing that surrounds the shifter. You will see two 10mm nuts holding down the plastic cover....remove them and pull out that plastic cover. |
||||||||||||||||||||||||||||||||||||||
Forgive the poor pictures on this next part, but it is a dark area to work with and my camera does not have a flash. When the plastic is removed, you will see a 6mm hex nut that is circled in the pic. Just below that (in this pic it would be to the left of the circled one) you will see another 6mm hex nut. These two bolts are the biggest pain in the ass part about this job - especially because I did not have a long allen key. I decided to loosen the ashtray to get more room. Before your remove these bolts, you will want to mark their location so that you can re-install the shifter easier. |
||||||||||||||||||||||||||||||||||||||
For the top bolt, you want to mark where the bottom of the bolt is on the metal piece that it is screwed into. This is very straight forward. |
||||||||||||||||||||||||||||||||||||||
The bottom bolt is not nearly as straight forward. Below the screw there is a grey plate. I originally marked where the bolt hit the plate (like the top screw), however with the bottom screw, the plate comes off with the bolt! You have to mark Where the grey plate ends on the transmission rod below. In the picture to the left you can see the allen key inserted into the hex bolt - it would be nice if the key was long enough to get above the center console...mine was not however.... |
||||||||||||||||||||||||||||||||||||||
After you remove the 2, 6mm hex screws, you want to remove the 4, #25 torx screws that are holding the shifter in place - no need to mark these screws as they are not adjustable. To the right you can see what it looks like when the shifter is removed. The two rods each had one 6mm bolt in them. |
||||||||||||||||||||||||||||||||||||||
After you get the shifter assembly out, you can go inside to disassemble and reassemble it with the new short shifter. |
||||||||||||||||||||||||||||||||||||||
The breakdown of the stock shifter is very straightforward. You want to remove the one 10mm bolt that is holding the shift for to the shift lever. You then want to use your circlip pliers to remove the large circlip at the top of the shifter's ball joint. Below is a picture of where to grab the circlip, as well as what the pliers look like - for those of you who have never used them. |
||||||||||||||||||||||||||||||||||||||
After the circlip is removed, the balljoint will come loose and you can remove the two washers that are located in there. You then want to go ahead and reassemble and reinstall everything in reverse. When resinstalling regrease the ball joint and shifting fork and make sure everything feels smooth. Take note that when assembling the neuspeed shifter, the flat end of the shifter faces the drivers side of the vehicle. Also, do not tighten down the shifting fork completely onto the shift lever. It should move freely on the shift lever. Use the supplied lock nut. |
||||||||||||||||||||||||||||||||||||||
Below is the re-assembled short shifter, as well as the shifter installed back on the car. |
||||||||||||||||||||||||||||||||||||||
Good luck!! |
||||||||||||||||||||||||||||||||||||||