Fiberglass Sub Box Fabrication
Prior Experience: None
Cost: approx. $180
Time: aprrox. 2 days
| Discuss this mod - Here | |||||||||||||||||||||||||||||||||||||||||||||||||||||||||||||||||||||||||||||
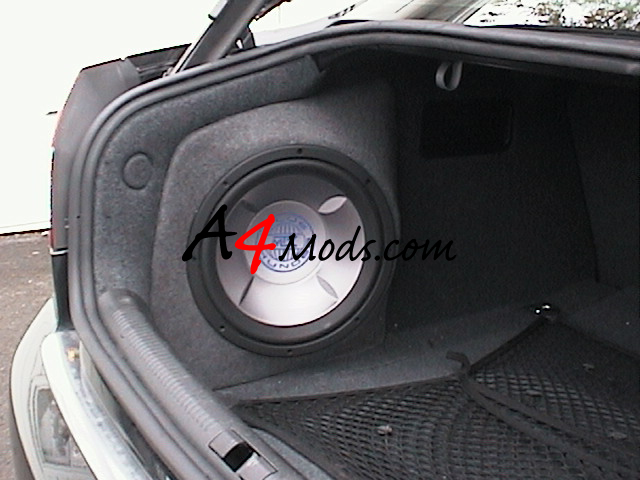
| After installing my 12in MTX Blue Thunder amp and sub from my jetta to my audi A4, I was quite upset with the loss of trunk space. In my jetta, the rear seats did not fold down so it was not such a big deal. In the audi - I couldn't stand it. I read up on some things and decided to fabricate a custom sub box to fit into an empty side compartment in my trunk. I believe the 2002 A4's have this 'pocket' to help golf bags fit across the width of the trunk. I am not sure if all models have it. Anyway - here's what it looks like and how to do it - don't mind the floating amp. | 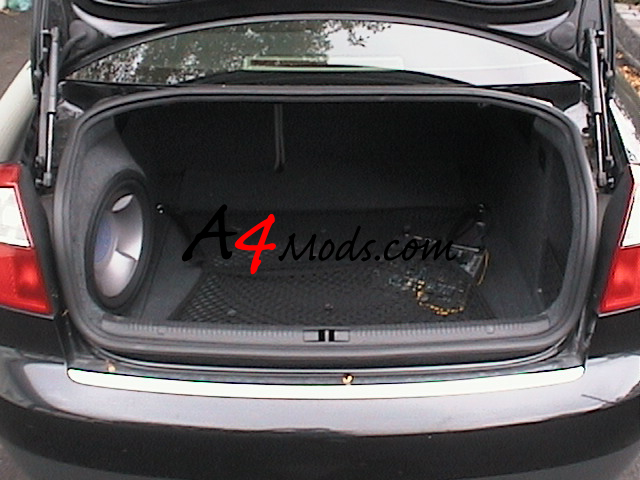 |
||||||||||||||||||||||||||||||||||||||||||||||||||||||||||||||||||||||||||||
 |
 |
||||||||||||||||||||||||||||||||||||||||||||||||||||||||||||||||||||||||||||
First things first: SUPPLIES - almost all supplies were available at Lowes for relatively cheap. Id suggest not "cheaping out" on these things because you will end up making more trips. If you buy too much, you can always return it. |
|||||||||||||||||||||||||||||||||||||||||||||||||||||||||||||||||||||||||||||
|
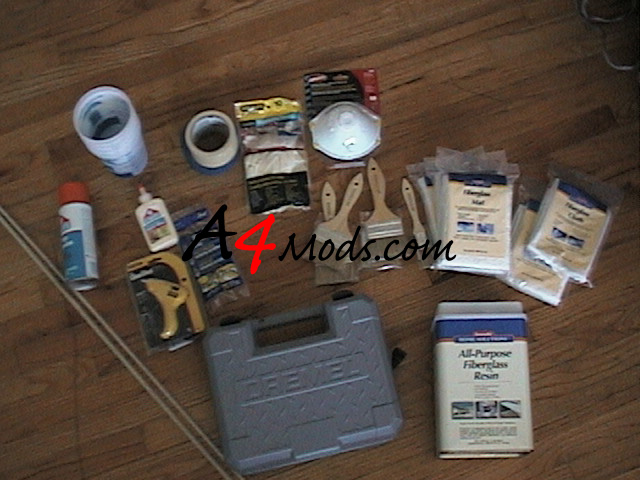
Some things I didn't use and some are not pictured...all should be listed to the left |
||||||||||||||||||||||||||||||||||||||||||||||||||||||||||||||||||||||||||||
Now it is on to the prep work. Since fiberglass is some nasty stuff, I decided NOT to work out of my trunk. I removed the left side trim and worked outside, far away from my car. The following is a description on how to remove the trim - the pictures are copyrighted by Bentley Publishers and I in no way claim ownership to them. |
|||||||||||||||||||||||||||||||||||||||||||||||||||||||||||||||||||||||||||||
| First you remove the mat covering your spare tire - if you need help with this, please quit now. After this you have to remove the plastic trim along the edge of your trunk. It is held on by several clips along the top (you cant see them) and two 10mm nuts at the bottom. To get to these nuts you have to remove the spare tire. After they are unscrewed you can lift the plastic trim by lifting up. Be sure to disconnect your trunk light if necessary. Put the spare, mat and trim somewhere safe. | |
||||||||||||||||||||||||||||||||||||||||||||||||||||||||||||||||||||||||||||
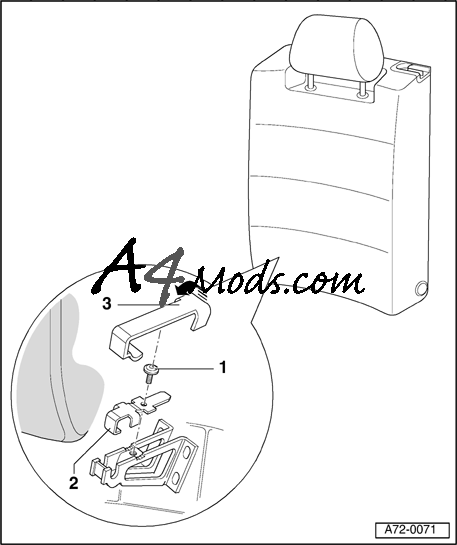
Now to remove the side trim: First you will have to lift the left-rear seat out of position. To do this you fold down both seats and disconnect the clip between them as diagramed to the right. Clip 3 is a plastic part that can be easily lifted off. Screw 1 is a Torx screw. Then Clip 2 is disconnected the same way as clip 3. From here you will be able to lift the seat from the center of the car. You will want to lift it higher than the other backrest so you can slide it towards the center of the car - disengaging the pin to the right. You will understand what I mean when you get there. The whole point of this is to allow you to remove the side trim without cutting/tearing it. After all, you're doing this because you would like a 'clean' install. After the seatback is removed, you can follow the diagram below to remove the side trim. Then it's time to go to work on our fiberglass box. |
 |
||||||||||||||||||||||||||||||||||||||||||||||||||||||||||||||||||||||||||||
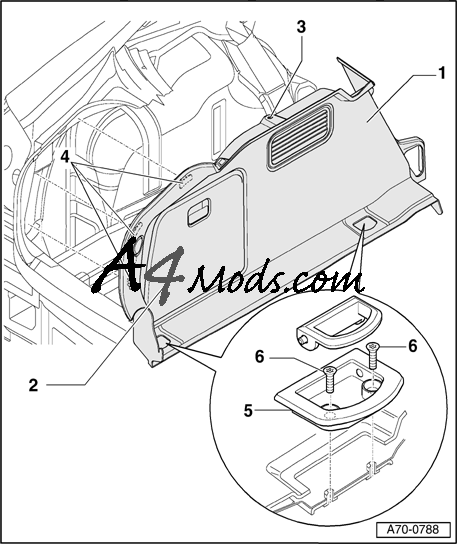 |
As I mentioned earlier I have this "golf bag" cutout in my car that is not pictured in this diagram. It seems like in the more recent years they have replaced it with this door of sorts. You will see what I mean on the next page |
||||||||||||||||||||||||||||||||||||||||||||||||||||||||||||||||||||||||||||
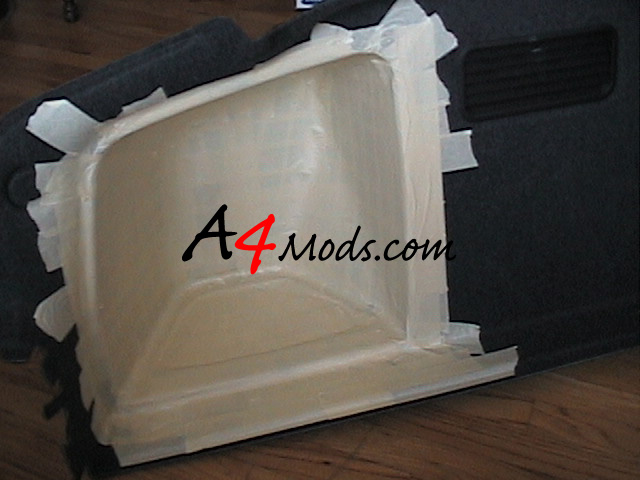
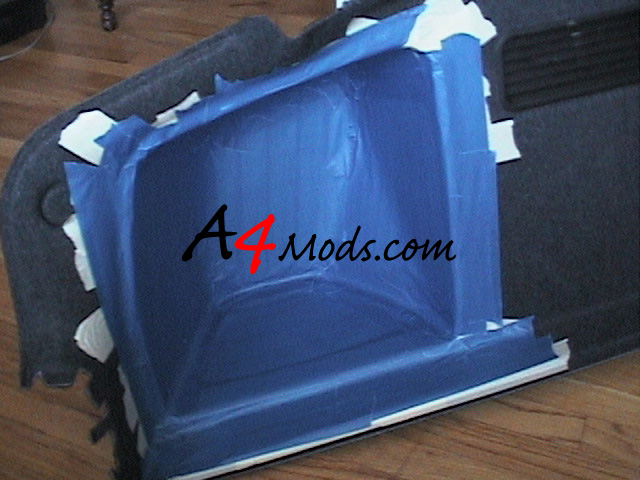
After you remove the side trim, It is time to mask off the area you plan to use as the rear of your fiberglass box. You should first apply several layers of the standard 2 inch masking tape before applying a layer or two of the quick release blue painters tape. The picture to the right is after I was done masking with standard tape - below, painters tape |
 |
||||||||||||||||||||||||||||||||||||||||||||||||||||||||||||||||||||||||||||
 |
Your prep- work is done. Time to get your hands dirty and start fiberglassing this box! Things you NEED to know: Fiberglsss is naaasty and you DO NOT want it to touch your skin, and you certainly do not want to breath it. Wear long sleeves and pants. I decided "It's not so bad" and wore shorts and sandals - my feet were itching for 3 days. Trust me on this one. Before you touch ANY of the fiberglass, you want to be covered!. |
||||||||||||||||||||||||||||||||||||||||||||||||||||||||||||||||||||||||||||
Newbie Summary: For everyone who has never used fiberglass before (neither did I), the concept is this. You will mix up the resin with the hardener that presumably comes with it. Bondo stuff suggested 14 drops per ounce of resin. For me as a first-timer, I went with 10 drops per ounce so I had a little more time to work with the fiberglass before it hardened. The choice is up to you. You will then "paint" the taped surface with the resin and apply a strip of fiberglass to it. After you place the fiberglass you use the brush, loaded with resin, to dab or tap the top of the fiberglass with more resin. You will notice the fiberglass will become transparent as you coat the top with resin. You repeat this procedure, working your way around the entire surface until a complete layer is down. As a first-timer, I took a little long to get the layer down and my resin hardened up before I used what I had mixed....no biggie, I just mixed more. You would continue this proces until 3 layers are down - no need to let dry between each layer ---------------------------------------------------------------------------------------------------------------------------------- Now that the general concept is out of the way, lets get going ---------------------------------------------------------------------------------------------------------------------------------- First thing you want to do is to open the bags of fiberglass and make these yard sheets managable in size. I suggest using fiberglass matte for the first couple layers. It is messier, but I think its sticks better than the cloth and will give you an easier start. I also recommend tearing the matte instead of cutting it. It may 'look' worse in the beginning, but it will make its application easier. The frayed edges will help it stick to where you want it. I thought 'managable size' meant the size of each of the sides of the box. However it means 2 inch wide strips about 6 inches long. This will work much better for you, especially at the beginning. As mentioned before, you paint the surfaces, lay fiberglass, then dab more resin on top of the fiberglass. Repeat this until 3 layers are down. (If you get nervous/confused after one layer, stop and let it dry before starting the next one - however, you will find it is easier to lay the second layer when the first is still wet.) If you notice air bubbles forming, just simply work them towards the edges with your brush to try to get rid of them. Air bubbles will make the box somewhat weaker and will grow with each layer so try to get rid of them as you go. I have no pictures of the layering process because I was elbow deep in resin. This is the pic after the first 3 layers were done. |
|||||||||||||||||||||||||||||||||||||||||||||||||||||||||||||||||||||||||||||
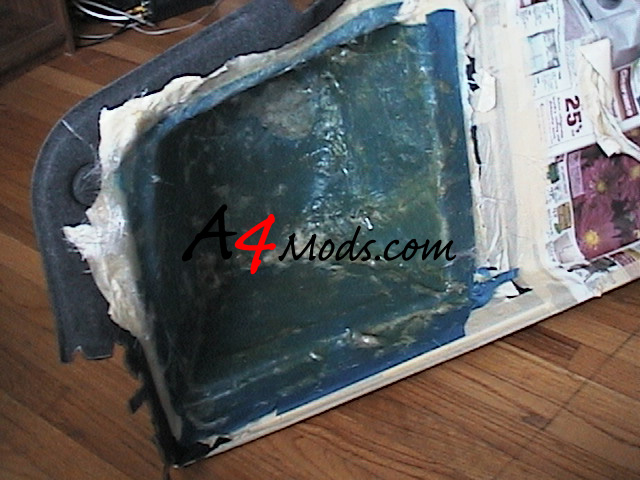 |
Notice I have fiberglassed about 2 inches passed where I intend on ending the box. This is the best way to do it as you can always trim the dried fiberglass much easier than you can evenly lay more. When you get 3 layers down -take a break and let it dry for an hour and a half or so. |
||||||||||||||||||||||||||||||||||||||||||||||||||||||||||||||||||||||||||||