Interior Trim Refinishing - Ultra suede Overlay: B6 A4
Prior Experience: None needed, very easy to do
Cost: $25
Time: 2 hours
| Discuss this mod - Here | ||
| NOTE: All pics are hyperlinked to higher resolution versions. | ||
I decided to overlay my 'fish scale' interior trim with black ultra suede to put a new touch on my interior. Plenty people have done this mod in the past, but I figured I would take some pics and write it up as I went along. Realistically you will be able to tell well in advance if you are able to do this by just knowing if you can wrap a Christmas present. If you can't wrap a box with wrapping paper, please don't try to wrap your trim. This requires more patience and much more attention to detail. If you have your wife or mom wrap all of the presents each year, then you should try to get them to do this too..haha |
||
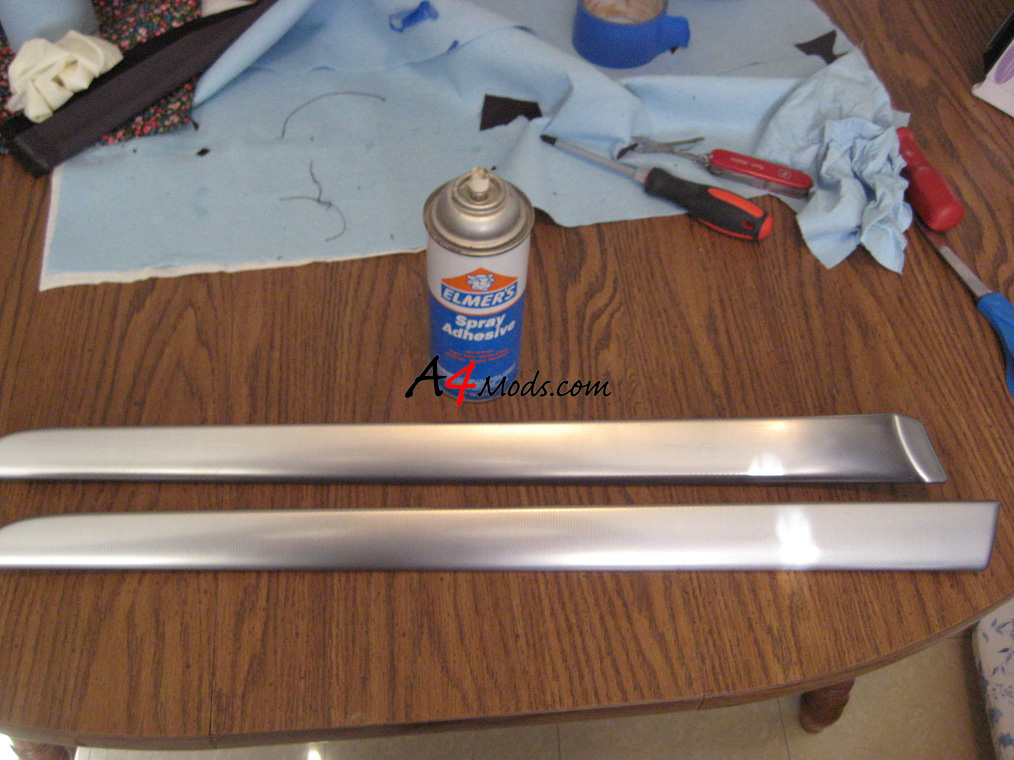
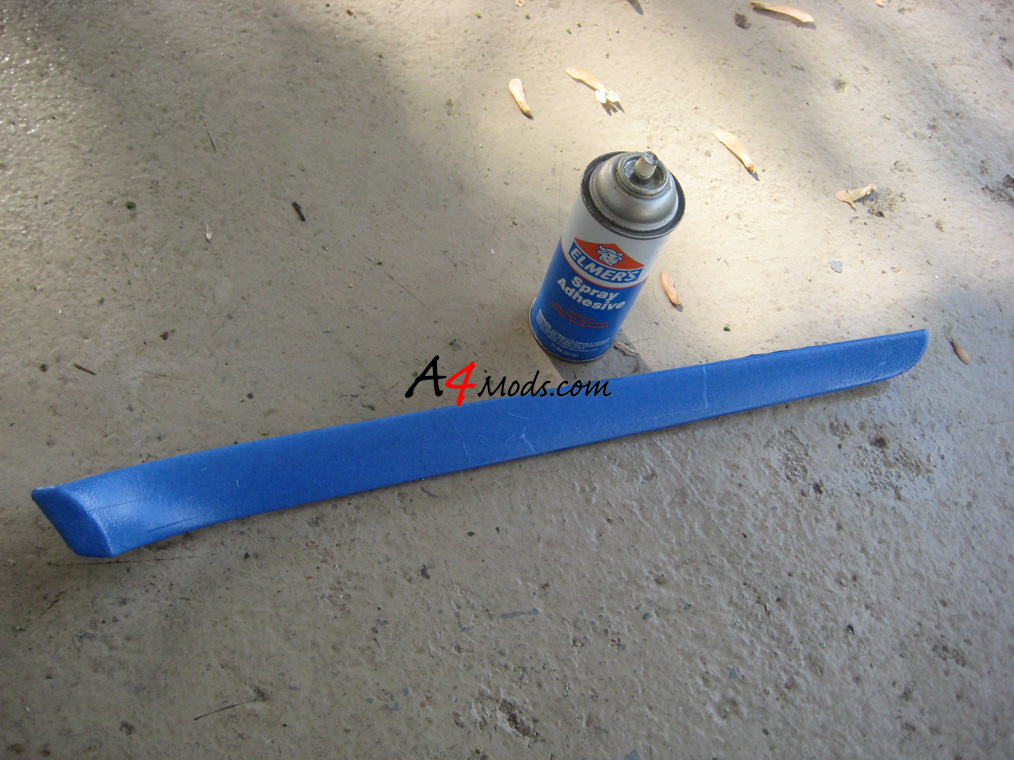
SUPPLIES - The supplies are easy. You need the ultra suede from a fabric store - I got some from JoAnn Fabrics - 1/4 yard @ $22/yard. Realistically you should buy at least a half of a yard - a quarter of a yard was cutting it very close. You will also need some spray adhesive. I used some Elmer's brand, but most people would probably recommend 3M or something similar. All of the other supplies are just basic hand tools and a panel tool. Here is the goal - black ultra suede trim: |
||
 |
||
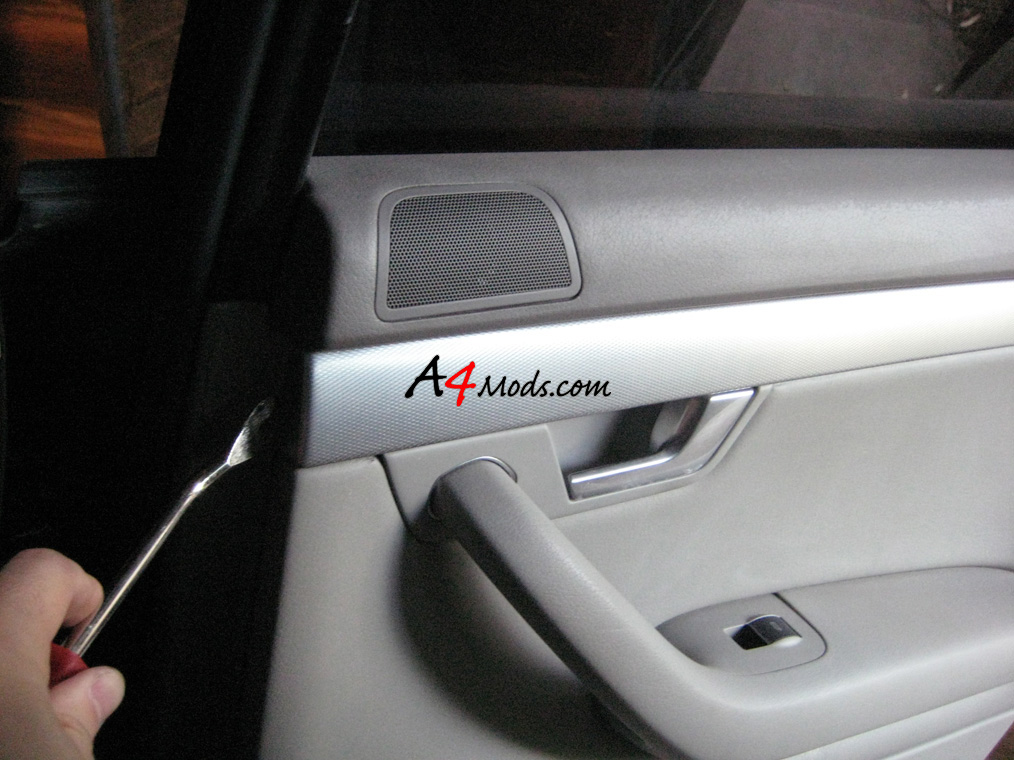
| The first part of the write up will focus on removing the trim. First we will start with the door panels. On each door panel, you want to remove the trim by using the panel tool at the inside edge of the trim (closest to the door hinge). You then work your way towards the outside edge. Each piece of trim has 4 tabs that need to be popped out - when you get to the outside edge of the trim you DO NOT pop it with the panel tool. Instead, you pull the whole piece of trim TOWARDS the car. This motion will disengage the final clip. | ||
Start with the inside edge |
 |
|
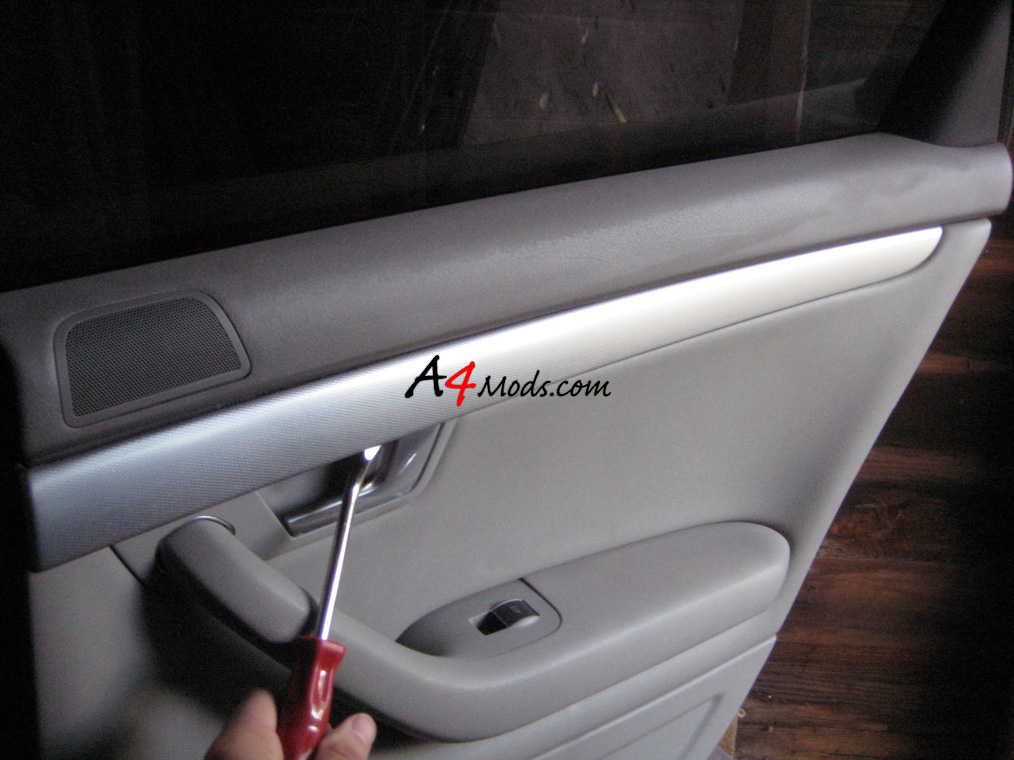
Move towards the outside edge |
 |
|
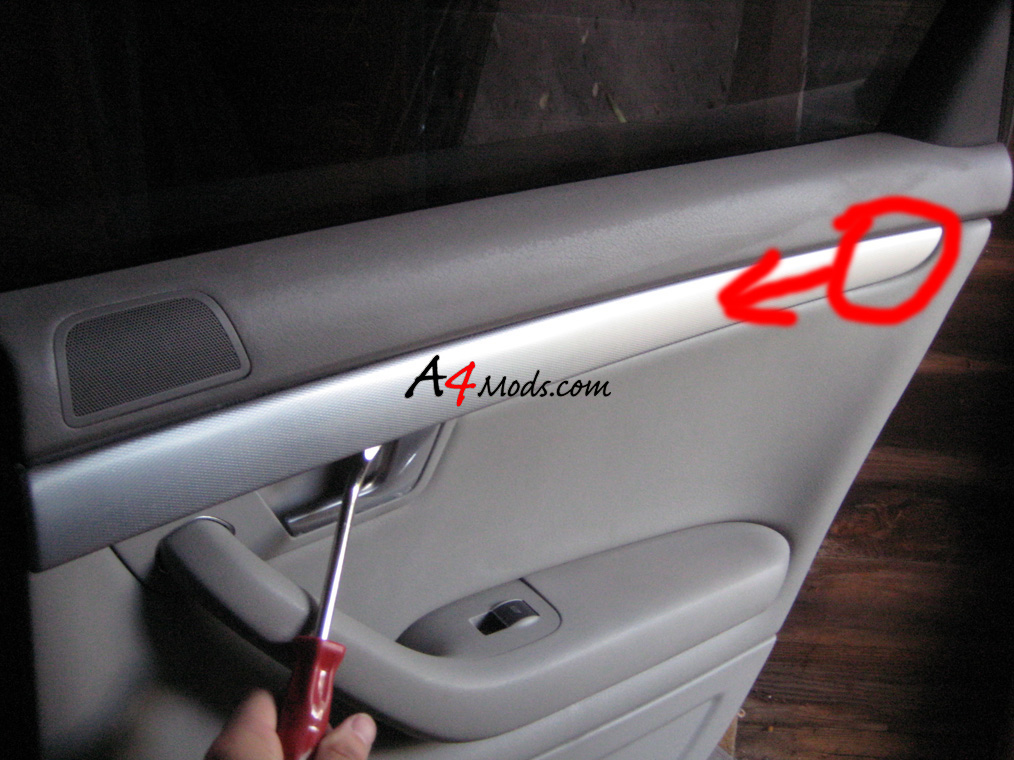
At the end slide the trim towards the door hinge. If you do not do it this way, you will brake the end tab. Then, each time you close the door the trim may fall off... I learned this the hard way when I did the Turbo Timer Companion Install |
 |
|
After you get each of the door panel trim pieces off, you can move the the trim along the dash. To remove the dash trim, you have to first remove the driver's side kick panel. |
||
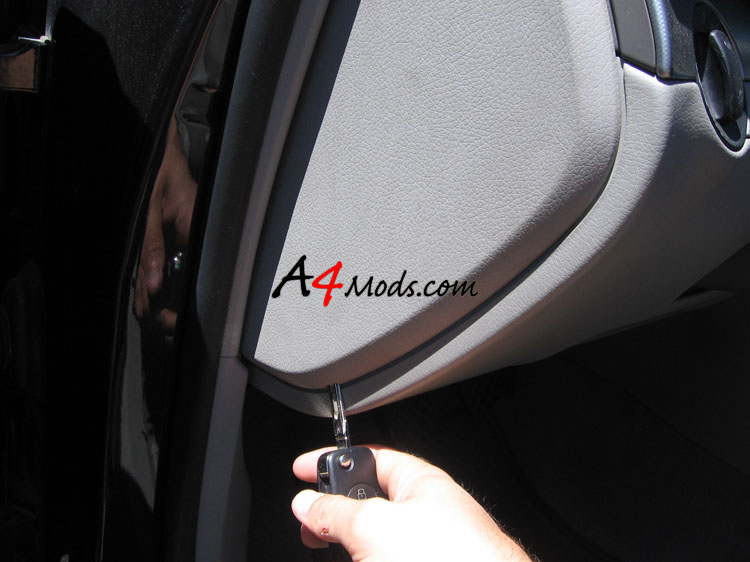 |
First remove the fuse panel cover on the driver's side of the vehicle You can do this by simply inserting your key into the slot and prying it off |
|
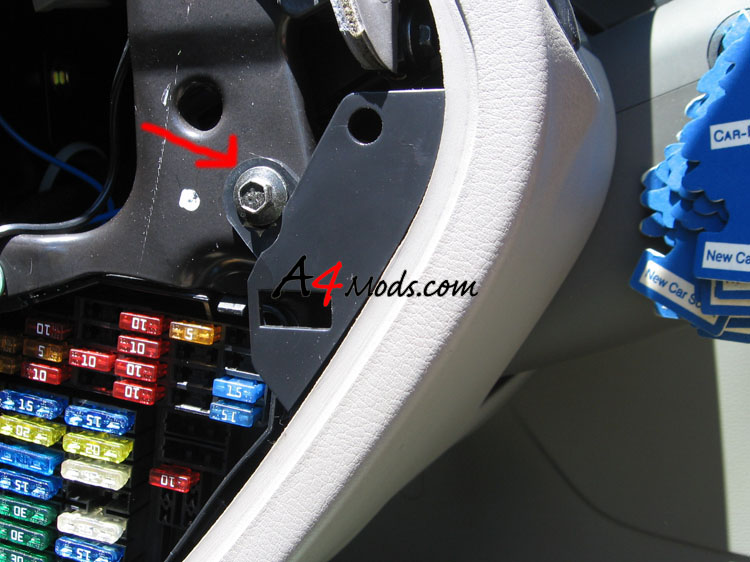 |
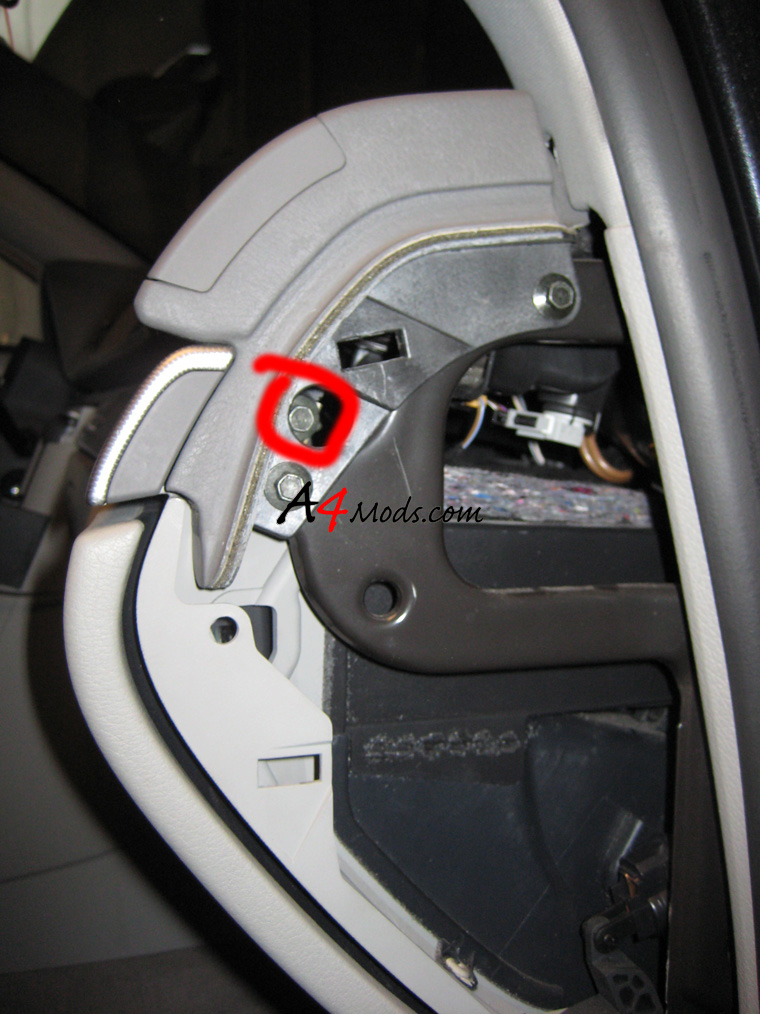
Next remove the 8mm bolt on the side of the panel Please, no comments on the air fresheners. Only the top one is new. |
|
| Next unscrew the two 8mm screws under the kick panel - under the steering wheel | ||
 |
 |
|
After the bottom two screws are out, pull the panel at the upper trim to disconnect it Just lay it on the floor on the driver's side. No need to disconnect anything else with the kick panel. |
 |
|
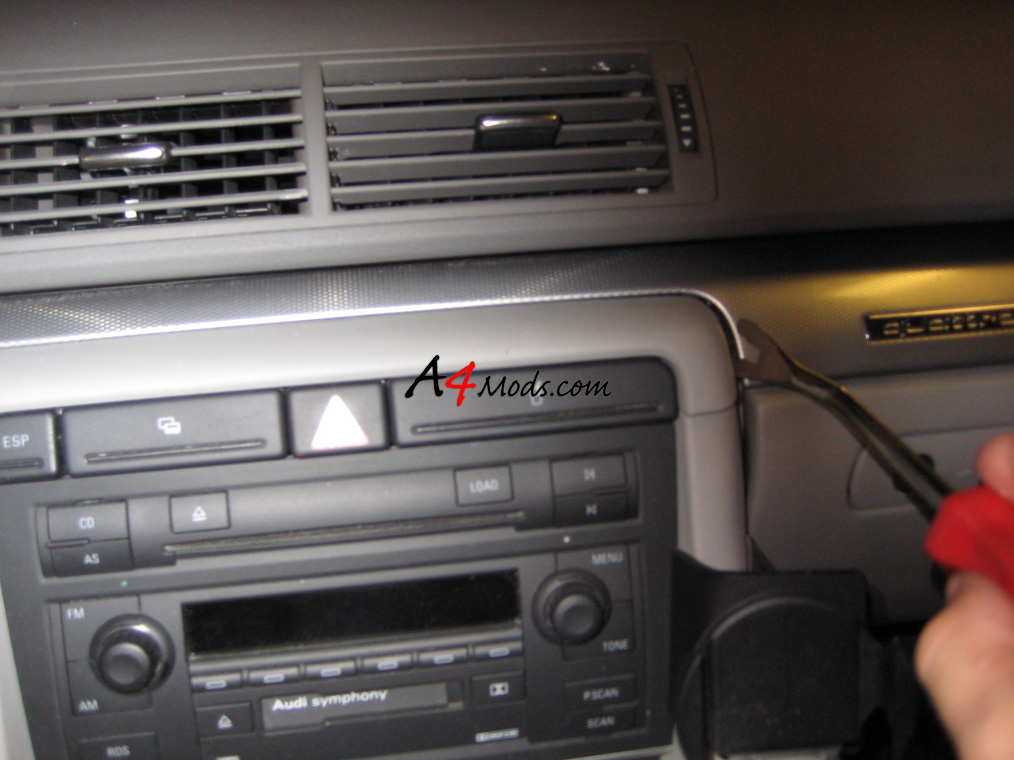
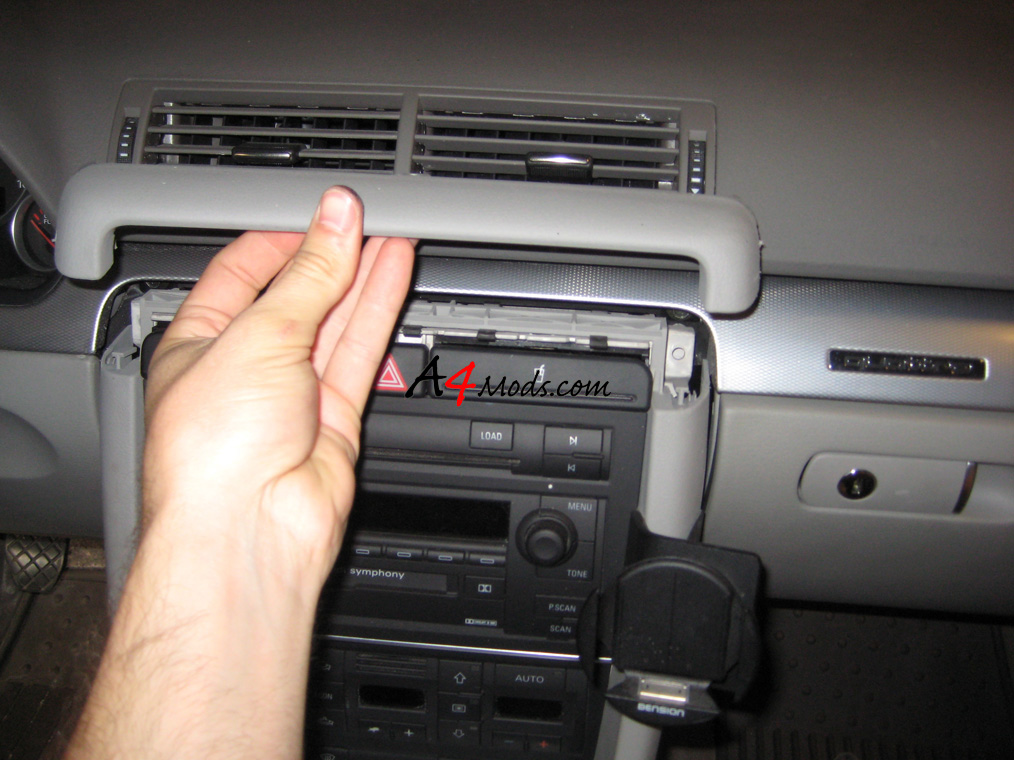
| Next you need to remove the trim above the radio. Just use the panel tool or a pick to get behind it and pull it out | ||
 |
 |
|
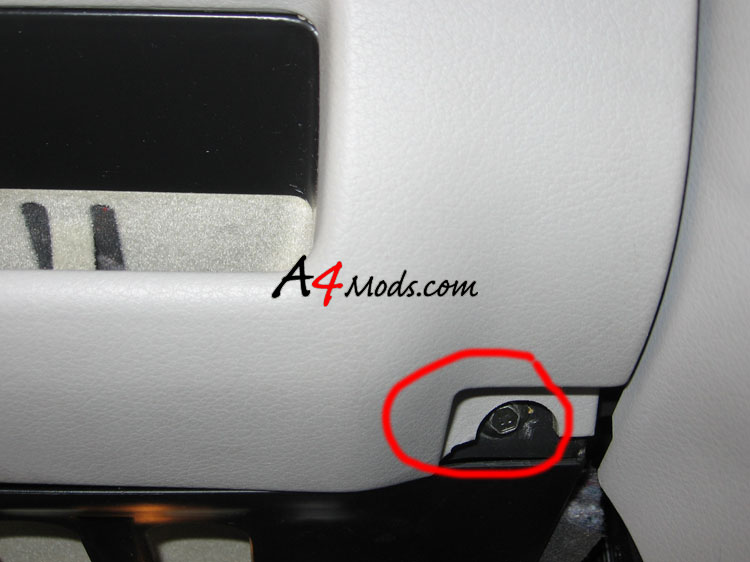
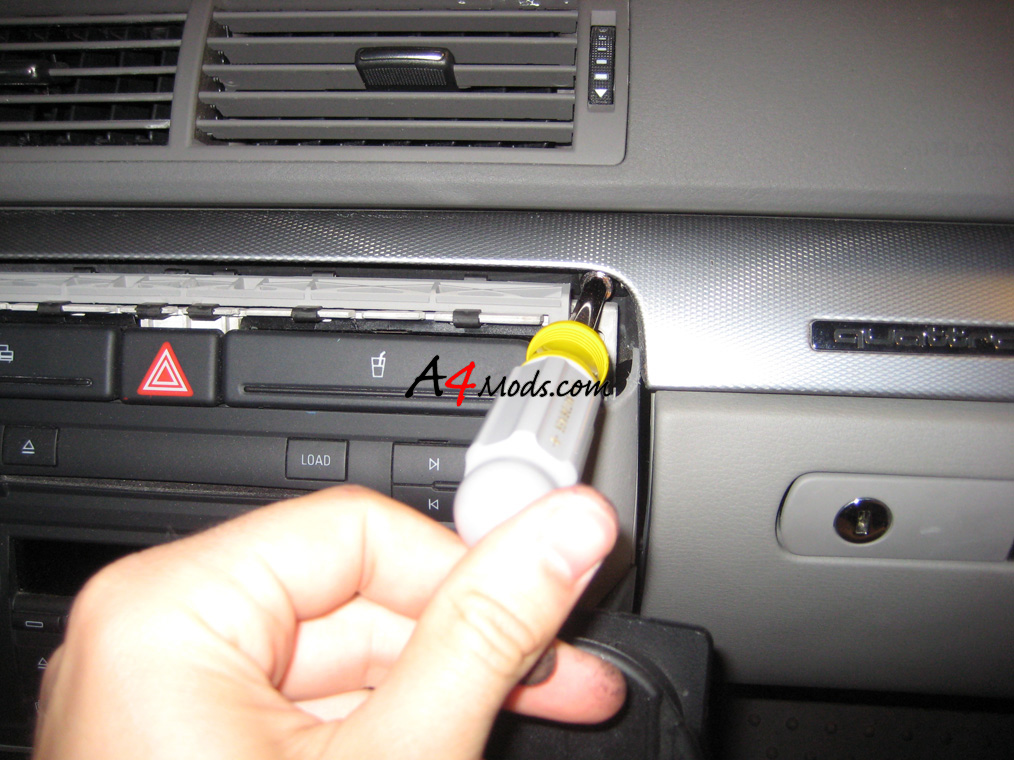
| Now that the kick panel and radio piece have been removed, you can remove the right side trim. Start at the passenger end by unscrewing the screw pictured to the right |
|
|
 |
Next remove the two bolts that are behind the radio trim. One is shown in the pic on the left. The other bolt is in the same spot but on the other side of the radio |
|
The last screw holding the trim on is located next to the steering column: |
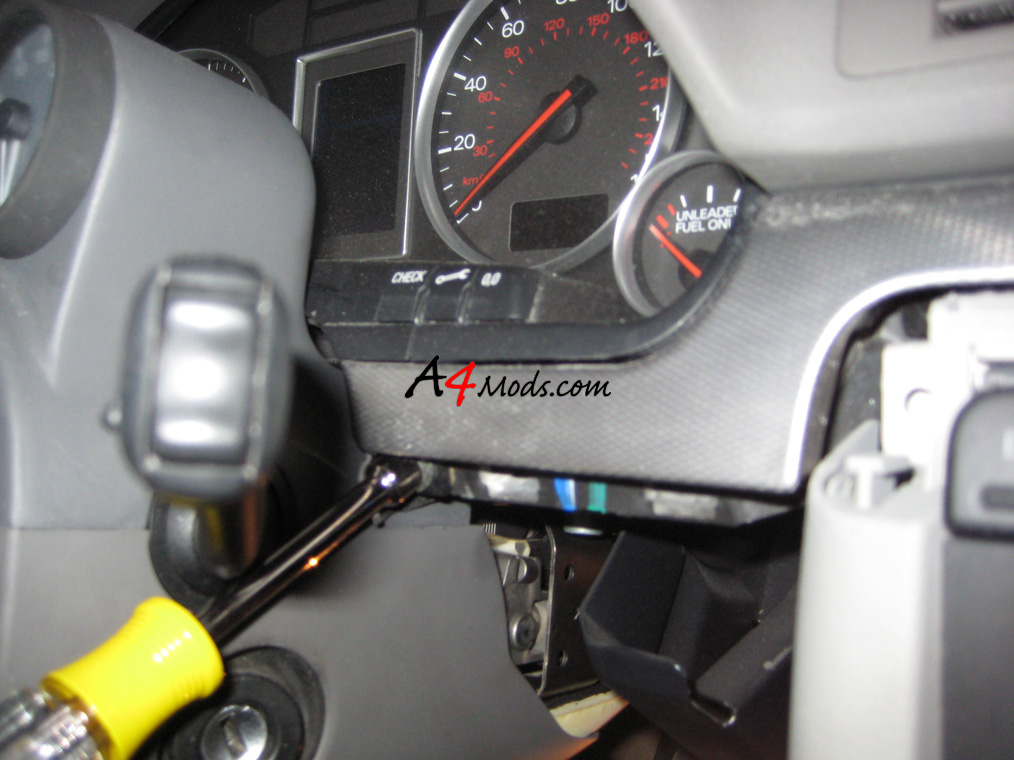 |
|
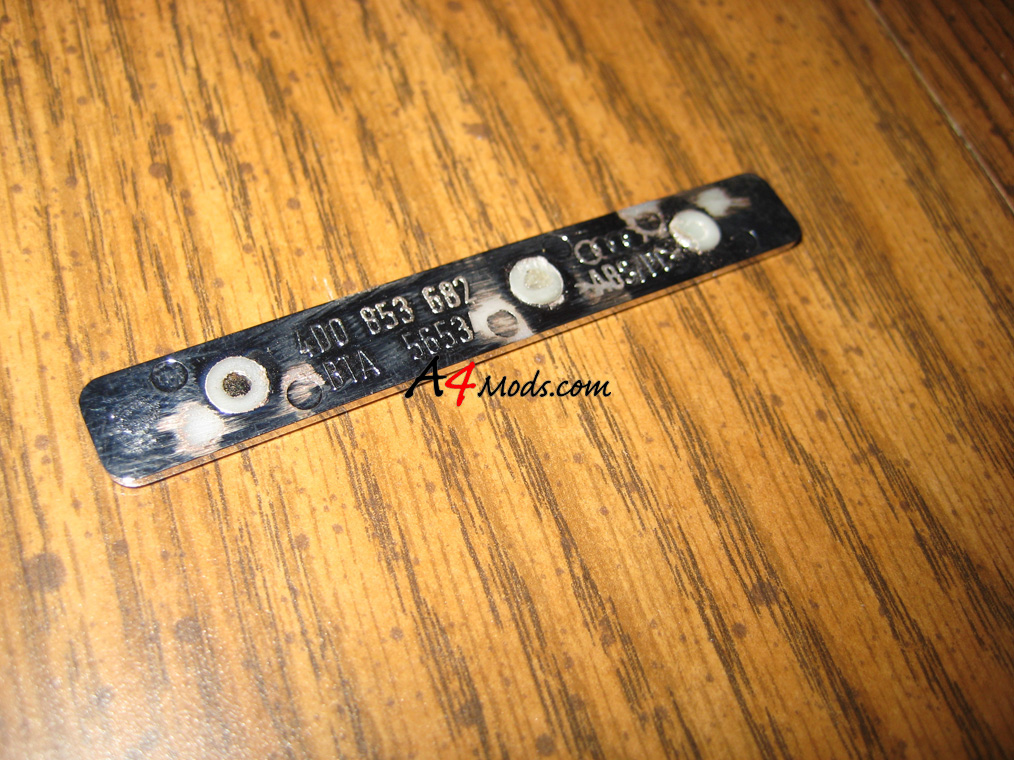
After you have removed those four bolts, the trim will just pop right out. If you have a quattro, there is a quattro badge located on the right trim. Chances are you will not want to cover over the badge when you overlay the ultra suede so you will need to remove it from the trim before you overlay it. Then you can put it back on top of the ultra suede when you are done |
||
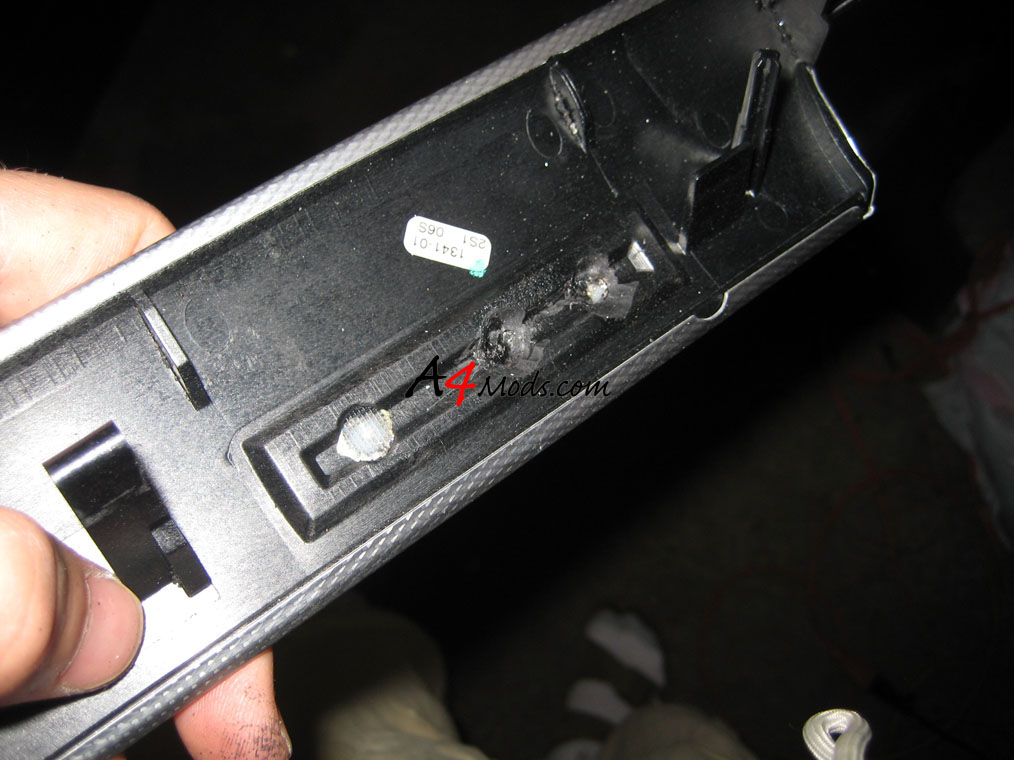
The Quattro badge is held in by three plastic tabs: |
 |
|
| I used a dremel tool to carve out the tabs at the back of the trim, and then to flatten out the back of the badge | ||
|
 |
|
That is all there is to do with the right trim... Now we will move onto the trim to the left of the steering wheel. |
||
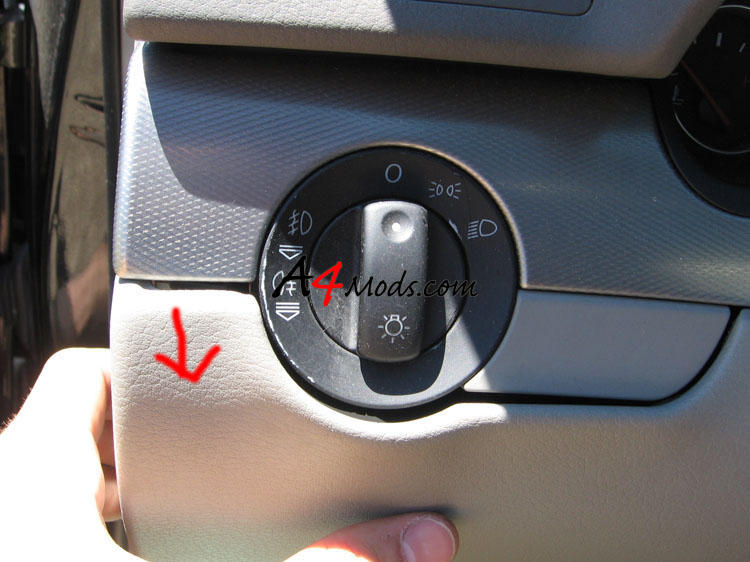
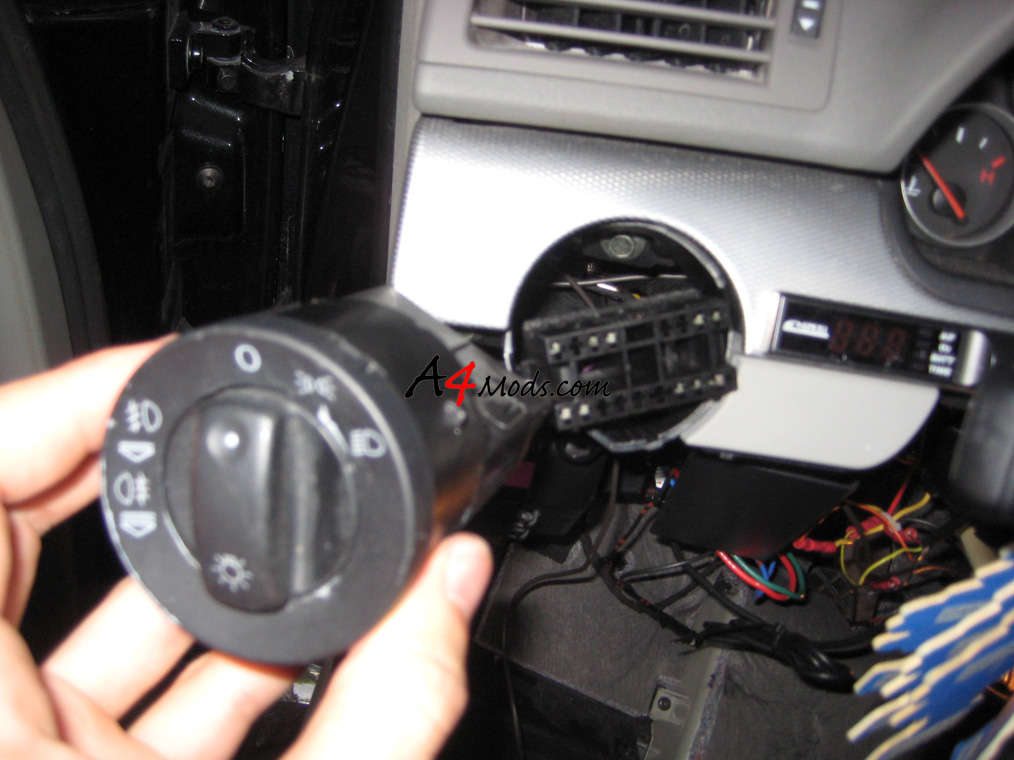
First you have to remove the headlight switch. To do this, you push in on the face of the headlight switch and turn it about an 1/8th of a turn clockwise. You then pull it towards you and it will slide out of the dash. Disconnect the wiring harness to the light switch |
 |
|
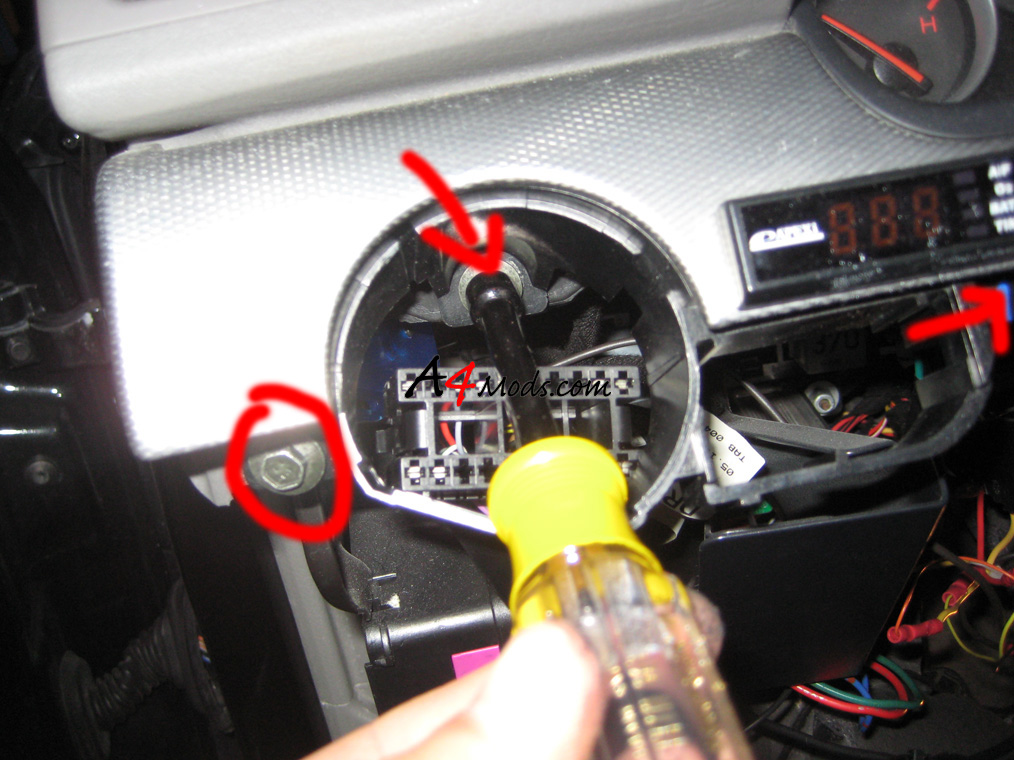 |
The left trim is held in by four screws. Two are circled in the picture to the left, and one is located just to the left of the steering column (arrow is pointing to the third screw's approximate location)
|
|
| There is one additional screw next the the fuse box (similar to what was shown on the passenger side). I do not have a good picture of it, but you will find it easily. After these 4 screws are remove, this final piece of trim should slide right out. With that done, you are ready to move to a clean space to refinish the trim panels. | ||
Ultra Suede Overlay
| I wont show every piece here as the process is very repetitive. However, I will suggest that you start with the door pieces and then move to the right front trim and finish with the left front trim. By doing it this way you are saving the hardest pieces for last - by the time you get to them you will have had plenty of practice. If you start with the front pieces, you are only asking for trouble. | ||
 |
These are the two door trim pieces I started with |
|
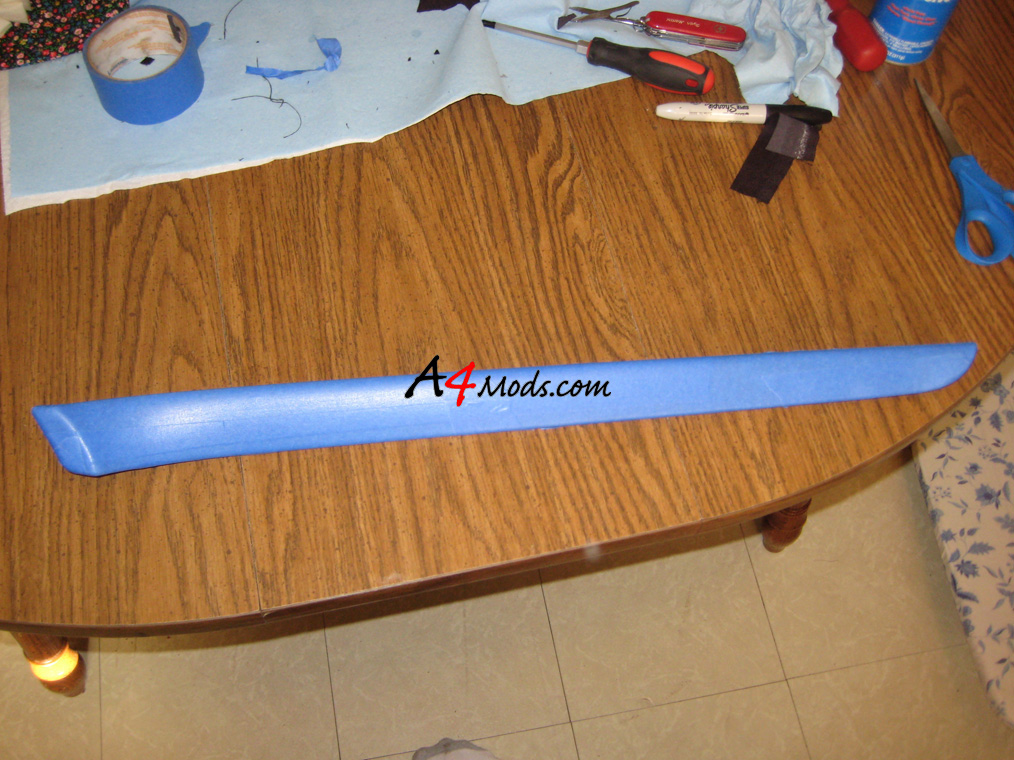
Since I like to keep all of my mods reversible, I decide to overlay the ultra suede on top of painters tape. I think this is an excellent idea so I highly recommend you do this as well. I neatly laid down two layers of painters tape on the trim - once again, if you can't get the painter's tape to lay flat, you probably shouldn't even try the ultra suede If nothing else, the painter's tape should be practice for the suede. |
 |
|
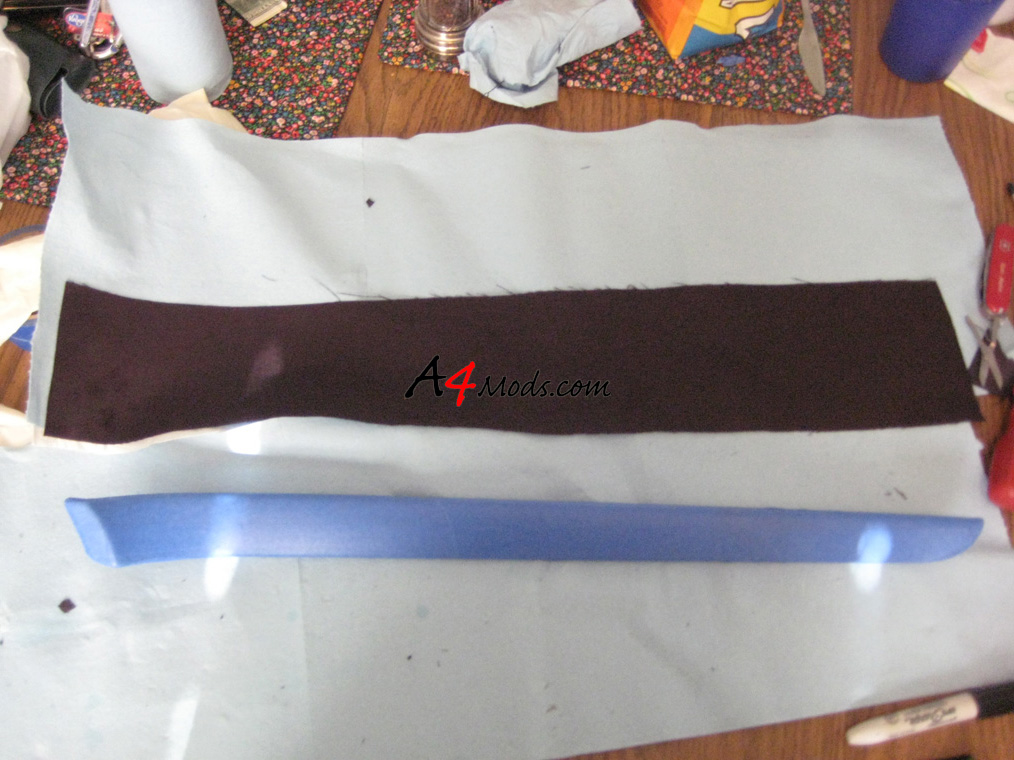 |
Next cut the piece of ultra suede to the approximate length and width. I would recommend leaving plenty of extra around the edges as it will make it easier to wrap the pieces. You can always trim it later |
|
 |
Next I applied the spray adhesive to the panel covered in painters tape. This picture has the glue on it already, but you can't really tell since the glue is more or less clear |
|
 |
The first thing I did was lay the ultra suede out and flatten down the suede on the face of the trim. The face is by far the easiest. I just pressed it on and ran my finger down it to make sure there were no wrinkles, etc |
|
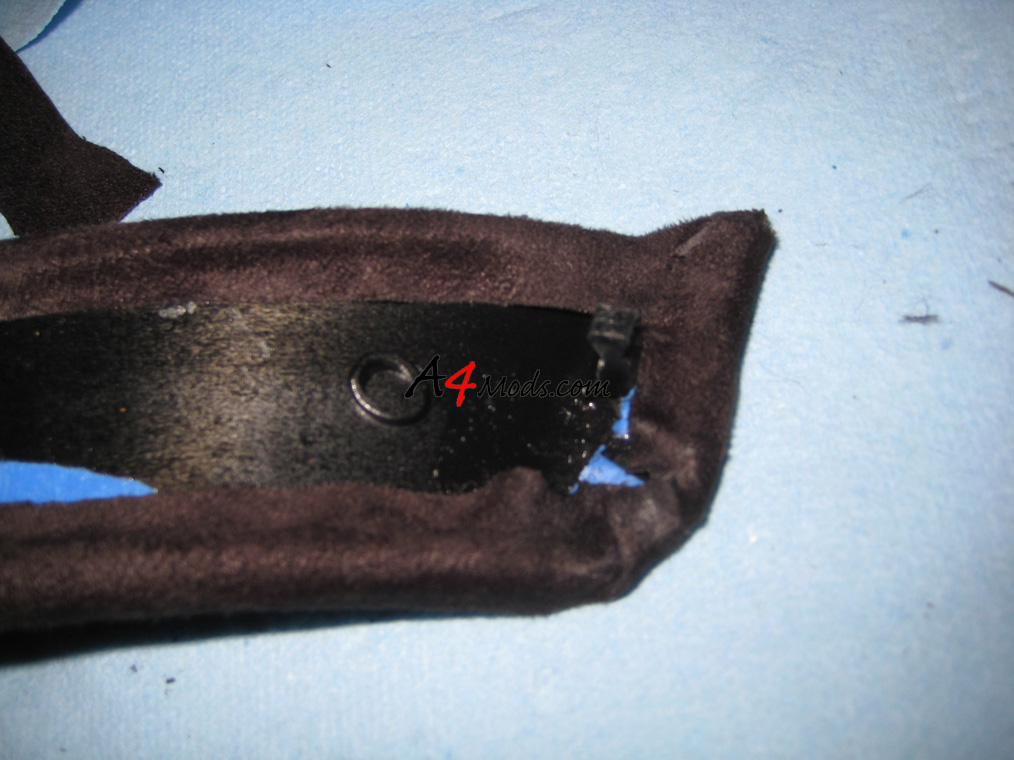
| From there you need to start working the edges. I sprayed each section as I went along and gently stretched and wrapped the material around the trim. I was constantly trimming the material and cutting sections so they can be wrapped. Make sure you are careful handling the part while you are handling glue - if you get glue on your fingers and you touch the front of the suede, you will have to start all over. The corners are the hardest... here is what mine look like. | ||
|
 |
|
When you are done, everything should lay smooth and the corners should be sharp. |
 |
|
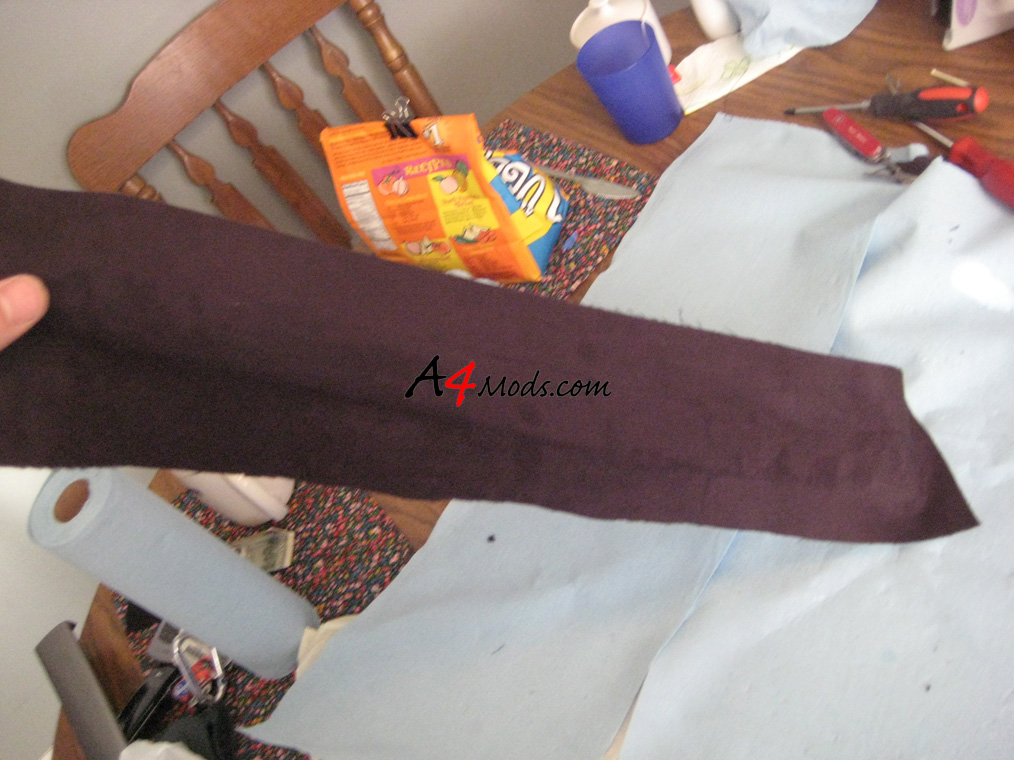
Here are the two trim pieces when they were done |
 |
|
You repeat this process for all of the parts. By the time you get to the last piece, you will be a pro. To re-apply the quattro badge, I just used the same spray adhesive and stuck it back in place. When you are done, you can reinstall all of the parts: |
||
|
||
| That's all there is to it. Good luck! | ||
