Audi A4 iPod Integration - Dension Ice Link Install
Prior Experience: None
Cost: approx. $20
Time: aprrox. 30 minutes
If you are like me you probably have tons and tons of mp3's on your computer but for years you have been listening to cds in the car. You probably own an iPod since just about everyone does these days. You may have been using some low end FM Modulator to convert your iPod's audio signal to a radio station. If you have, then surely you have realized how bad the audio quality is.
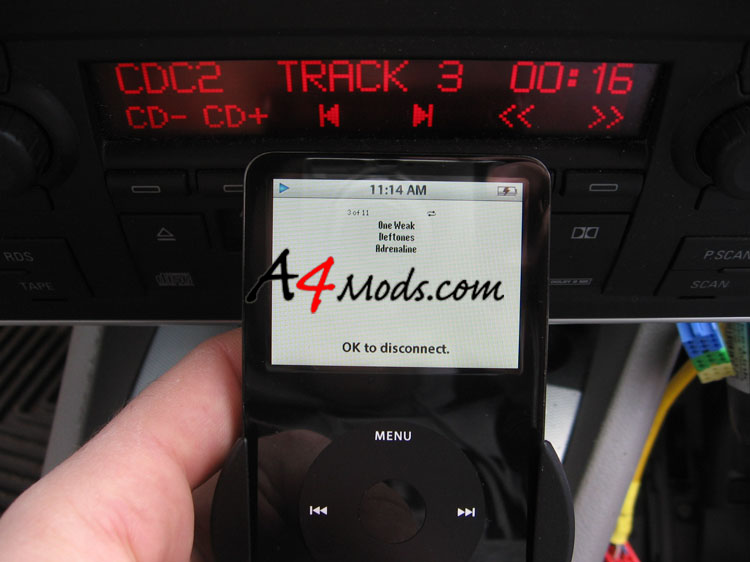
For the B6 A4 as well as some other makes and models, Dension has prodcued the (now discontinued) Ice Link: Plus or the newer Dice unit. This unit seemlessly integrates your ipod into your vehicle and gives you premium sound quality. It works by tricking your head unit into thinking your iPod is an external CD changer. Then the Ice Link allows you to control your iPod directly from your head unit (or from your iPod itself). If you have an external changer, you will loose its functionality however if you have an indash changer (like on the Symphony II head unit) you will still have full functionality of your changer.
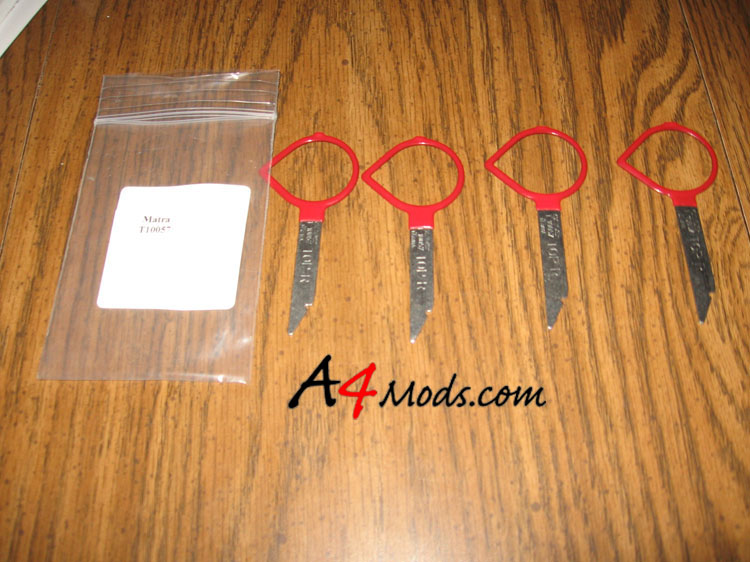
SUPPLIES - The only things you need for this install are your Dension unit and radio removal keys. I got my discontinued Ice Link for a killer deal on eBay and purchased my radio removal keys from SamStagSales NOTE: If you disconnect power to the radio, you may need to enter your radio code to activate the radio again (this is usually found in the vehicle's user manual). My radio did not require the code. |
||||||
|
 |
|||||
|
||||||
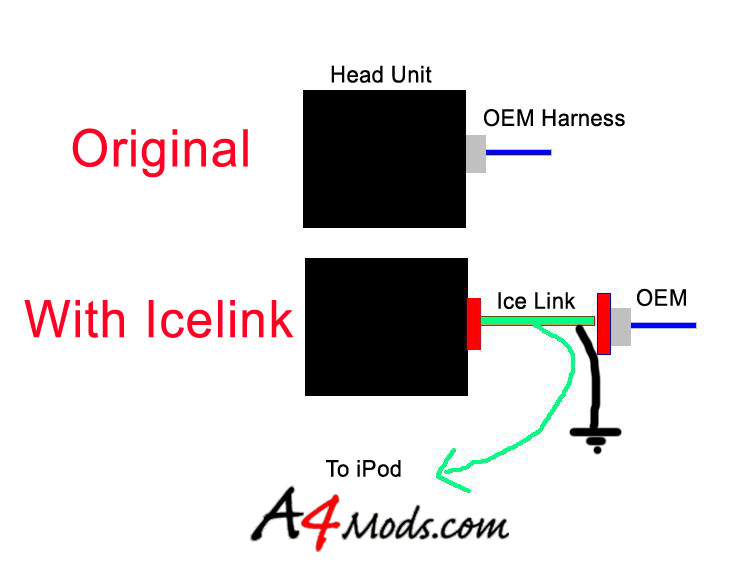
The Ice Link is very easy to install. All you have to do is remove the radio, and wire the ice link in series with the existing connector. Then you have to ground the connector and you are set. The 'concept' is clarified to the right |
 |
|||||
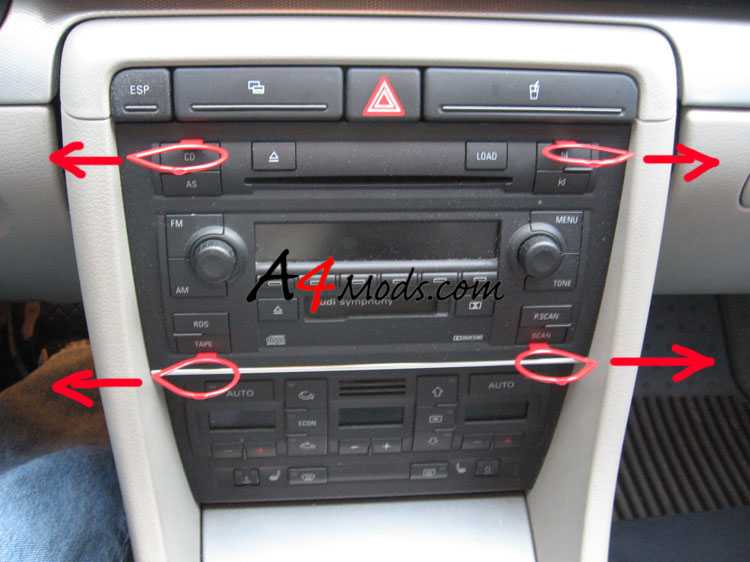 |
So first you have to remove the radio. To do this insert your radio keys into the four slots and pus them all the way in. Once they are in, push them all towards the outside of the radio as illustrated to the left |
|||||
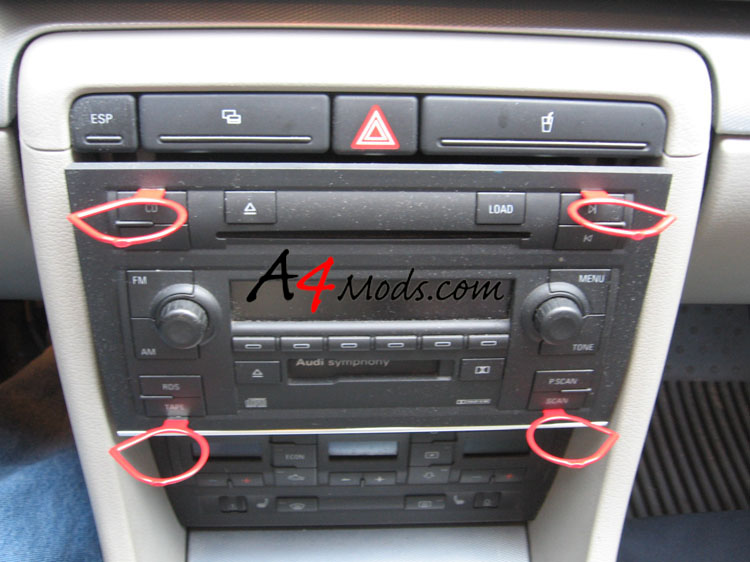
While pushing the keys towards the outside, you can pull them towards you to remove the radio |
 |
|||||
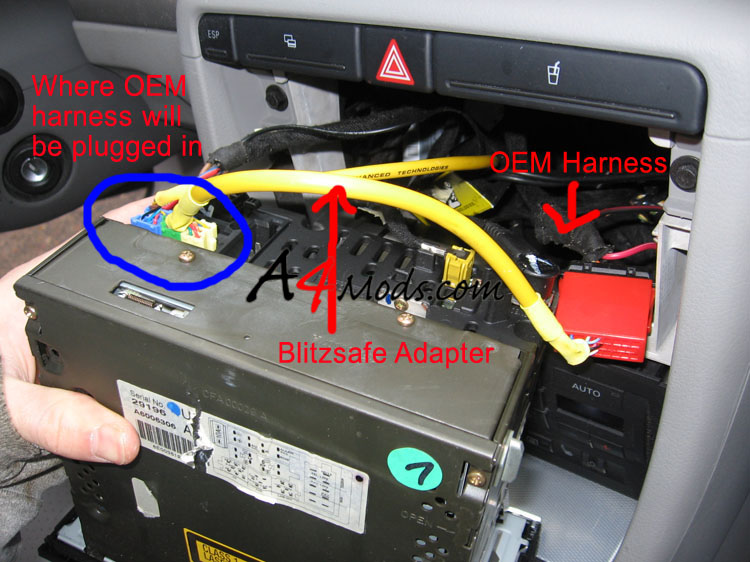
Once the radio is removed you should inspect the rear connections. You will be installing the ice link into the spot circled in BLUE in the picture to the right. NOTICE: The picture shows MY head unit which had a BlitzSafe Adapter installed for my DVD player. You will NOT HAVE THE YELLOW cable there. However you will notice that the YELLOW cable is insalled EXACTLY the same way we will be installing the Ice Link |
 |
|||||
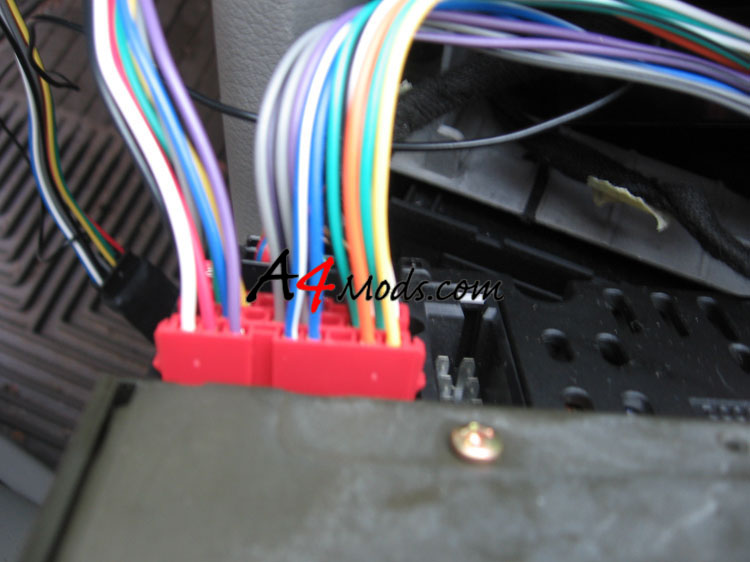
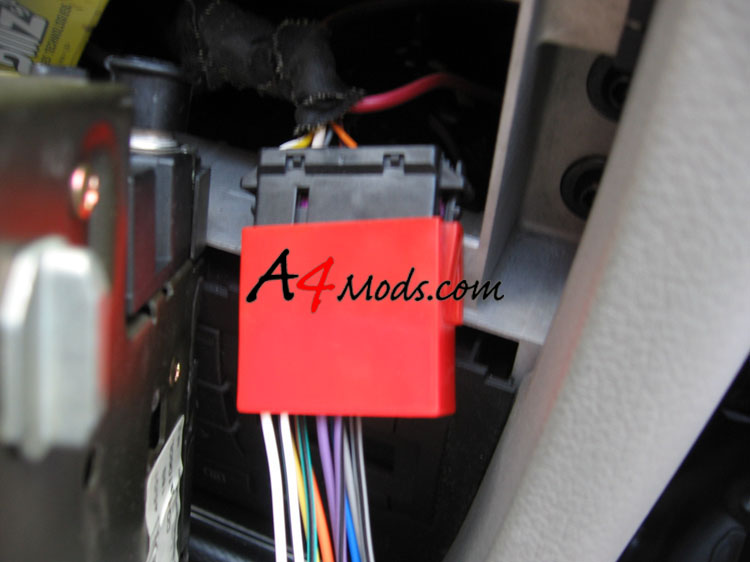
| Once you remove the OEM harness from the back of the HU, you will be connecting your Ice Link. One side goes to the back of the HU, the other connects to the OEM harness | ||||||
 |
 |
|||||
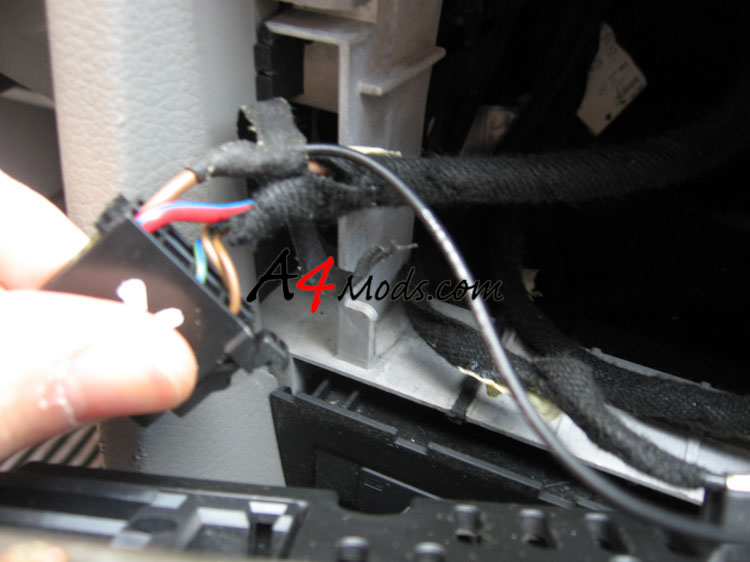
After the Ice Link is wired in series with the HU, you will need to ground the black wire. This is easily done by connecting it to the BROWN wire on the other OEM harness. The wire you are looking for is shown in the picture to the right |
 |
|||||
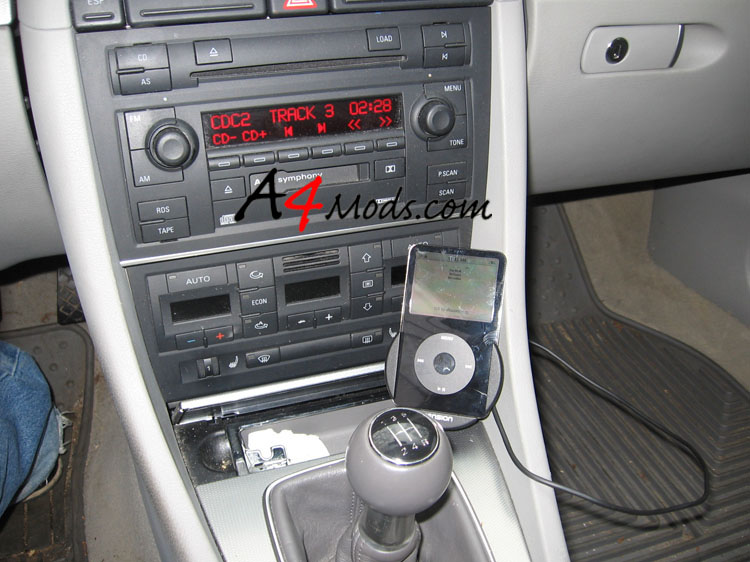
| After the round is connected its time to connect the iPod to the harness and test it out | ||||||
 |
 |
|||||
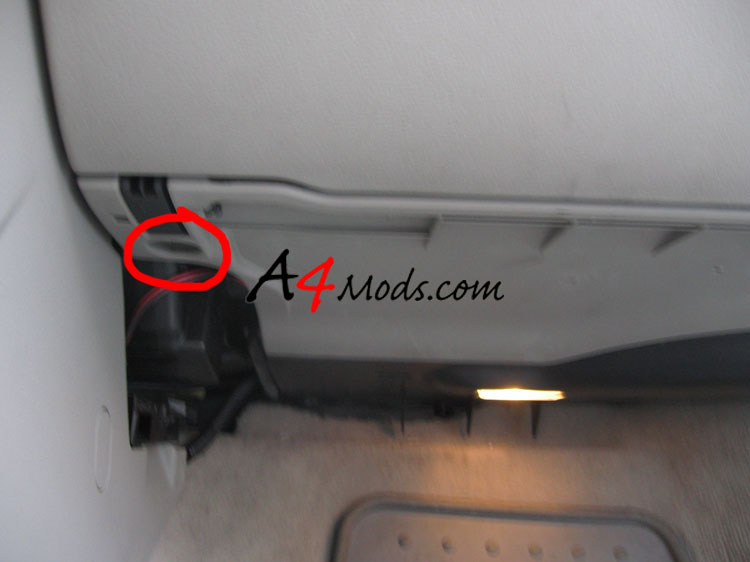
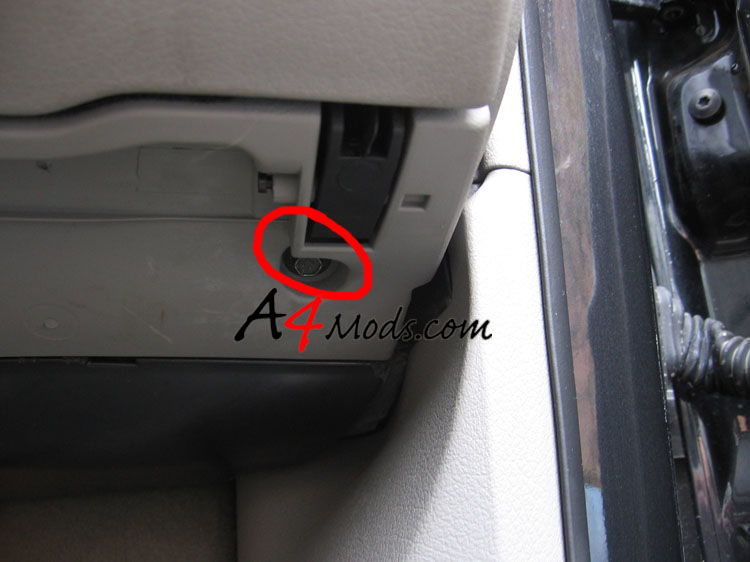
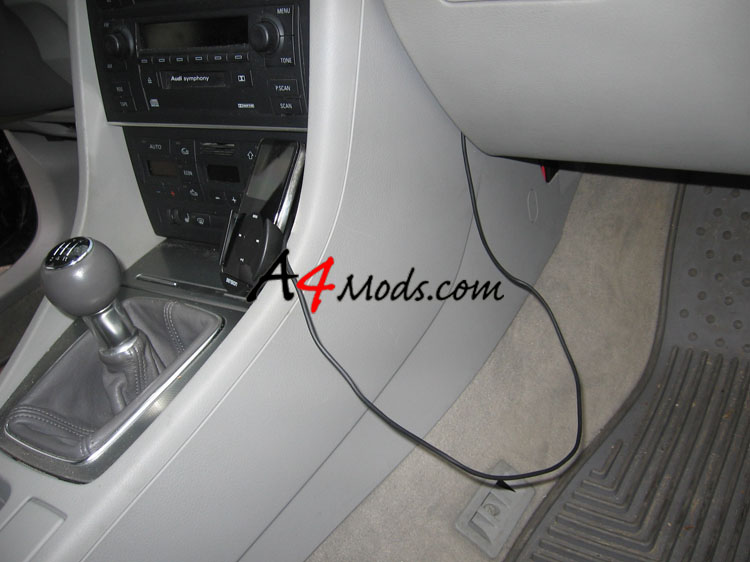
How you proceed from here is really up to you. I decided that I will use the ProClip mount for my Ice Link and place it next to the head unit. Since I didn't have the ProClip at the time of the installation I just ran the wire to where I will install the ProClip so that when it arrives I wont take anytime to insall. To do this I removed the glove box and ran the wires between the glove box and the center console To remove the glovebox all you have to do is remove 5 bolts. Two are located under the glovebox and are circled in the next two pictures. |
||||||
 |
 |
|||||
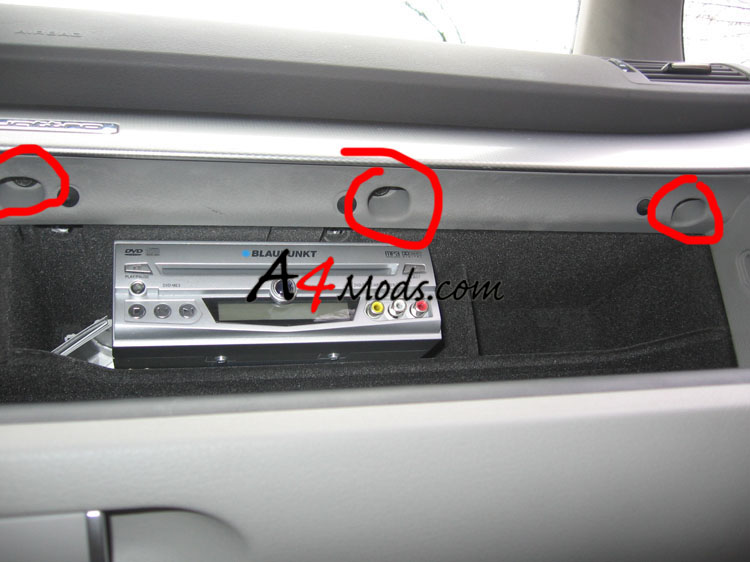
When the bottom two bolts are out you remove the three along the top |
 |
|||||
| With the glovebox out you can run the wire around the center console. Then reinstall the glove box and you're done. | ||||||
 |
 |
|||||
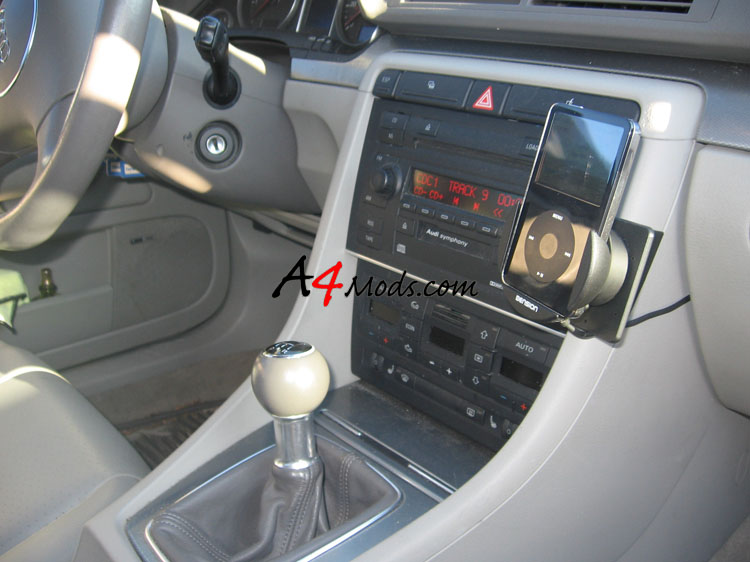
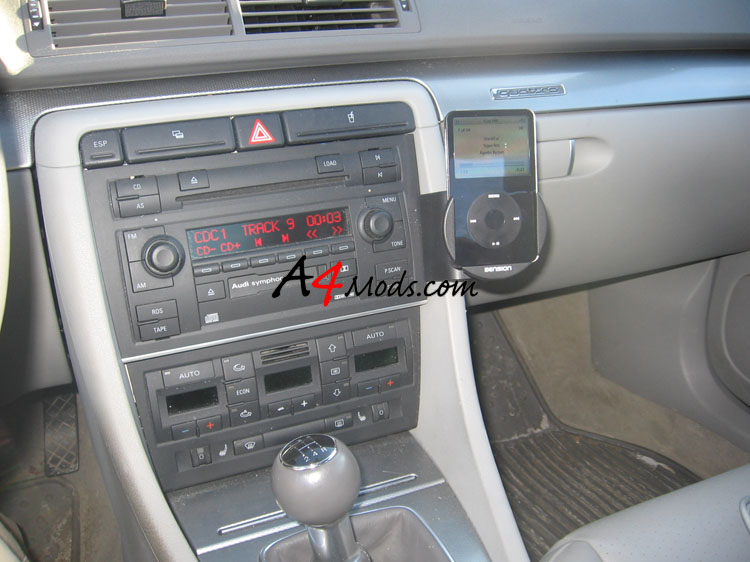
| I decided to purchase a ProClip for mine to clean up the install. | ||||||
 |
 |
|||||