Audi A4 Clear Corner Mod - The Easy Way
Prior Experience: None
Cost: approx. $5
Time: aprrox. 1 hour
| Discuss this mod - Here | ||||||||||||
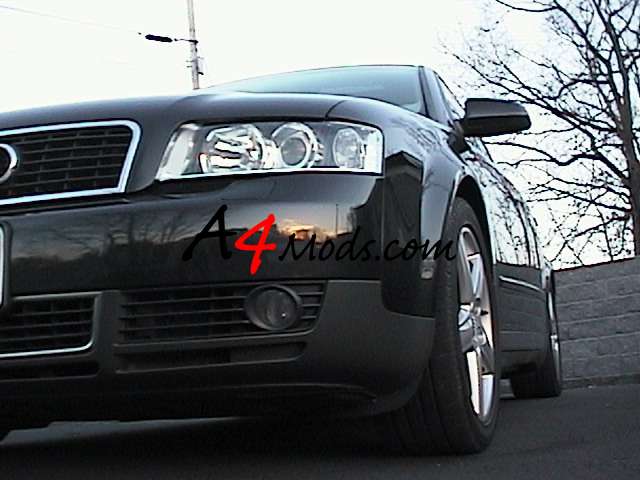
Without a doubt, one of the best mods for a B6 A4 is to pick up a set of Ecodes. Since I'm on a college budget, I decided to just take the amber lenses out of my stock Xenons, for a similar effect. I started this mod by reading up on several discussion forums. The DIY from Audiworld helped quite a bit, but it certainly made this procedure much more complicated than it actually is. I wrote this up to give you the 'easy' way to this mod. |
 |
|||||||||||
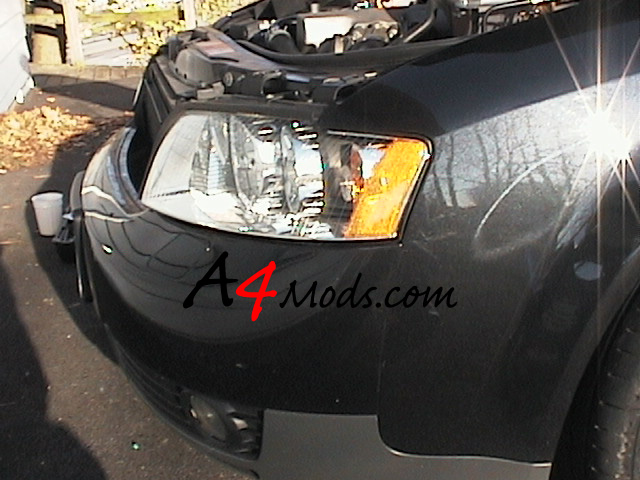 |
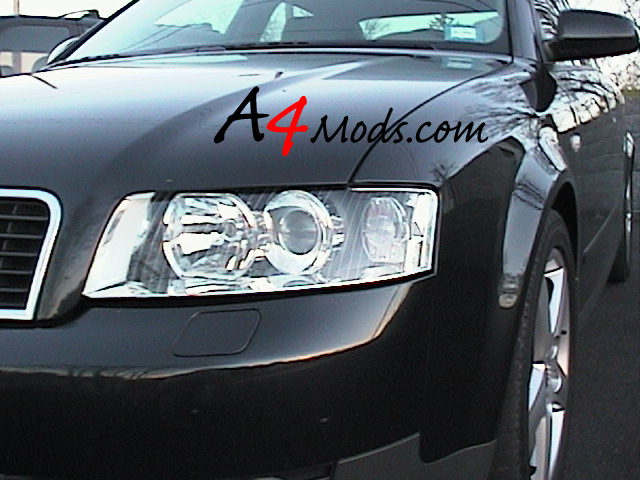
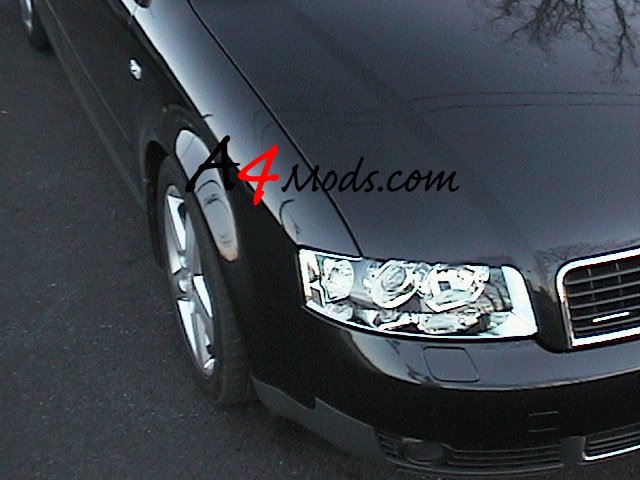
Here is a before shot of the same headlight. As you can see, the mod is well worth the 2 hours you will spend on it. And it is practically free. You have to be confident in your drilling ability to complete this mod, so if your not, then I suggest having someone else do it. You can certainly damage your headlights, and as you know Xenons are not cheap. However, the look is hot and the mod is easy, so give it a shot if your up for it. |
|||||||||||
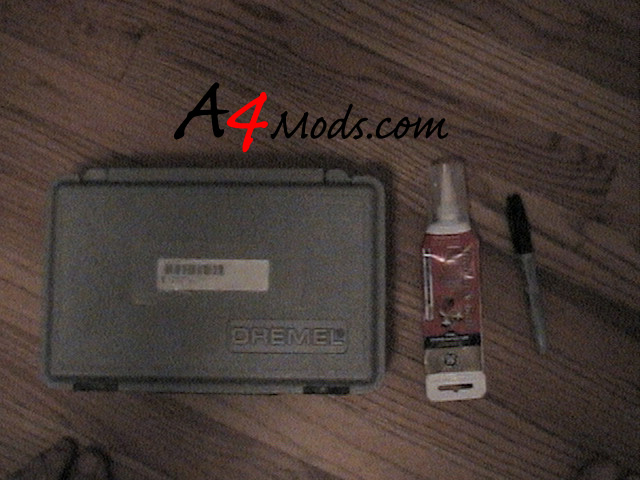
SUPPLIES -The only real thing you need to do this job is a dremel tool. Other things, such as a sharpie marker, and some waterproof sealant are probably laying around the house. A torx wrench is also necessary - but if you have done any of the other mods on this site, you probably have that laying around as well. For the formal break down: |
||||||||||||
|
 |
|||||||||||
For those of you who have seen the mod on audiworld, you can probably follow that description up until the amber lens is free from the stock housing, then continue here. Since I know not everyone knows what I'm talking about, I will explain everything in full below. The first thing you want to do is park your car on level ground - preferably facing a wall or garage door. You should turn on your headlights and mark on the wall where they aim. Since we will be removing the entire assembly, this is an important step. After you have the headlight patterns marked, it is time to take out the headlights. UPDATE: Do NOT start your car with the headlights removed! This could result in an auto-level error in your dash (meaning the headlights are no longer adjusted). If you accidentally do this, please follow the Removing the Auto-Level Error writeup. |
||||||||||||
|
||||||||||||
 |
 |
|||||||||||
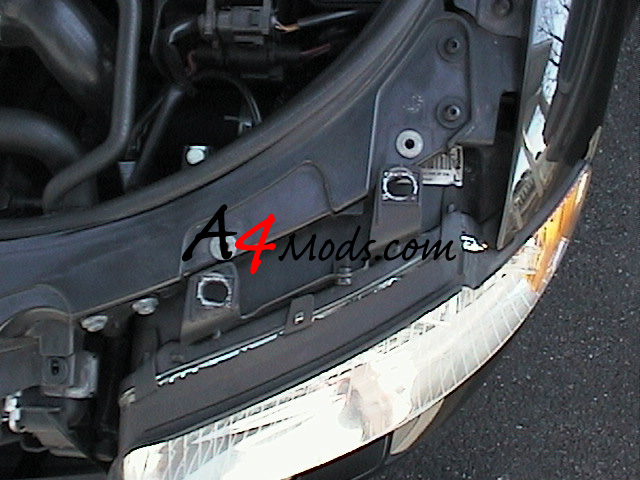
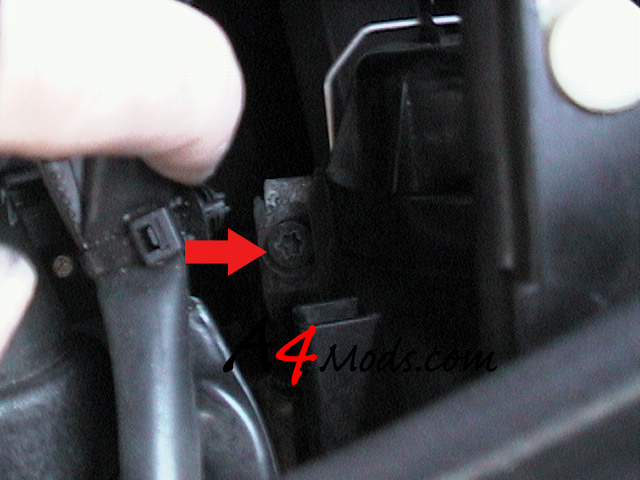
This one is just to the left of the headlight about 2 inches from the front of the car. |
The last one is on the right side of the headlight, towards the back. It is a tight squeeze to get to, but you can get it with an extension for your torx wrench |
|||||||||||
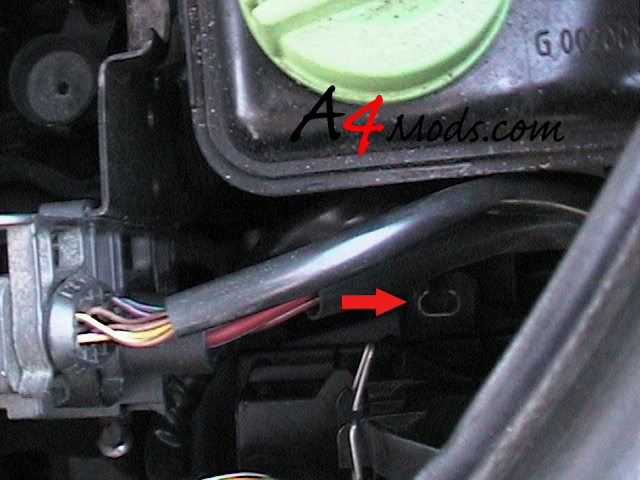
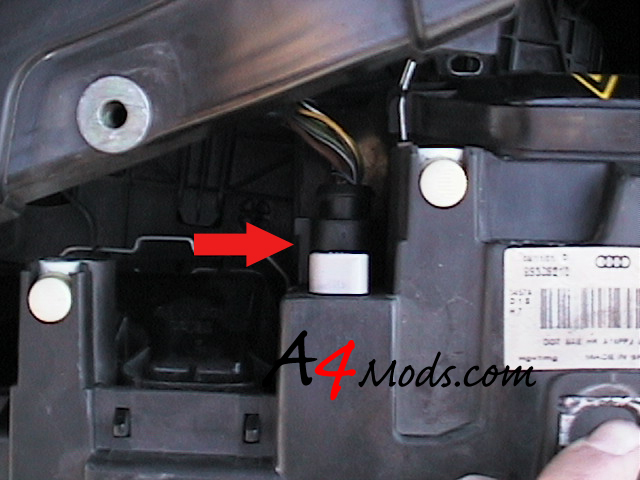
When all four screws have been taken care of, you can slide the headlight assembly out of the front of the car. You can simply disconnect the wire harness and continue on to the next steps. UPDATE: After questions from many frustrated users, I have decided to add a VIDEO of how to disconnect the headlight harness. It is not as straightforward as it may seem and if you don't know what to do you will spend MUCH more time than needed to get it off. |
 |
|||||||||||
|
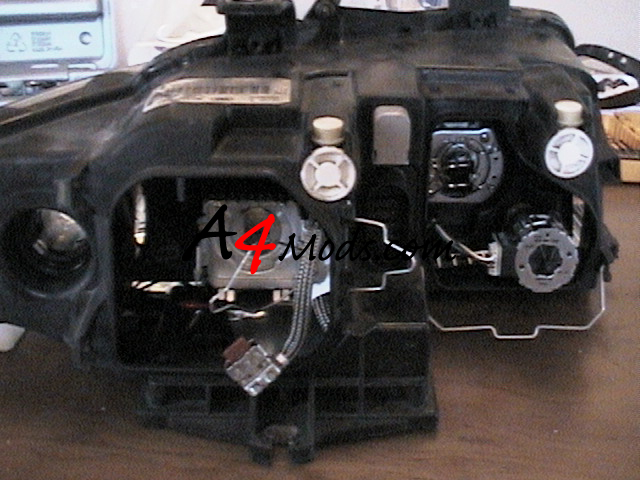
When you have the headlight out, it is time to start taking out the different bulbs. I started with the turn signal bulbs which are straight forward. I then proceeded to remove the back covers for the high beams and the Xenon bulb. There are just some metal clasps you need to disengage to get these backings off. Here is what the back of the headlight looks like at this point. As you can see, I also removed the center bulb - the Xenon. Once again there is just a metal clasp holding it down and then you can unplug the harness. DO NOT touch the bulb - the oil from your fingers can screw it up. I placed the bulb on a lint free cloth and set it to the side |
 |
|||||||||||
 |
You can then remove the high beam bulb by disengaging its metal clasp and disconnecting the wire harness. Once again, avoid touching the bulb, and put it in a safe place. Here is what it should look like at this point. |
|||||||||||
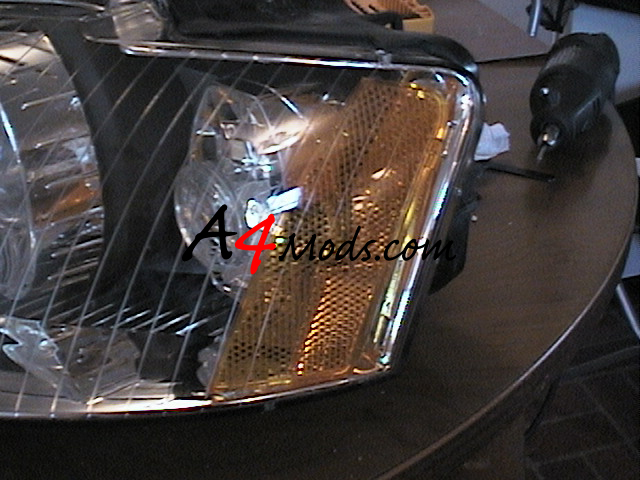
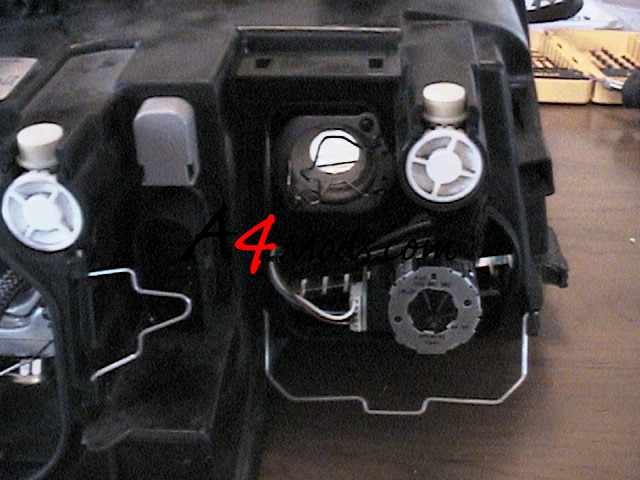
Now this is where I differ from the Audiworld guide. They suggest that you remove the lens for the xenon bulb so that you can slide the amber reflector out of that hole. This is not necessary. I spent about 2 hours trying to take out the Xenon lens before I was able to get its metal clasp off. I was pissed and was ready to quit. I made some posts on several forums looking for an easier way to do it, and "LongWolf" from audiworld hooked me up with the answer. So hold off, and do not remove the Xenon lens. We will do our drilling first, then proceed a different way. NOTE: If you are running lights that are NOT auto-level, you will have to remove the center lense to get the amber reflector out In order to see where we will be drilling, you need to remove the rubber surrounding the headlight. This is very easy, but make sure you do not rip it. After this rubber is removed, you can see that the amber reflector is held in with two 'tabs', one on the top and one on the bottom. What you will need to do is drill through the clear plastic part of the headlight to get to the tabs. Then carefully go in with a dremel grinder and grind away these tabs. I used the dremels lowest settings to prevent making a mess or melting the plastic. Go slow because you don't want to screw this part up. I started with the bottom tabs first. Working slowly, I grinded them down. When they are done, you should see the lens begin to pop loose. It is not a bad idea to reach your finger in through the turn signal bulb opening and push on the reflector periodically to see if it is loose enough to move. I'm sure you would like to drill as little as possible, so check frequently. When the bottom is disengaged, proceed to the top. Here are some pics, showing some of this stuff: |
||||||||||||
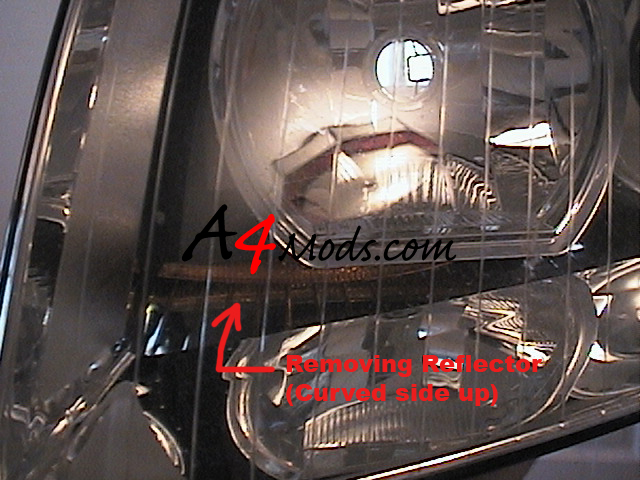
After repeating this procedure for the top of the light, you can see how the lens slips out of place. You can reach in with your finger and slide it past where the turn bulb goes in. Be careful not to bang it around too much or it may scratch the inside of your headlight. I just worked it until it was lying curved-side-up, on the bottom of the light. So how are we getting this out?? Here is the "secret" that will save you hours and headaches: |
||||||||||||
|
||||||||||||
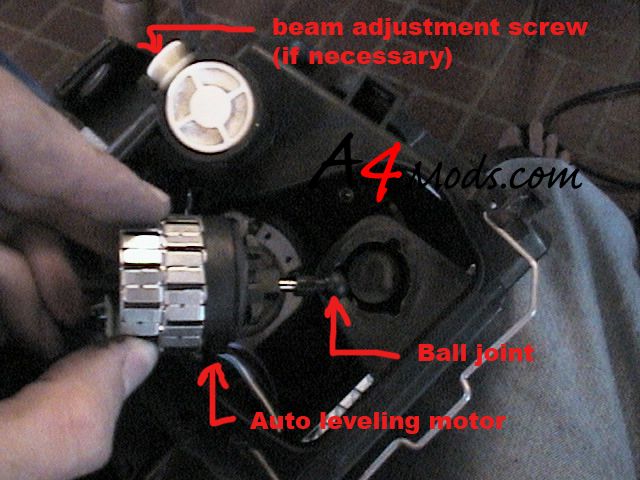
If for some reason you cannot get the amber reflector to fit under and out, you can loosen the white beam-adjuster screws on the top of the headlights to make more room. I suggest counting the number of turns you do on these screws so you can set them back to their original position when you get the reflector out. |
||||||||||||
|
||||||||||||
After your lights are back together and everything looks good, you should go and fill the holes you made with the silicone sealant. It is important to make the headlights water tight so rain does not leak into them. Some people choose to hit the inside of the light with some compressed air to blow out any flakes or shavings that fell though during drilling. Mine came out pretty clean on the first try so I skipped that step. When you have the light sealed up, start with the next one. Get them installed, make sure they are in line with your previous markings on the wall - then sit back and enjoy. Here are some pics for your enjoyment: |
|
|||||||||||
 |
||||||||||||
 |
||||||||||||